

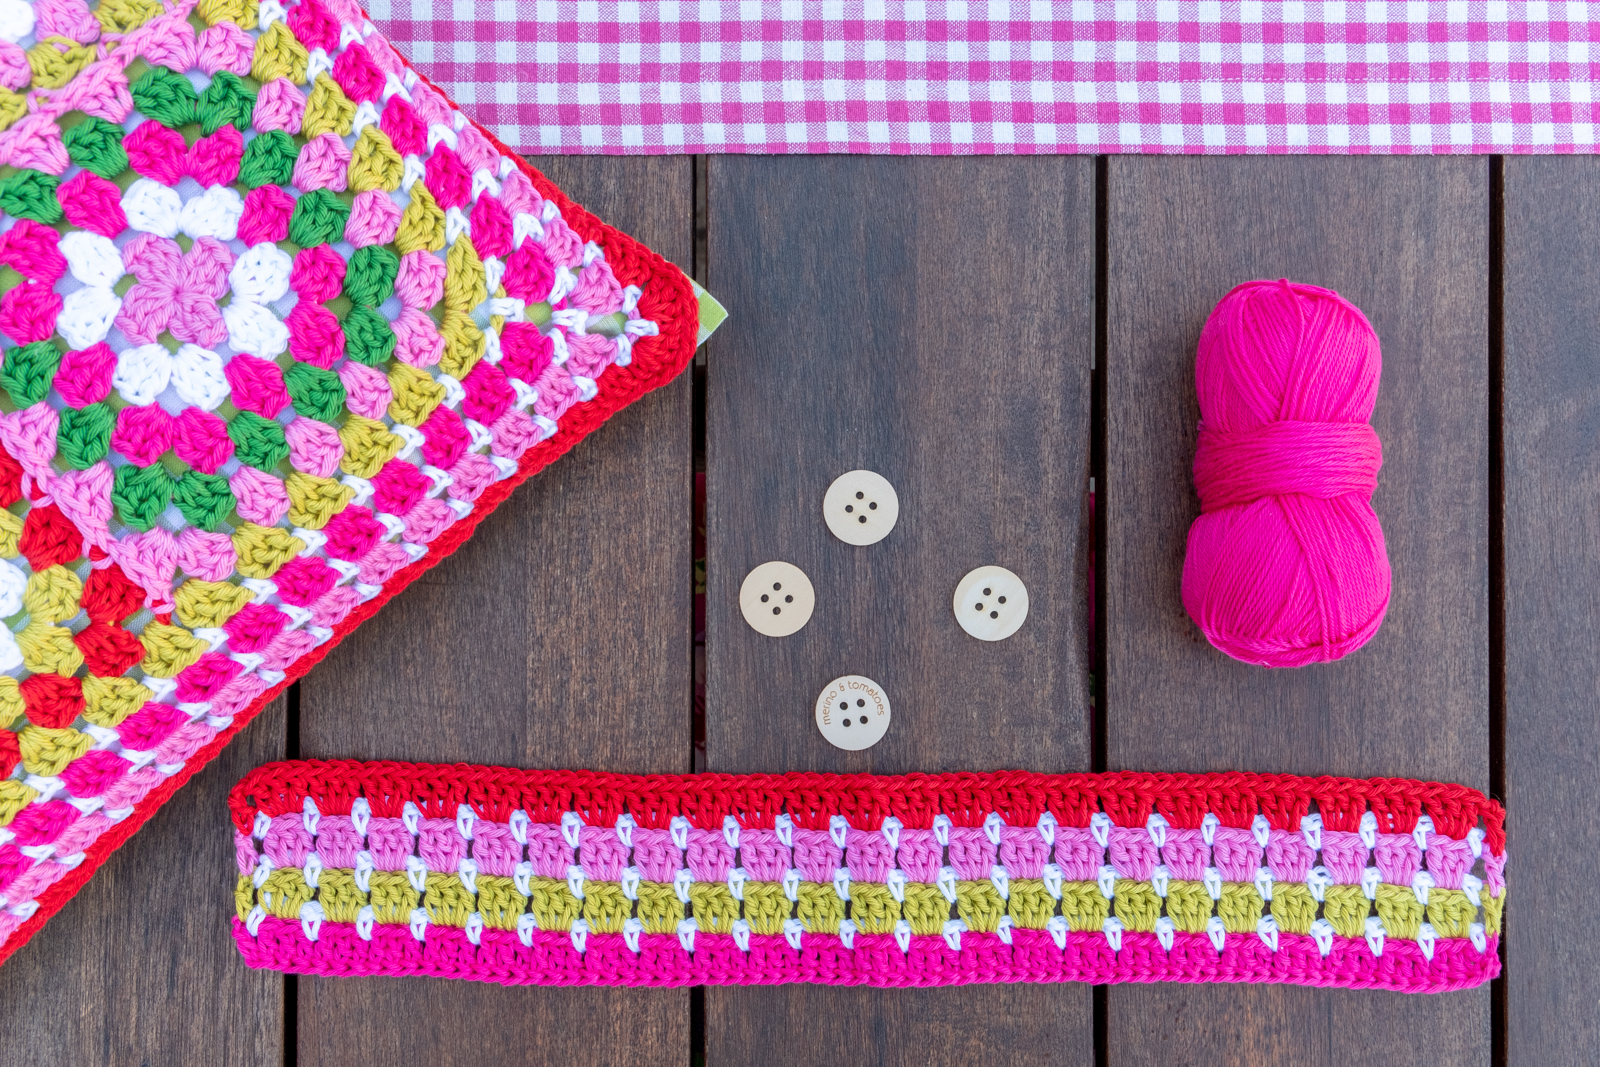
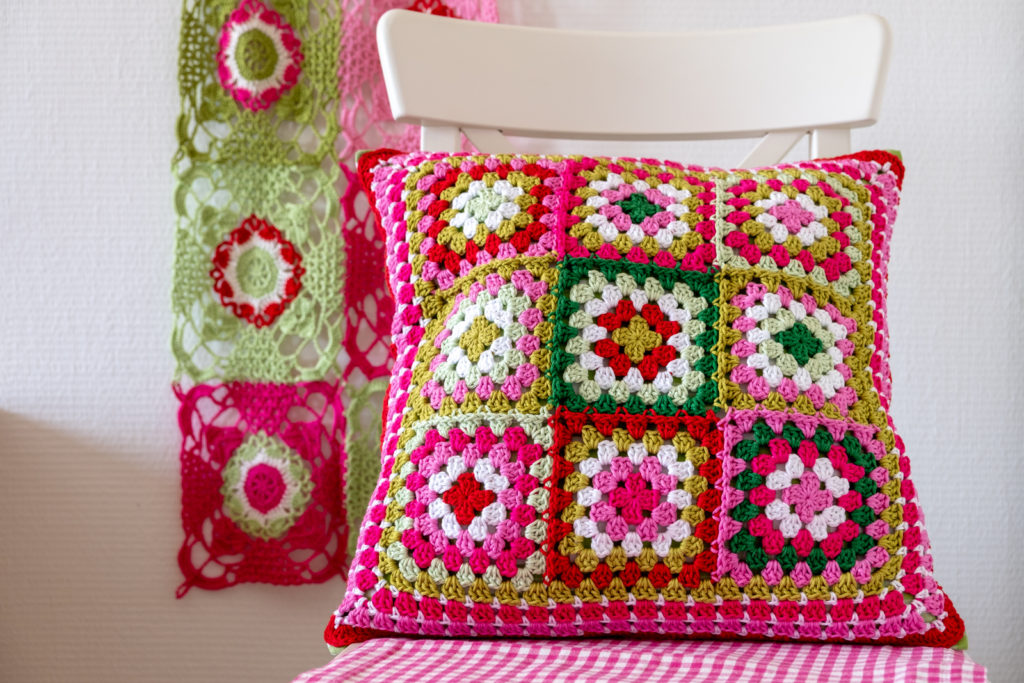
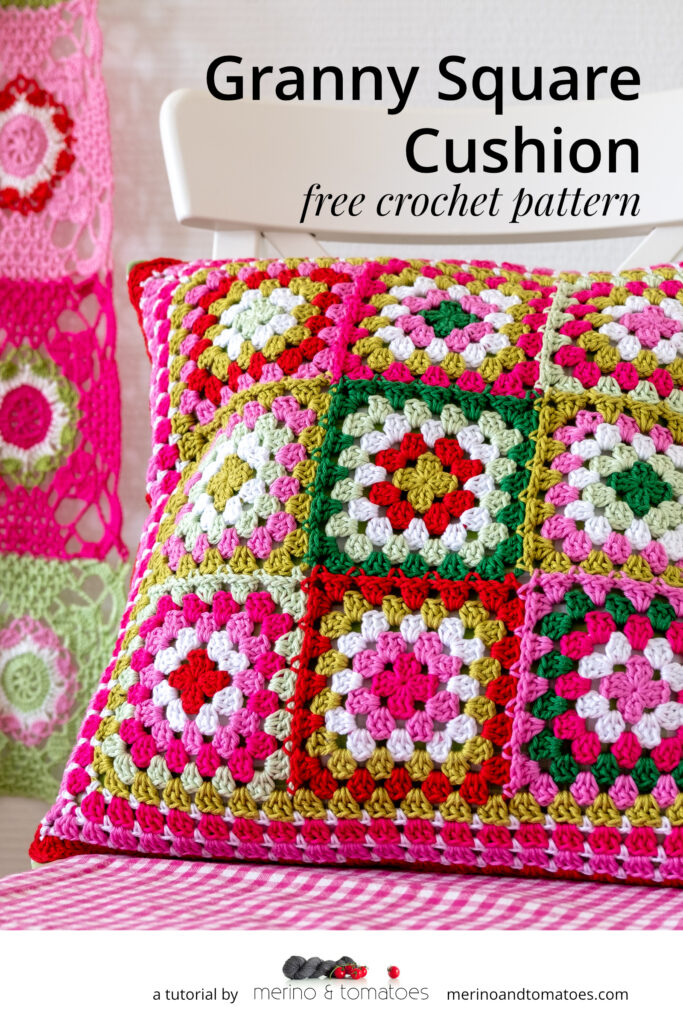
The plain granny square is probably one of the oldest and most well-known crochet patterns. It’s a lovely basic pattern that can be used in many ways. It’s the first time that I have used it for a granny square cushion (after all those years of crochet…).
I am totally aware that this pattern can found all over the Internet as well as in many crochet books. I am not going to pretend that I have re-invented the wheel here :). What I would like to show you with this pattern is the way that I make them and how to turn nine of them into a colourful cushion with a nice edging and a matching closure at the back.
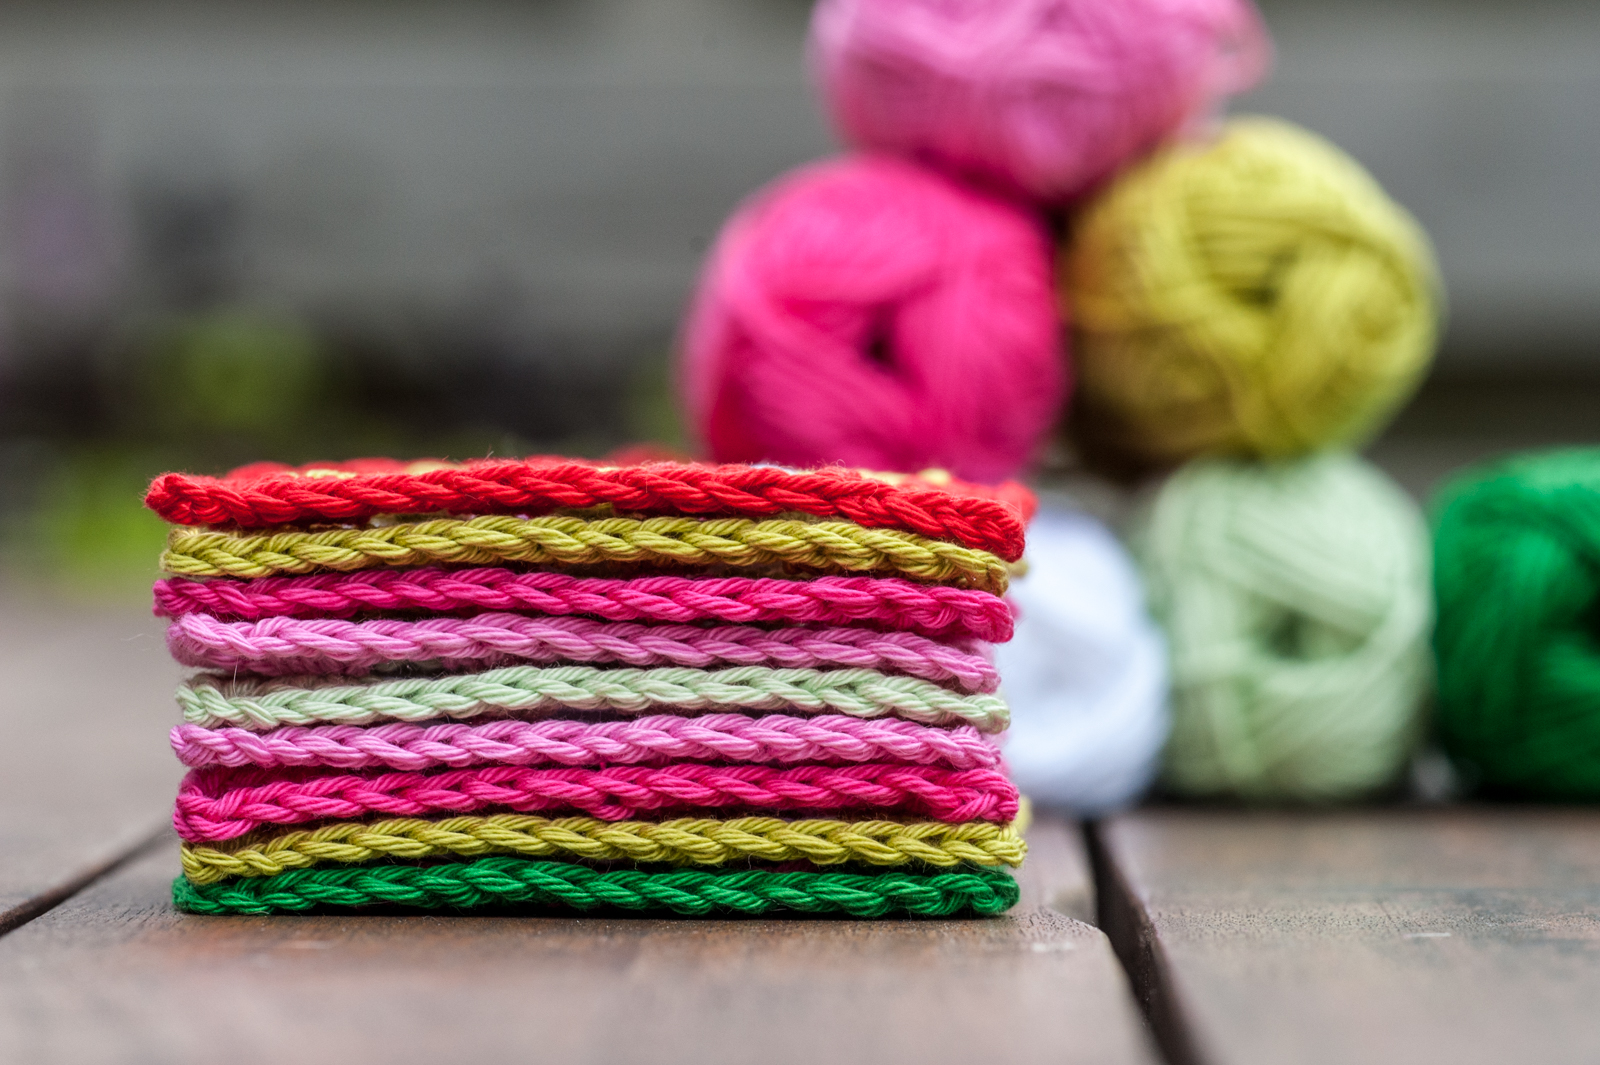
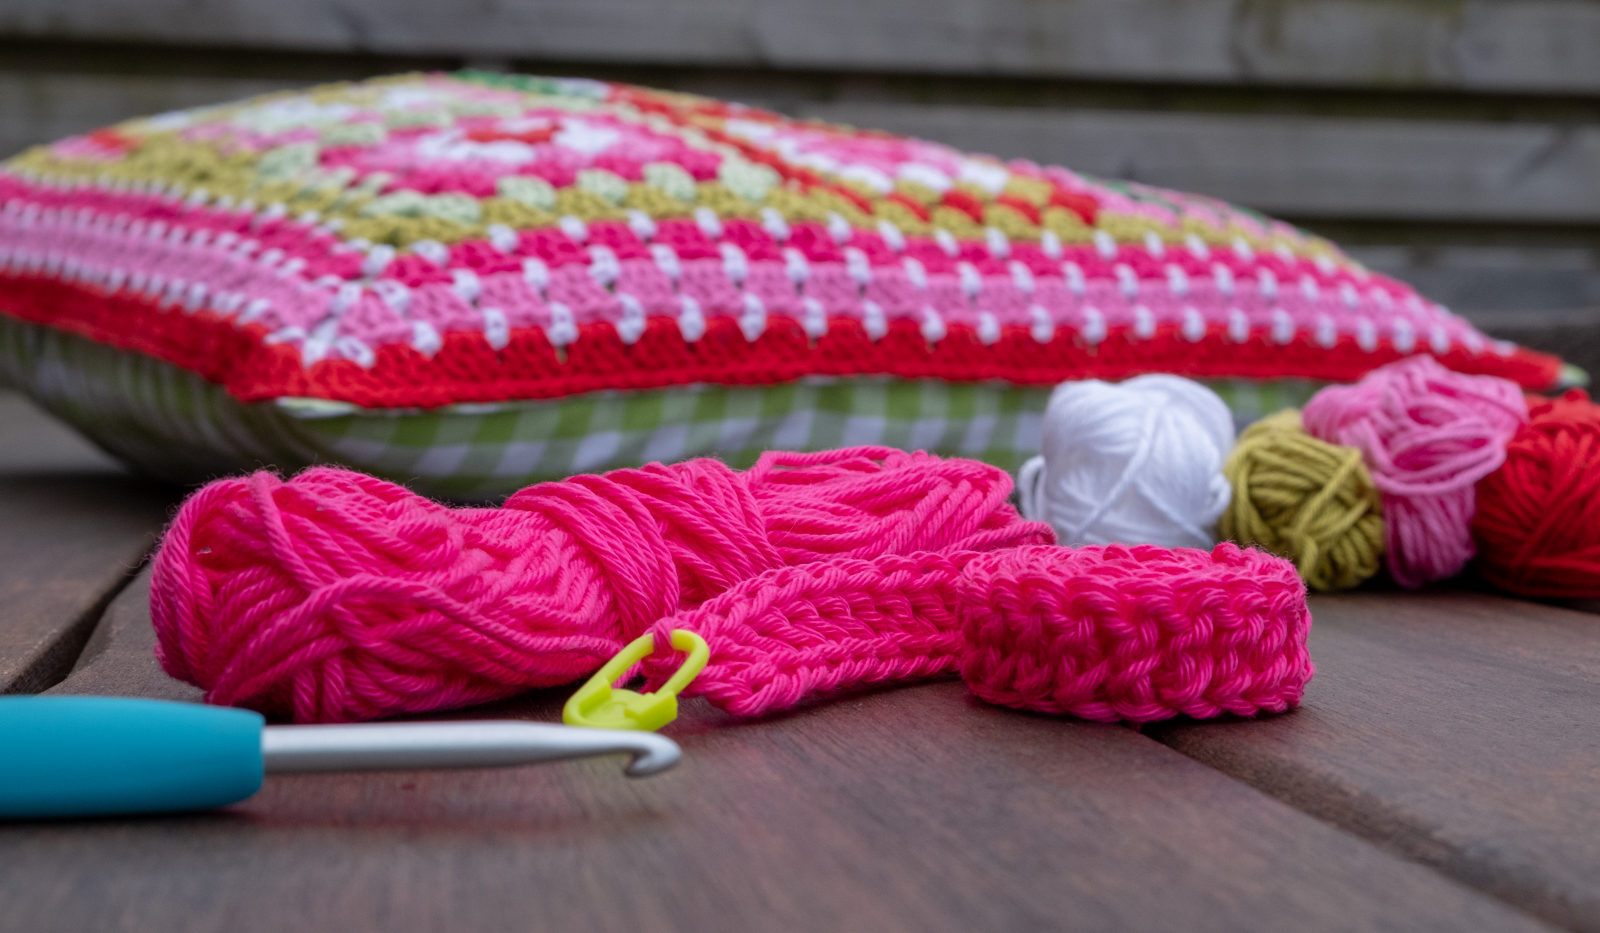
Materials

Yarn
Phildar Phil Coton 4 in the following colours:
- A: no. 0010 blanc
- B: no. 0088 anisade
- C: no. 0087 bamboo
- D: no. 0044 golf
- E: no. 0050 cerise
- F: no. 0034 oeillet
- G: no. 0068 petunia
Hook
Crochet hook: 4,5 mm (US 7)
Notions
Scissors and a darning needle
Other Supplies
- A piece of fabric approx. 50 x 125 cm
- A cushion pad of 50 x 50 cm (for instance this one from Ikea), or one that fits your finished crochet piece
- A few buttons
Construction
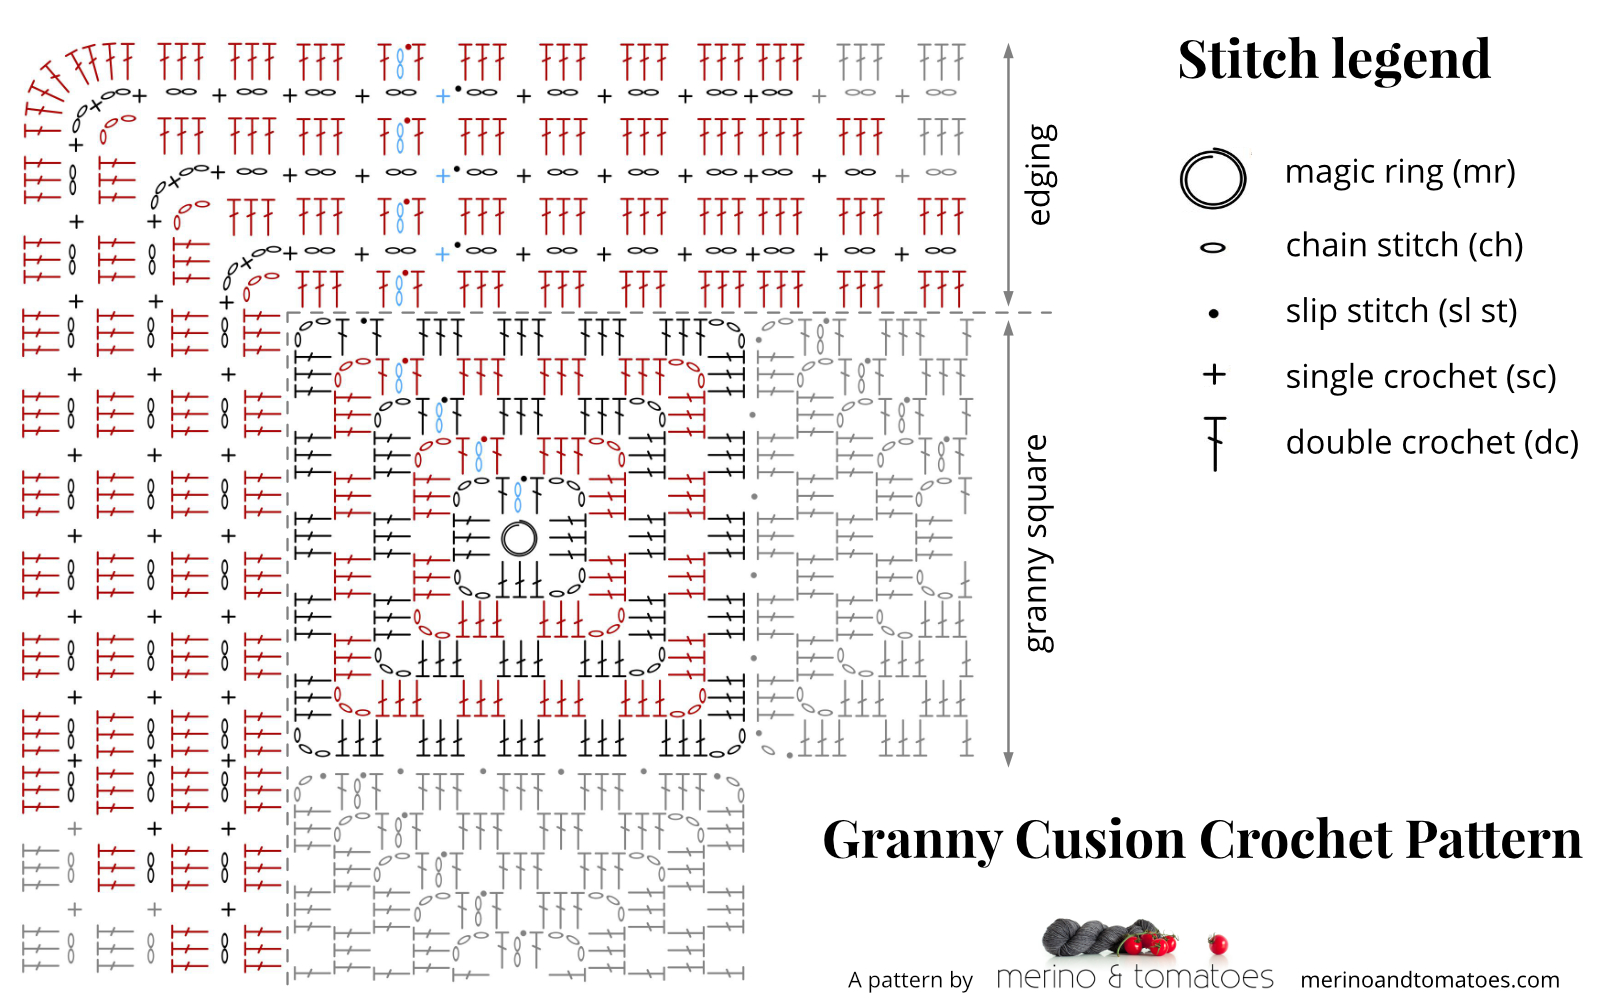
In order to make this granny square cushion, you first make nine basic granny squares, each consisting of four rounds. When you’ve completed all of you squares, you will join them when adding the fifth round. You end up with a large, square piece of crochet. The edging will be made around this piece in seven rounds.
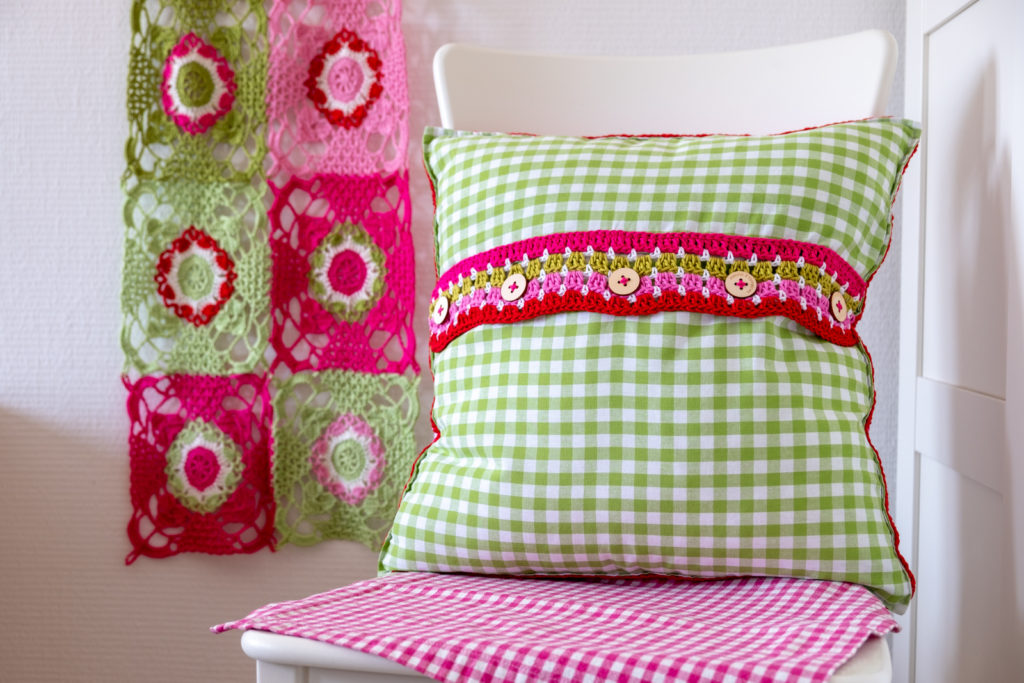
Using your fabric and a sewing machine, you make a cushion cover in the most simple way: fold the short ends towards the middle of the fabric and let them overlap. Close the side-seams and sew on your piece of crochet. I used my sewing machine to sew it on, but you can do it by hand if you’re more comfortable with that.
The backside closure is made separately. It’s a small piece of crochet roughly as wide as your finished cushion is. Sew it onto the top flap of the cushion over and sew on the buttons.
Finished Measurements
The cushion that I have made measures approximately 47 x 47 cm.
Gauge
Gauge is not critical for this pattern.
Stitch Library
For this pattern the following stitches are used:
Chain stitch, slip stitch, single crochet (UK: double crochet), double crochet (UK: treble crochet).
I like to start my work with a foundation double crochet (fdc) rather than starting with a number of chains. It makes counting your stitches a lot easier and the foundation double crochet gives you a more stretchy base. The foundation double crochet replaces round 1, so after finishing it you start immediately with row 2. Use the link below for instructions:
- Foundation double crochet by Moogly
The written pattern and pattern charts use US stitch terms.
Additional Notes
- When attaching a new colour I prefer to use a standing double crochet (or single crochet) instead of (a number of) chains. You can find perfect instructions for using these methods here on mooglyblog.com:
- Single crochet (stsc)
- Double crochet (stdc)
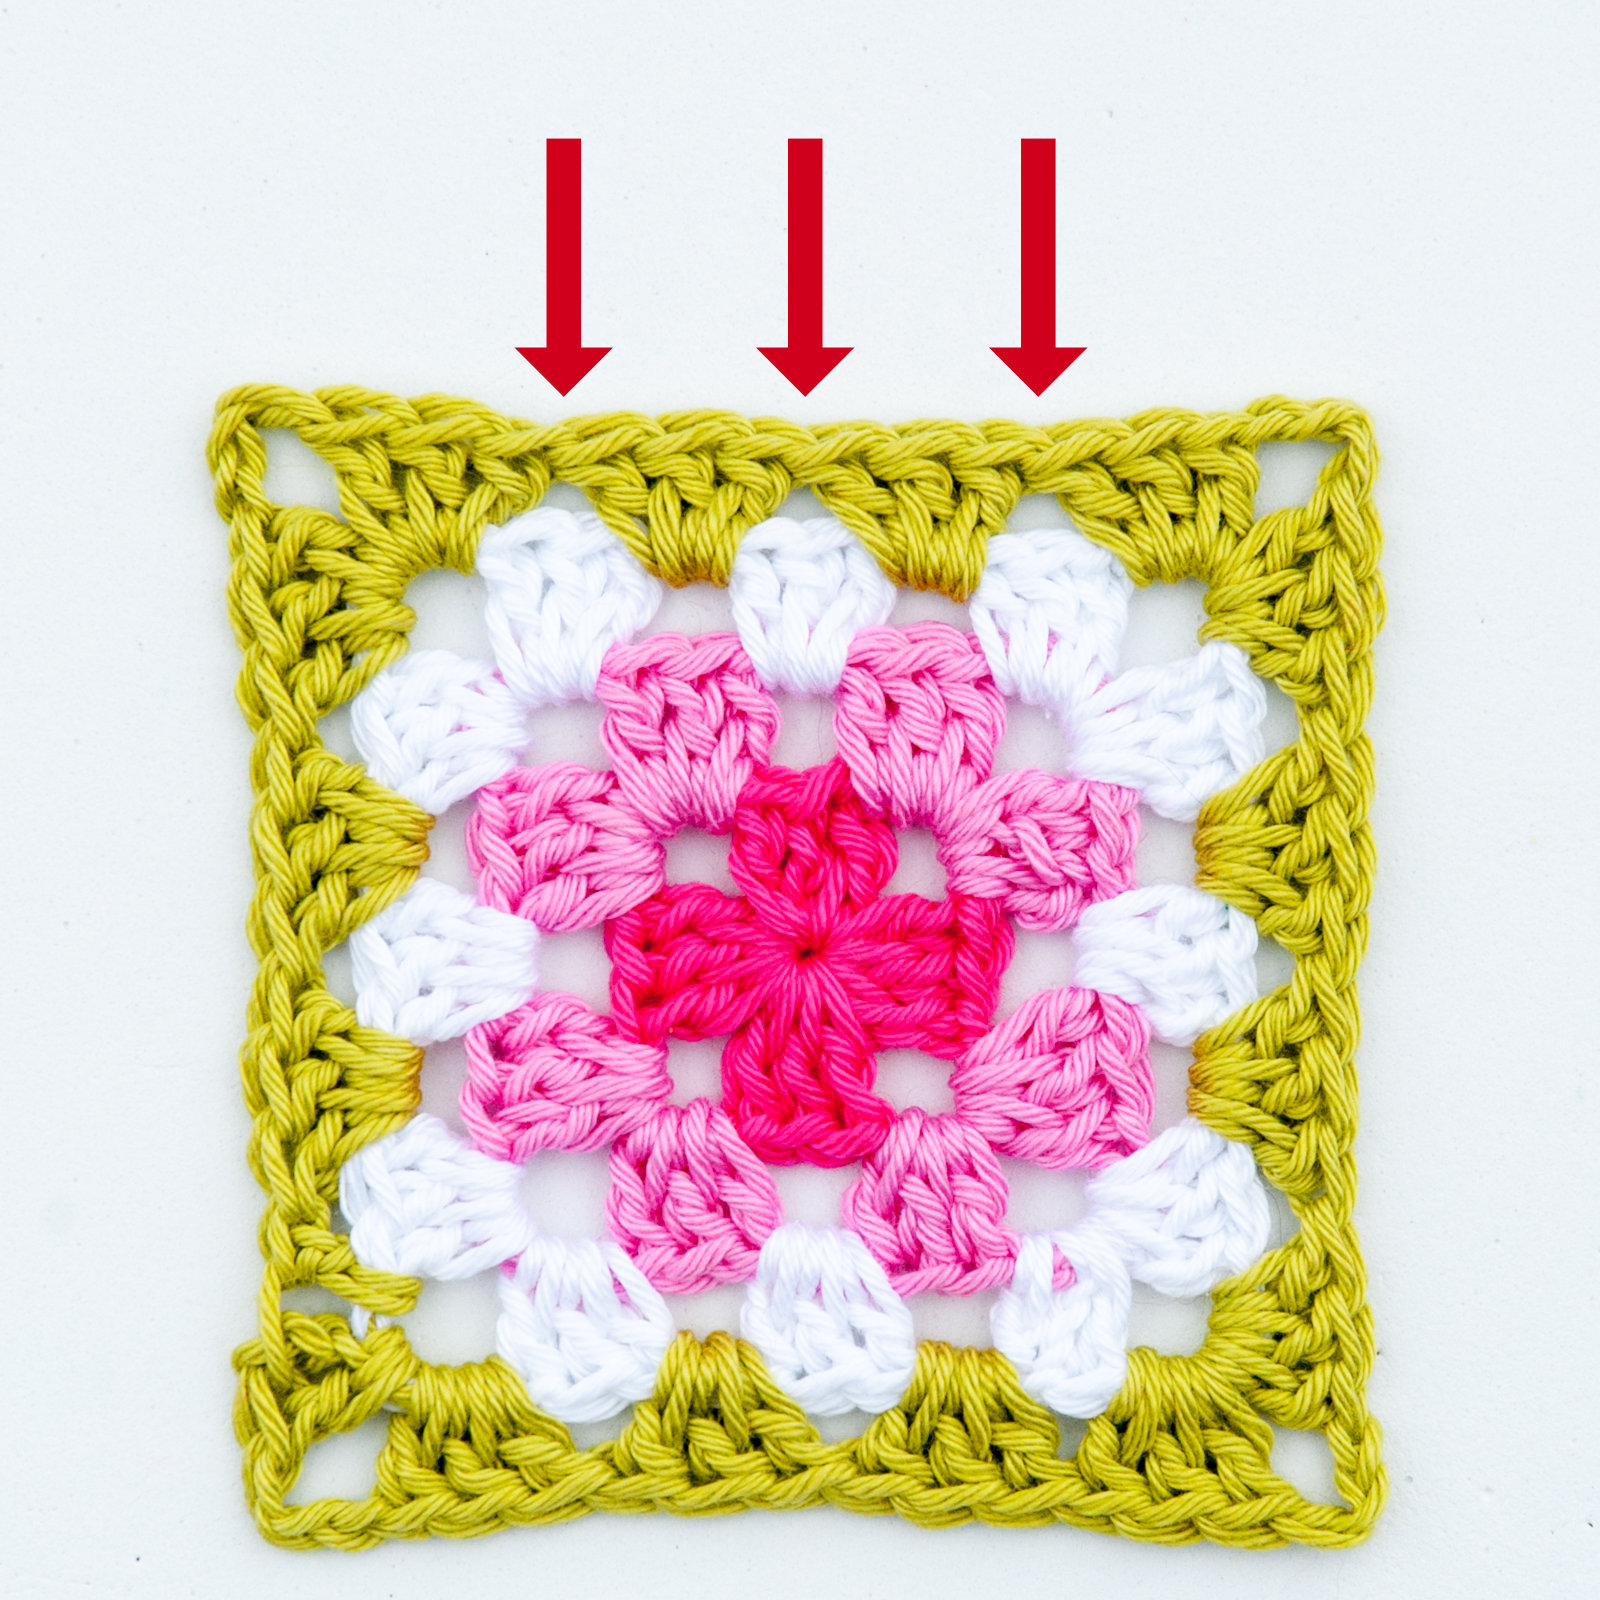
 With these basic granny squares I like to start a new round in the middle of the group of three stitches just before the corner (see chart). I close my round with a slip stitch in the second stitch that I made (the last stitch of the cluster).
- For the granny square, you make each group of 3dc stitches between two groups of 3dc stitches of the previous round. The arrows in the photo on the right indicate where you would place the 3dc stitches in the next round.
- When making the edging and the closure, you make a group of 3dc stitches around the ch-2 space of the previous round.
The Granny Squares and Edging
Written pattern for the Squares
You will be making nine squares all with different colour combinations. Here is the colour order that I used for each square (the last colour is used to join the squares in round 5):
- Square 1: G – A – C – F – B
- Square 2: D – B – A – G – C
- Square 3: G – A – F – D – G
- Square 4: D – G – A – C – F
- Square 5: C – E – A – B – D
- Square 6: F – G – A – C – E
- Square 7: B – A – C – E – G
- Square 8: C – A – B – G – C
- Square 9: E – A – G – F – B
Using the colour of the first round, make a magic ring. Alternatively, you can ch 4 and close the ring with a sl st.
Round 1: ch 2, dc 1, ch 3, *dc 3, ch 3], repeat from * twice, dc 1. Close with sl st in the first dc. Break yarn. (24 st)
Round 2: join a new colour in one of the ch-3 sp by using a stdc, dc 1, ch 3, dc 3, [dc 3, ch 3, dc 3] in each of the remaining ch-3 sp, dc 1 in the first ch-3 sp. Close with sl st in the first dc. Break yarn. (36 st)
Round 3: join a new colour in one of the ch-3 sp by using a stdc, dc 1, ch 3, dc 3, dc 3 in sp between 3dc group of previous round, * in next ch-3 sp [dc 3, ch 3, dc 3], dc 3 in sp between groups of previous round, repeat from * twice, dc 1 in the first ch-3 sp. Close with sl st in the first dc. Break yarn. (48 st)
Round 4: join a new colour in one of the ch-3 sp by using a stdc, dc 1, ch 3, dc 3, dc 3 in each sp between of groups of previous round, * in next ch-3 sp [dc 3, ch 3, dc 3], dc 3 in each sp between groups of previous round, repeat from * twice, dc 1 in the first ch-3 sp. Close with sl st in the first dc. Break yarn. (60 st)
Weave in all ends and make nine squares in total.

You will now add the last round to the squares and you will be joining them at the same time. The photo shows the colour order that I used for my squares.
Take one of your corner squares (I started in the top-right corner) and add one more round like you did in round 4.
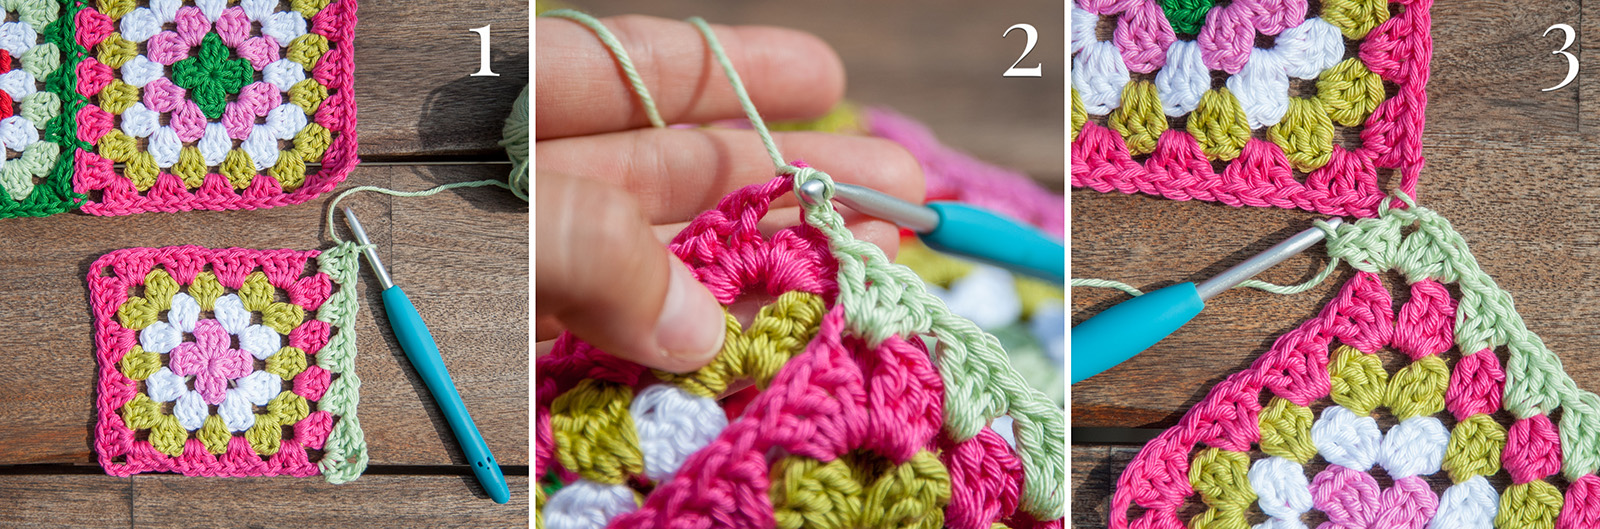
Now take a square that will be attached to one of the sides of this square and start adding the last round along one side of the square. In the corner make [dc 3, ch 2]. (photo 1)
Pick up the square that already has 5 rounds and hold them wrong sides together. Now you make [sl st around the ch-3 sp of the back square, dc 3 to complete the corner of the front square] (photo 2 and 3).
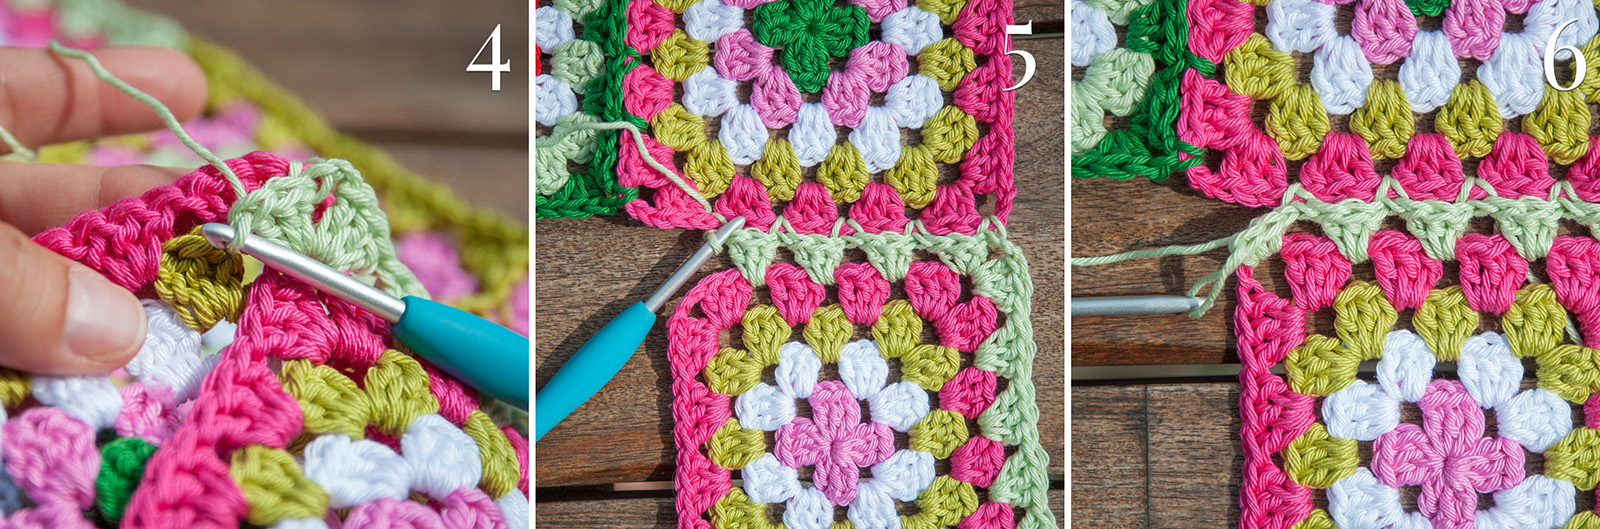
You now start to join the sides. Before making another 3dc group in the front square, you make a sl st in the space between two 3dc groups of the back square. (photo 4)
Continue working this side until you reach the next corner. (photo 5)
In the corner, you make [dc 3, sl st to join, ch 2, dc 3] (photo 6). Note that the order of the stitches is mirrored compared to the first corner.
Finish the 5th round as usual and your first two squares are joined. (photo 7)

In this case, you only had to join two squares along one side, but later on, you will have to join squares along two sides. You start preparing the square that you will be joining in the regular way by adding the 5th round along one side. You then join the first corner like you did before and work your way to the next corner. (photo 8)
Here things change and you will attach this square at two points. Here is what you do: dc 3, sl st to join in the corner of the first square (the one to the right in the photo above). Then ch 1 and sl st to join in the corner of the second square (the one to the top in the photo above). Next, make dc 3 to complete the corner and continue joining the sides of the squares. The arrows in photo 9 show the two points where the squares are joined.
Continue to join all other squares and weave in your ends. You’re now ready to start the edging.
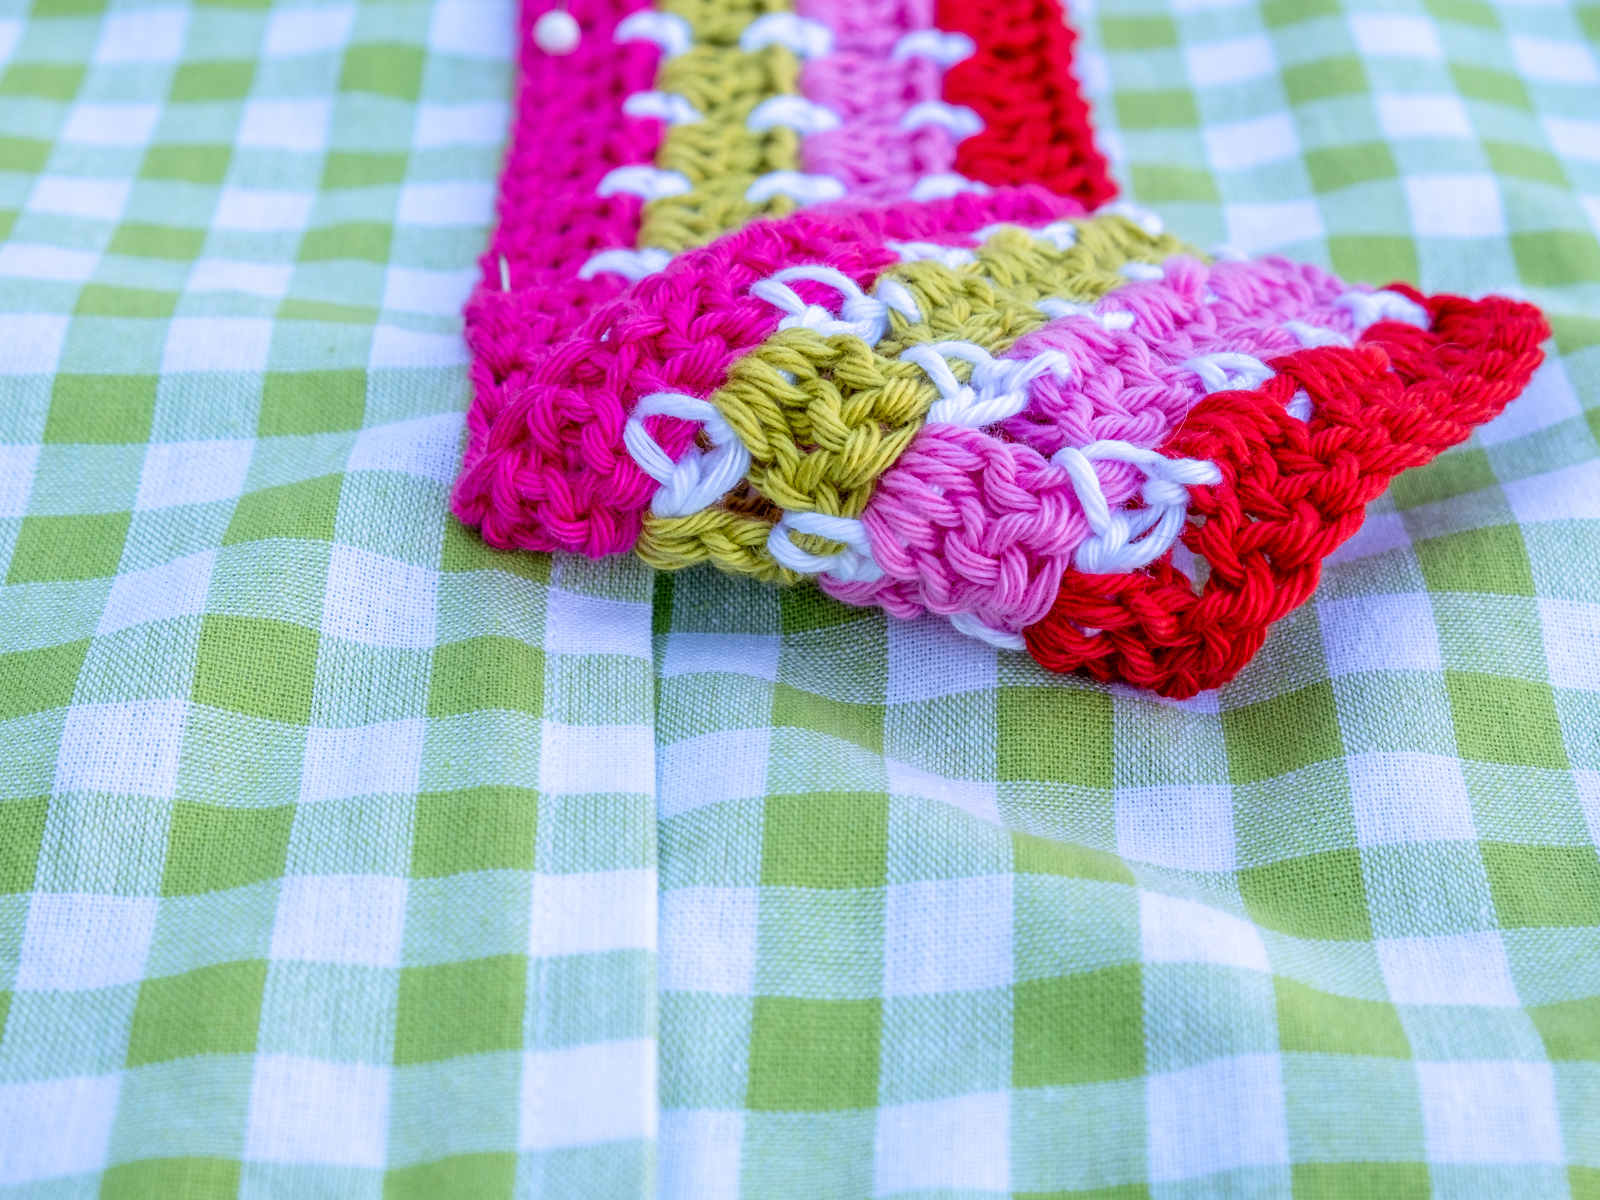
Written Pattern for the Edging
The edging is worked around the entire piece of joined squares. For my cushion I have used the following colour order: C – A – F – A – G – A – E
Round 1: join yarn C with a stdc in any of the sp between 3dc groups, dc 1, *dc 3 in each sp until next corner, in the corner make [dc 3, ch 3, dc 3]. Repeat from * until the end of the round, dc1 to complete 1st 3dc group. Close round with a sl st. Break yarn.
Round 2: join yarn A in any of the sp between 3dc groups, *ch 2, sc in each sp between groups of the previous row until next corner, in the corner make [sc, ch 2, sc, ch2, sc]. Repeat from * until the end of the round, close round with a sl st in 1st st. Break yarn.
Round 3: join yarn F with a stdc around any of the ch-2 sp of the previous round, dc 1, *dc 3 around each ch-2 sp until next corner (see chart), in the corner make [dc 3, ch 3, dc 3]. Repeat from * until the end of the round, dc1 to complete 1st 3dc group. Close round with a sl st. Break yarn.
Round 4: repeat round 2, using yarn A.
Round 5: repeat round 3, using yarn G.
Round 6: repeat round 2, using yarn A.
Round 7: join yarn E with a stdc around any of the ch-2 sp of the previous round, dc 1, *dc 3 around each ch-2 sp until next corner (see chart), in the corner make [dc 4, dc 4]. Repeat from * until the end of the round, dc1 to complete 1st 3dc group. Close round with a sl st. Break yarn.
Weave in all ends.
Pattern Chart
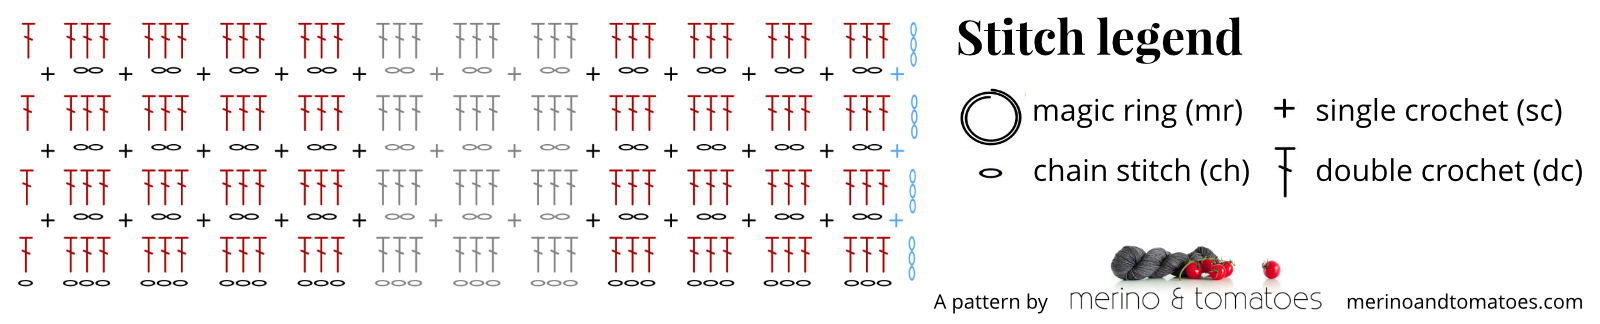
The Backside Closure
For my cushion, I have made this closure after sewing the crochet piece onto the fabric cover. That way it is easier to see the required width. I have made mine just a little bit narrower than the cushion is because it will stretch. A hint: measure along the border to see how many groups of 3dc you’ll need, the pattern is the same!
The 3dc groups are made around the ch-2 spaces of the previous row. You start each row at the same side, so no turning here.
This is the colour order that I have used: F – A – C – A – G – A – E
Written pattern
Start with making a foundation chain or use fdc, using yarn F. The number of stitches necessary for the required length should be a multiple of 3 + 2. When you start with foundation double crochet, then this counts as row 1. You should continue with row 2!
Do not turn your work when starting a new row.
Row 1: ch 3 (counts as dc), dc in 4th st from hook, dc in each of the remaining stitches. Break yarn.
Row 2: join yarn A using a standing single crochet (stsc) between the ch-3 and 1st dc of the previous round, *ch 2, sc between 3rd and 4th dc after previous sc, repeat from * until the end of the row. One stitch will remain. Break yarn.
Row 3: join yarn C using a standing double crochet (stdc) in the top of the first stitch of row 1, dc 3 around each ch-2 sp until the end of the row, dc 1 in last st of row 1. Break yarn.
Row 4: join yarn A using a stsc in the space between 1st dc and the 3dc group of the previous row, *ch 2, sc in next sp between groups of the previous row, repeat from * until the end of the row. One stitch will remain. Break yarn.
Row 5: join yarn G using a standing double crochet (stdc) in the top of the first stitch of row 3, dc 3 around each ch-2 sp until the end of the row, dc 1 in last st of row 3. Break yarn.
Row 6: join yarn A using a stsc in the space between 1st dc and a 3dc group of the previous row, *ch 2, sc in next sp between groups of the previous row, repeat from * until the end of the row. One stitch will remain. Break yarn.
Row 7: join yarn E using a standing double crochet (stdc) in the top of the first stitch of row 5, dc 3 around each ch-2 sp until the end of the row, dc 1 in last st of row 5. Break yarn.
Weave in all ends.
Pattern Chart
Sewing and Assembling
I have sewn my crochet piece on a fabric cushion cover that I made out of matching fabric. In my case, a fabric with a gingham design which turned out to quite practical since the little squares measure 1 x 1 cm. So instead of measuring, I could count the squares to check the sizing. My piece of fabric measured approx. 50 x 125 cm.

You first make the short sides a little neater because these will be visible later on. Put the fabric on a flat surface (right side down) and fold over the short side about 1 cm wide. It helps to iron this seam. Then fold it in again, press and put in needles or hold in place with clips. Do the same on the other short side and sew.
Then, place your piece of fabric on a flat surface again, this time with the right side up (facing you). Fold in both short ends so that the piece of fabric is just as wide as your piece of crochet is. The two flaps of fabric will overlap and you can choose to have them overlap in the middle or more towards one side. I prefer the have them more towards one side. Remember that your fabric is inside out. That means that the top flap will be on the inside once you’re finished. Pin the corners in place.
Place your crochet piece on top and mark the width. Now close the side seams with your sewing machine. Turn the cushion cover inside out so that the right side of the fabric is on the outside. Iron over to make it neat and straight. That’s it!
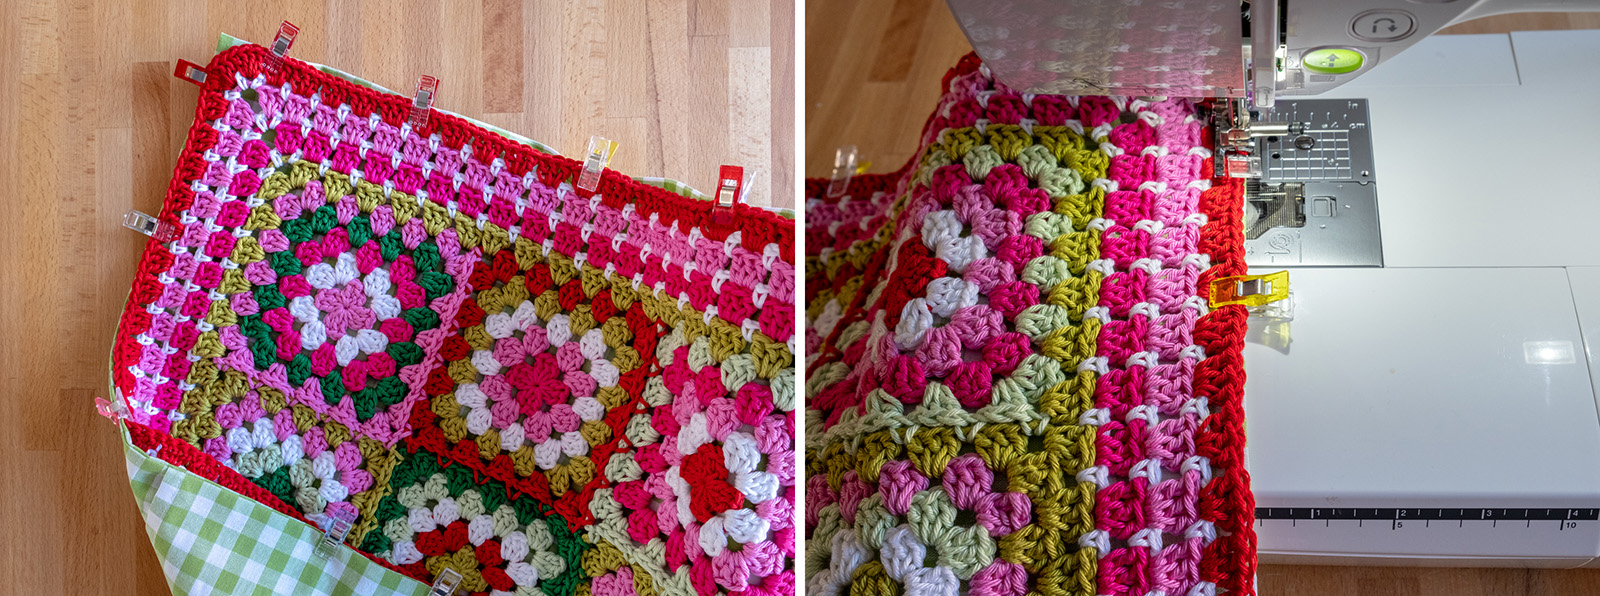
Now is the time to sew the crochet piece onto the fabric. I have used clips to hold everything in place. I then used my sewing machine to sew the crochet piece onto the fabric. If you are not feeling comfortable using your machine for that, then you can always do this bit by hand (I admit that I am too lazy for that).
You’re almost there now… This is the moment where I made the backside closure because at this stage you can determine the necessary width most easily.
Use pins or clips to hold the closure in place and sew it onto the fabric (either with your machine or by hand). Make sure you only sew over the outside flap!
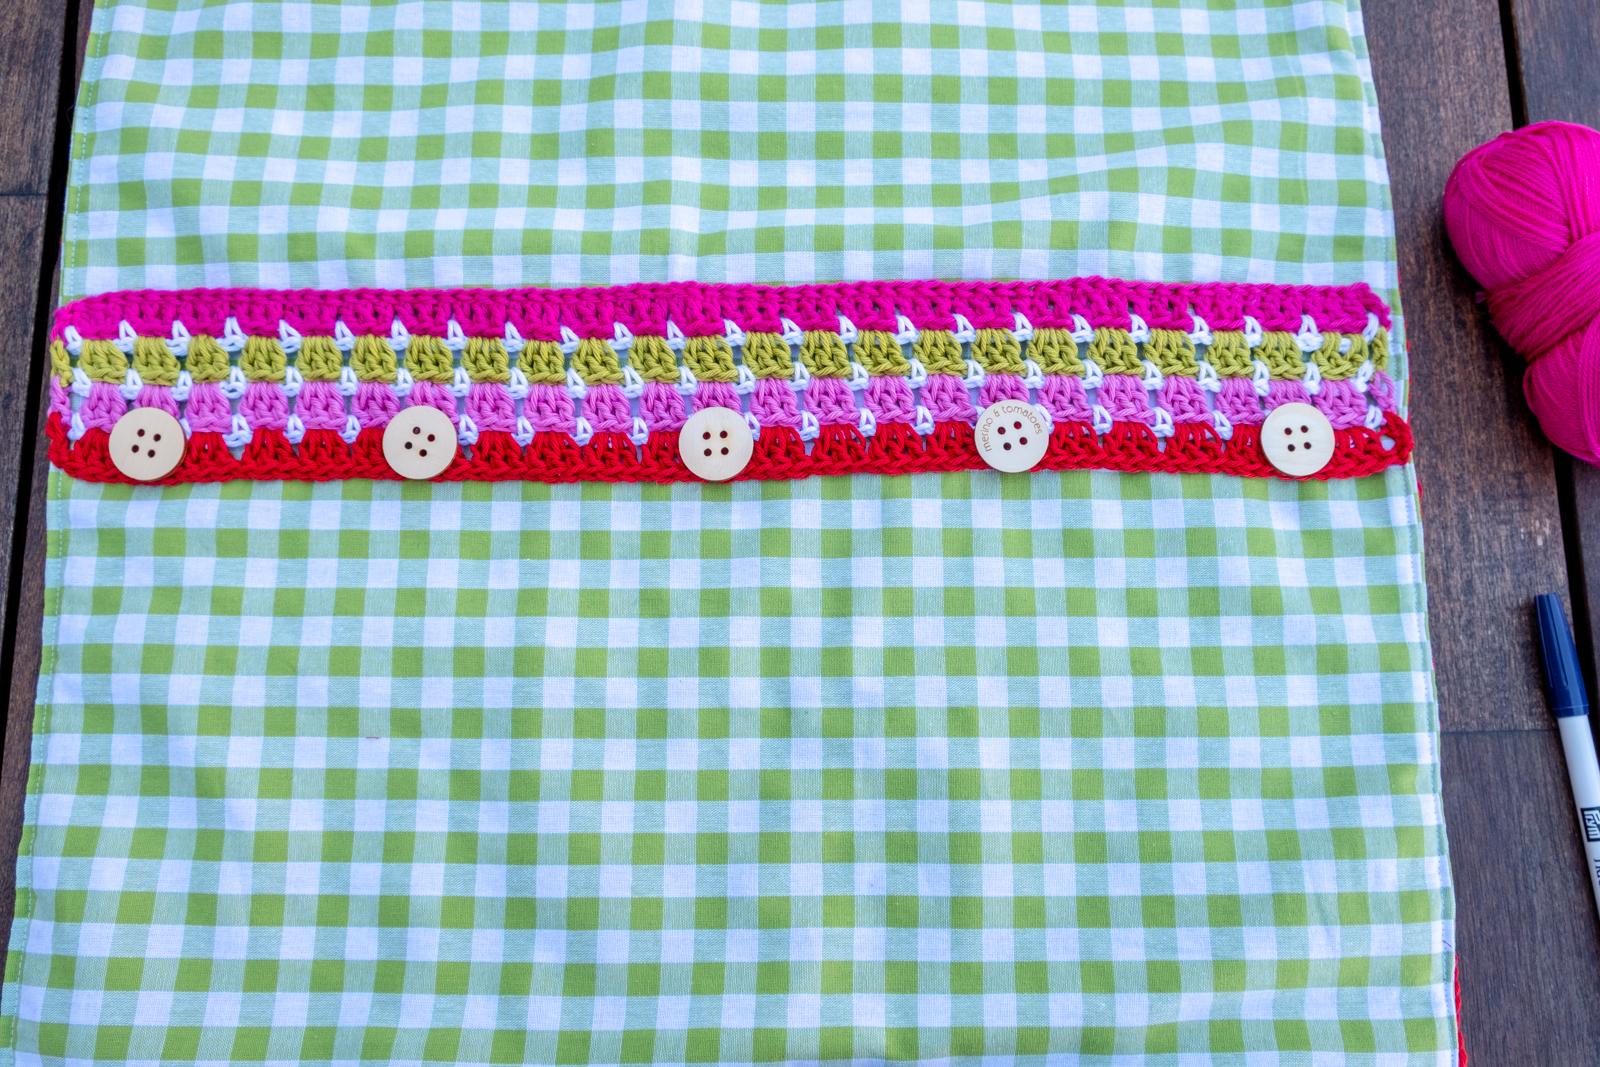
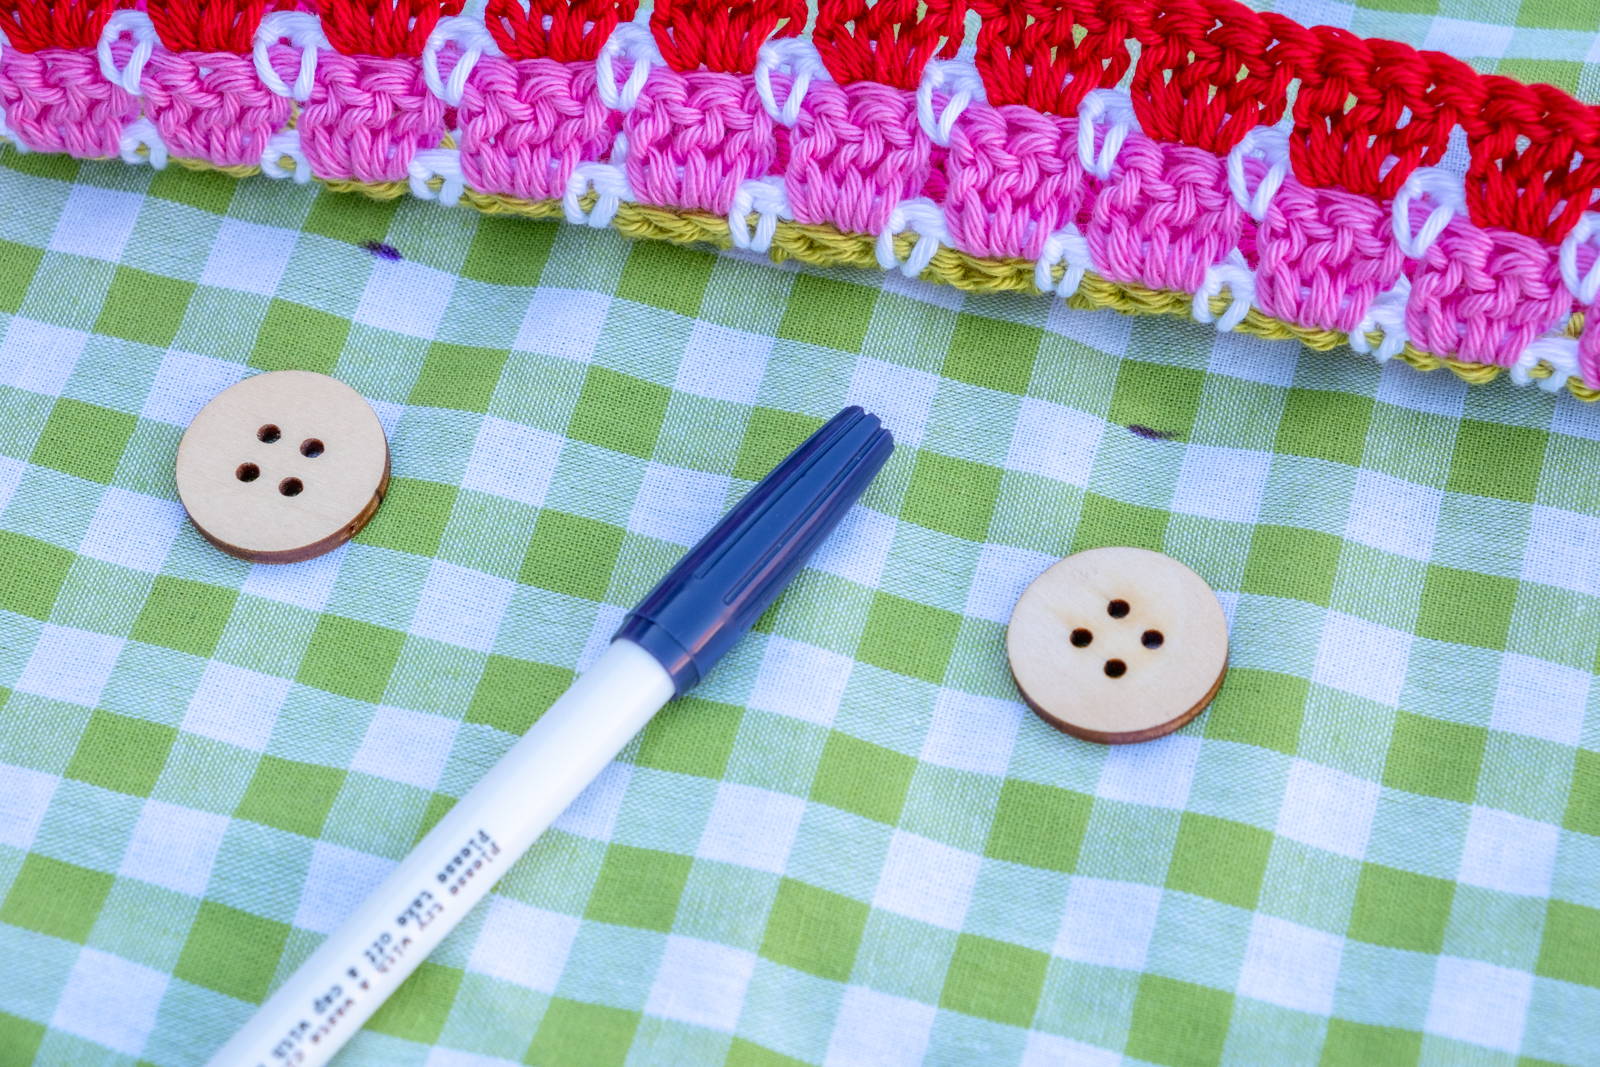
The last step is to sew on the buttons. I have used five buttons that fit through the ch-2 space of the closure. After aligning the buttons I marked the exact place where to sew them on. I have used Phildar Phil Coton 3 in the same colour to sew on the buttons. That’s the same yarn as the one I used for the crochet piece, but a little thinner.
All you have to do now is to put in your cushion pad and your granny square cushion is all done!
Here’s mine:
Love this pattern?
Pin it for later!
I really hope you enjoy making a granny square cushion of your own and I’m looking forward to seeing them! Please tag your creation with #merinoandtomatoes on social media when sharing so that I can find it! Don’t hesitate to drop me a message using the contact form if you have any questions.
This pattern is copyright protected, read more here.
