

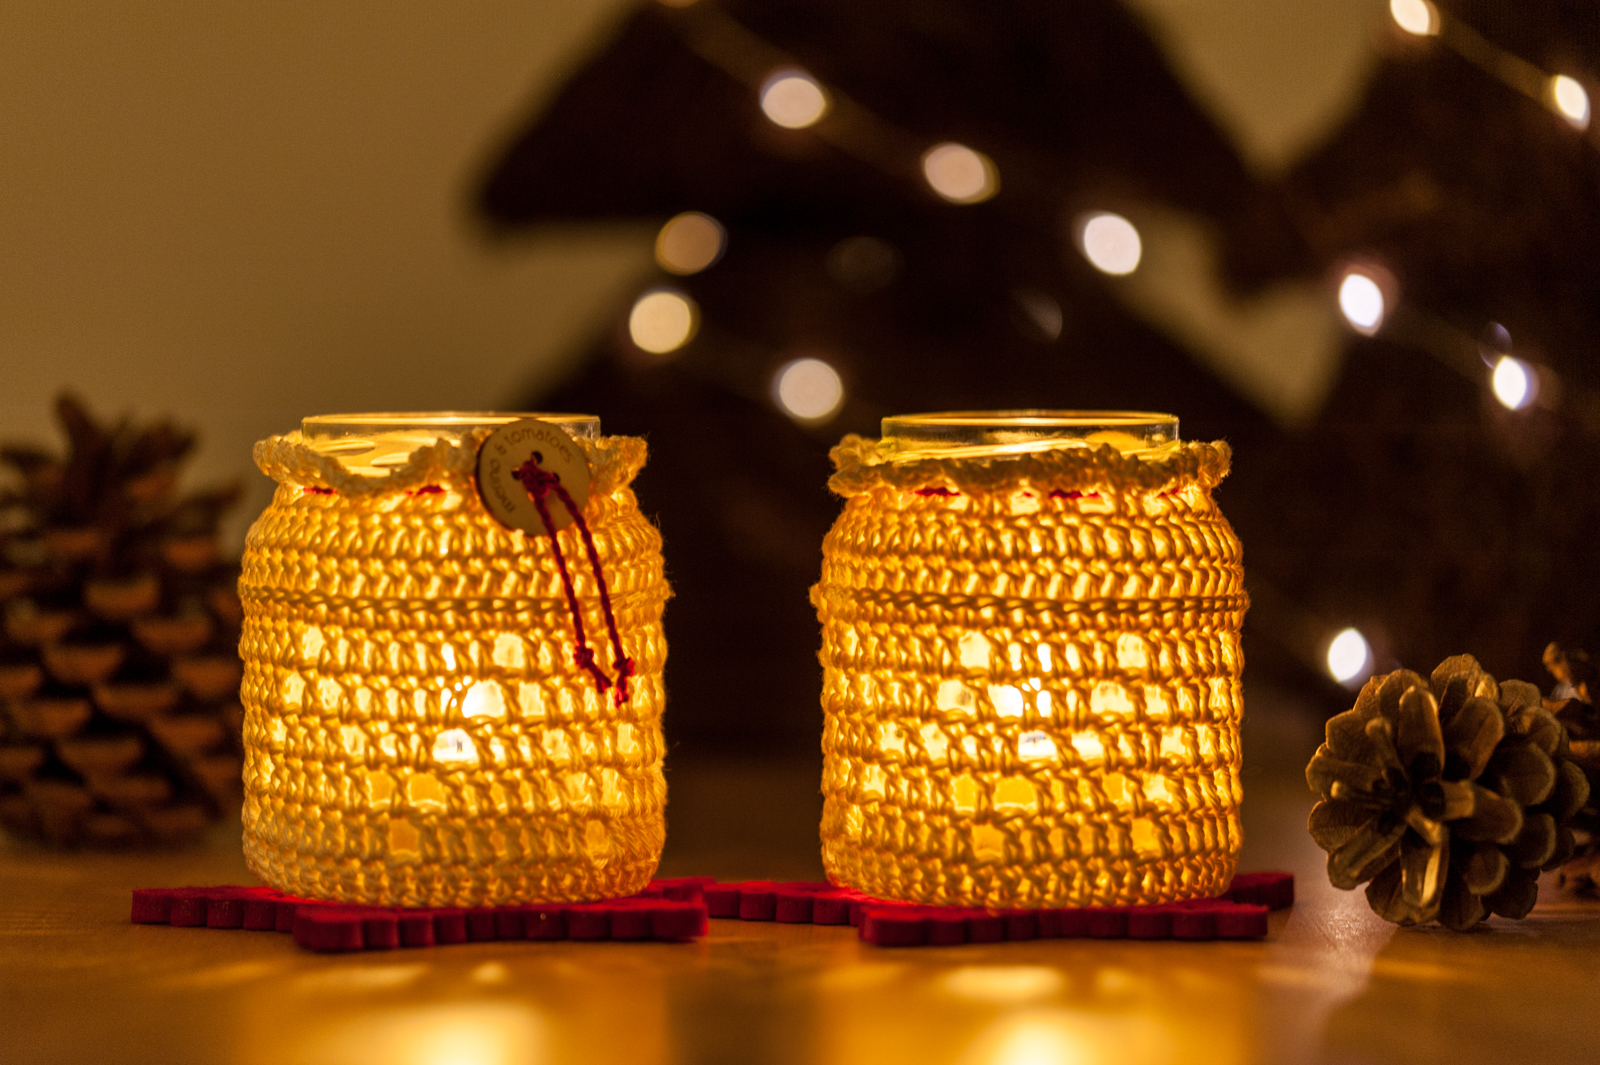
Aren’t they cute? Jar cosies are a perfect little make when you need a small gift. Fill the jar with some goodies (like chocolates, homemade cookies or your own jam) or put a tea light in it. In this pattern, I will explain to you how to crochet the Diamond Jar Cosy!
There is another one… click here for the Chevron Jar Cosy Crochet Pattern!

Materials
Yarn
Cotton yarn, fingering weight. I have used Phildar Phil Coton 3, colour no. 0032 (Ecru)
Hook
Crochet hook 3,5 mm / E-4
Notions
A pair of scissors and a needle to darn in the yarn ends.
Other Supplies
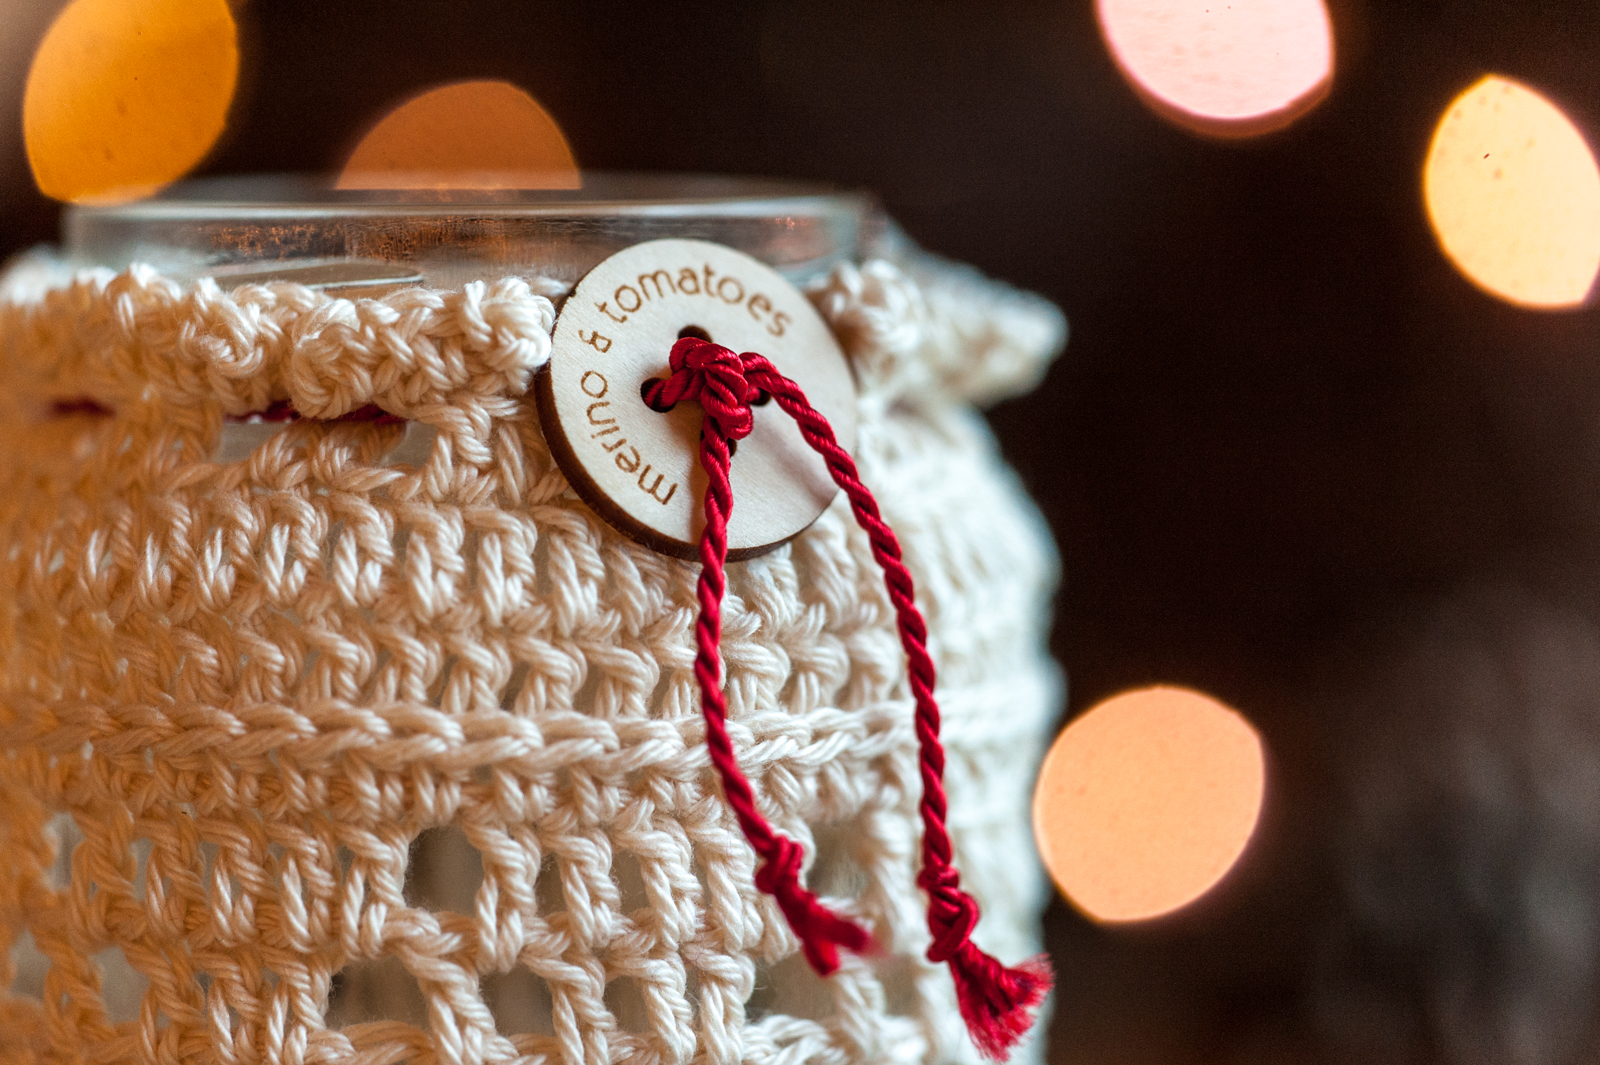
Some ribbon, fine rope or yarn and other bit and pieces to decorate your jar cosy. I have used wooden buttons, but leather tags or other embellishments will work just as well!
Construction
Shape
This pattern is worked in the round so that it fits around your jar seamlessly.
Finished Measurements
The finished jar cosy fits a (glass) jar with a circumference of 25 cm and a height of 10 cm (the ones that contain about 350 gr of fruit or vegetables).
Gauge
For my tension, I need 48 stitches to make the jar cosy fit around a glass with a circumference of 25 cm.
Stitch Library
For this pattern the following stitches are used:
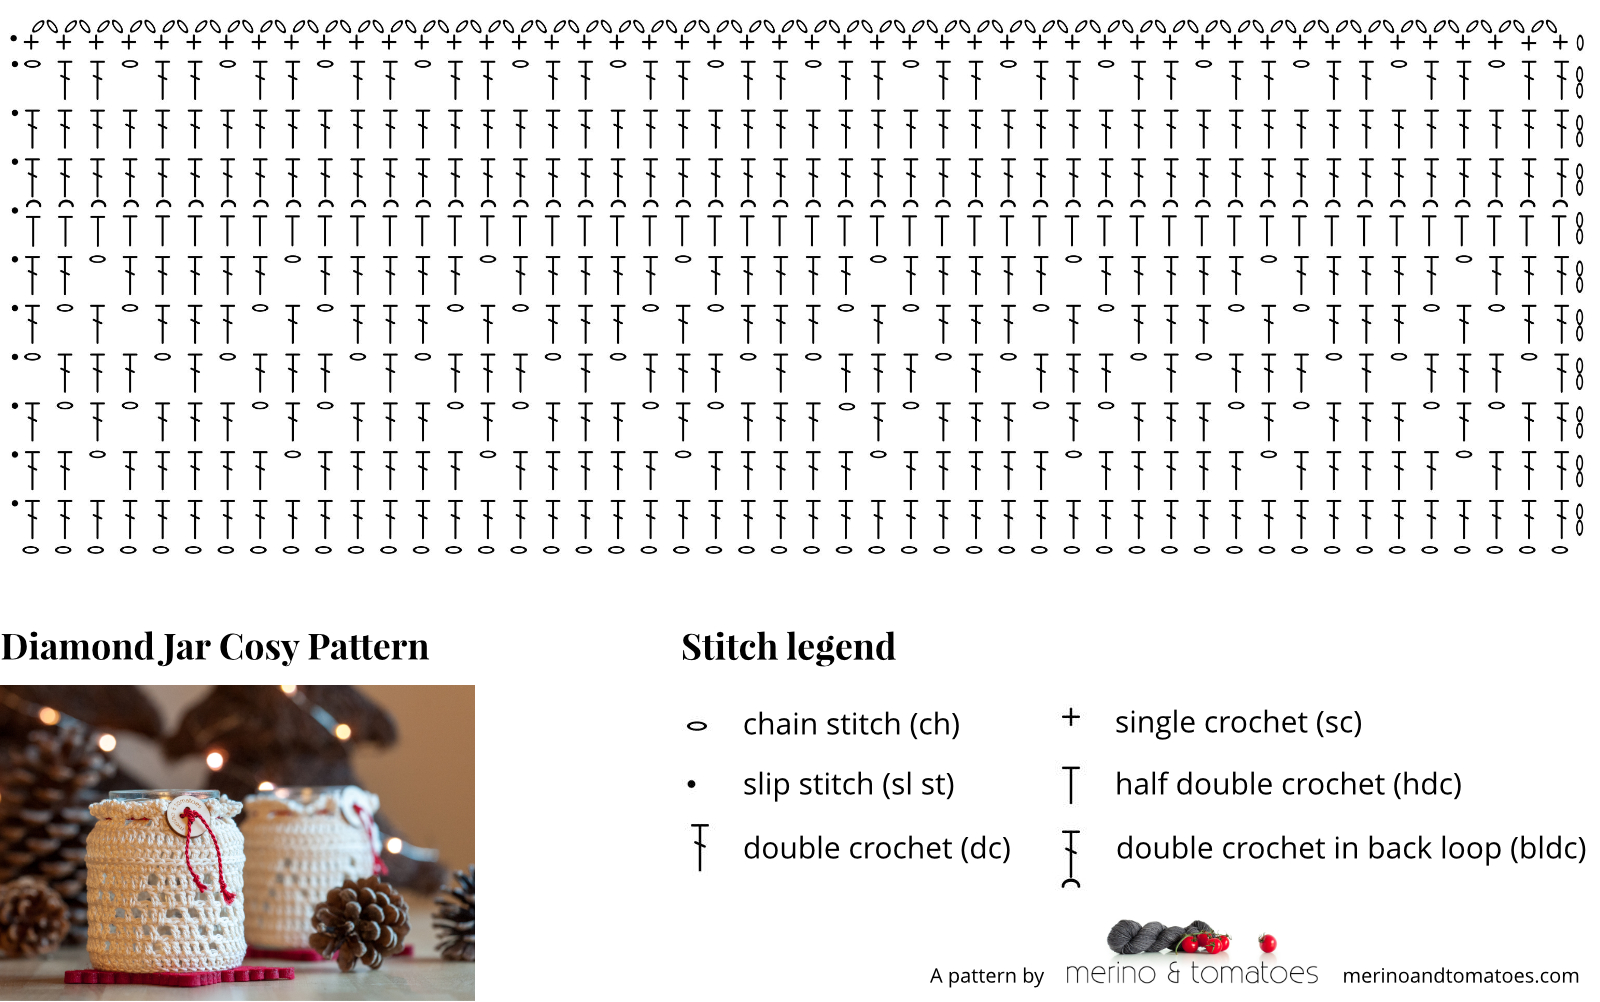
Chain stitch, slip stitch, single crochet (UK: double crochet), half double crochet (UK: half treble crochet), double crochet (UK: treble crochet).
In round 8 you work your stitches in the so-called ‘third loop’ of the half double crochet you have made in the previous round. In the chart, this is indicated as ‘double crochet in back loop (bldc)’. Working in the third loop of a half double crochet makes the ‘v’ on the top flip to the side. That adds a nice texture ridge to your work. When you are not sure how to work into that third loop or where to find it, then please use the link below:
- Half double crochet in the third loop by Moogly (note that in this pattern you work a double crochet in the half double crochet of the previous row!)
I like to start my work with a foundation double crochet (fdc) rather than starting with a number of chains. It makes counting your stitches a lot easier and the foundation double crochet gives you a more stretchy base. The foundation double crochet replaces round 1, so after finishing it you start immediately with row 2. Use the link below for instructions:
- Foundation double crochet by Moogly
The written pattern and pattern chart (at the end of this page) use US stitch terms.
Additional Notes
- Even though the crochet chart suggests that the jar cosy is worked as a flat piece, you work this pattern in the round. That means that you close each round with a slip stitch in the first stitch of the round.
- The turning chains do not count as a stitch throughout the pattern. Ignore them when closing the round and make your first stitch of the new round in the same stitch as the turning chains.
- To create the holes in the pattern, you make a chain stitch and skip one stitch before making your next double crochet (‘sk next st’ in the pattern).
- The pattern repeat for this pattern is 6 stitches. That means you will need a multiple of 6 stitches when you would like to adapt the pattern to different sized jars or containers.

Written Pattern
Chain 48 (alternatively: fdc 48, close with sl st in 1st st and move on to round 2)
Round 1: ch 2 (does not count as a stitch throughout the pattern), dc 48, close round with a sl st in 1st st, make sure your work Is not twisted.
Round 2: ch 2, *dc 3, ch 1, sk next st, dc 2. Repeat from * 7 times. Close round with a sl st in 1st st.
Round 3: ch 2, *dc 2, ch 1, sk next st, dc 1, ch 1, sk next st, dc 1. Repeat from * 7 times. Close round with a sl st in 1st st.
Round 4: ch 2, *dc 1, ch 1, sk next st, dc 3, ch 1, sk next st. Repeat from * 7 times. Close round with a sl st in 1st st.
Round 5: ch 2, *dc 2, ch 1, sk next st, dc 1, ch 1, sk next st, dc 1. Repeat from * 7 times. Close round with a sl st in 1st st.
Round 6: ch 2, *dc 3, ch 1, sk next st, dc 2. Repeat from * 7 times. Close round with a sl st in 1st st.
Round 7: ch 2, *hdc 3, hdc around ch-1 of the previous round, hdc 2. Repeat from * 7 times. Close round with a sl st in 1st st.
Round 8: ch 2, bldc 48. Close round with a sl st in 1st st. (You work this round in the ‘third loop’ of the hdc of the previous round. See ‘Stitch Library’ above for instructions.)
Round 9: ch 2, dc 48. Close round with a sl st in 1st st.
Round 10: ch 2, *dc 2, ch 1, sk next st. Repeat from * to end. Close round with a sl st in 1st st.
Round 11: ch 1, *sc, ch 2, sc, ch 2, sc around ch-1 of the previous round, ch 2. Repeat from * to end. Close round with a sl st in 1st st. Break yarn and weave in your ends.
Pattern Chart
Finishing
Use a needle to weave a piece of ribbon, rope or yarn through the loops created in round 10. Make a knot and put on some decorations if you like!
Love this pattern?
Pin it for later!
Would you like to show me your creations? Please use #diamondjarcosy and #merinoandtomatoes when sharing them on social media!
This pattern is copyright protected, read more here.
