
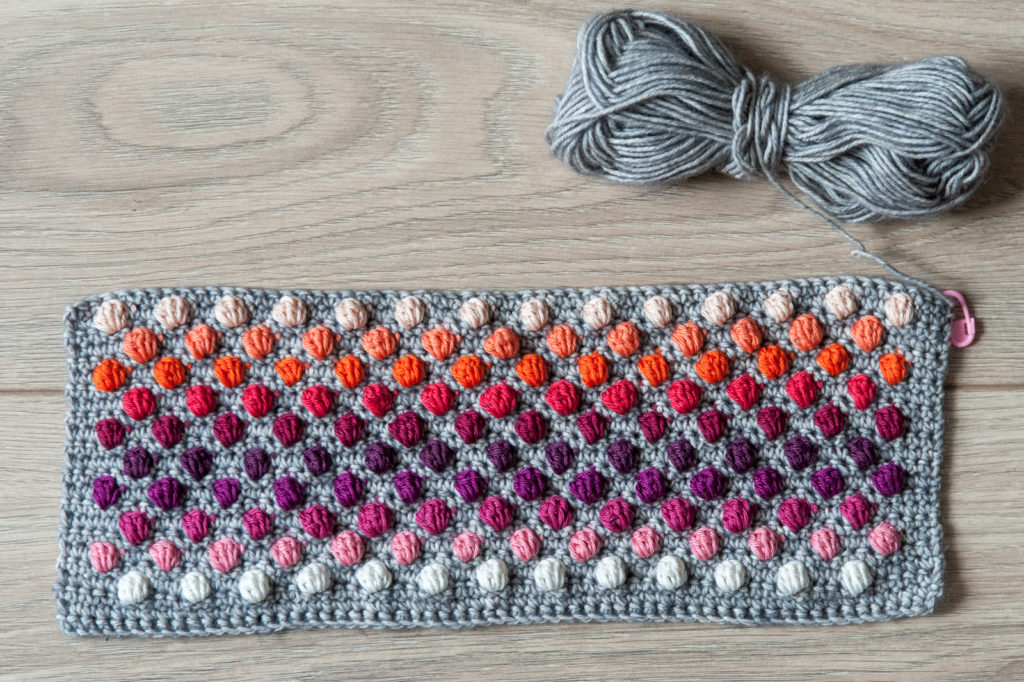
In my previous update, I’ve shown you my custom colour selection and the start of this beautiful wrap. It all started with a lot of bobbles! I had to complete a few more rows to finish part one of the Hygge CAL…
And here is the finished status of part one:
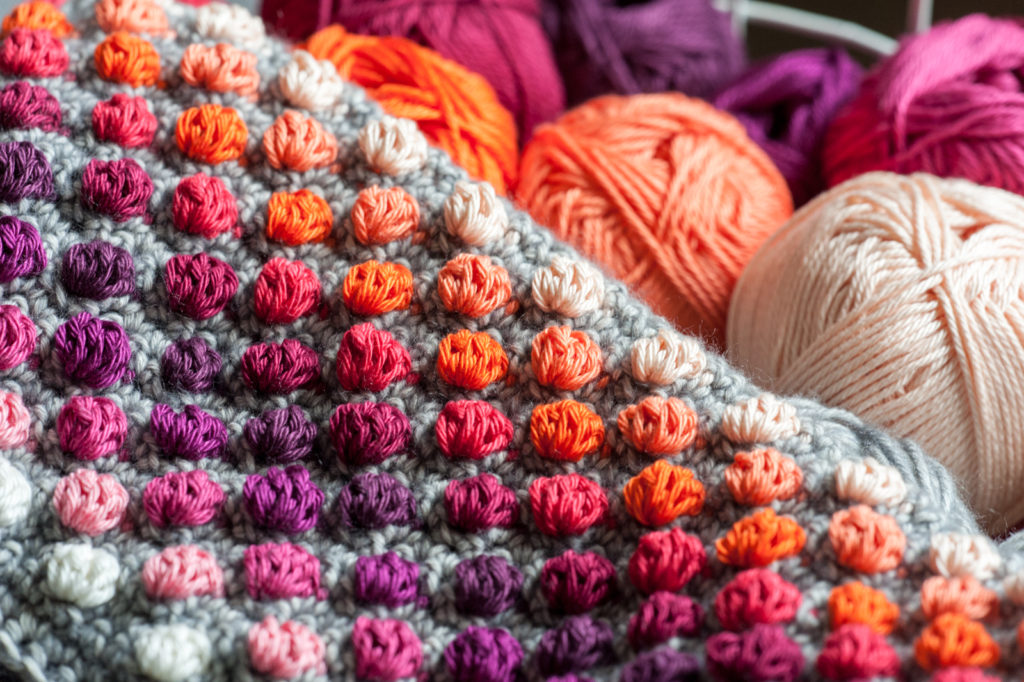
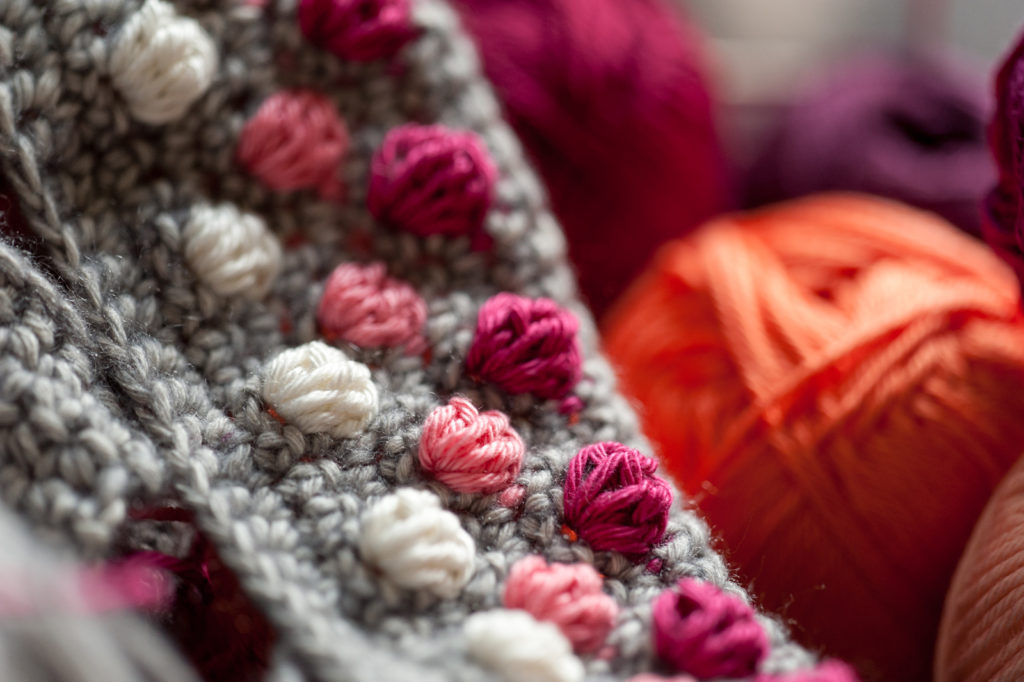
After my initial fiddling around with the bobbles, I’ve found a way that works best for me (which is not to crochet over the base yarn and make the bobbles pop by pushing them to the front with the back of a crochet hook). I really like how they look all together.
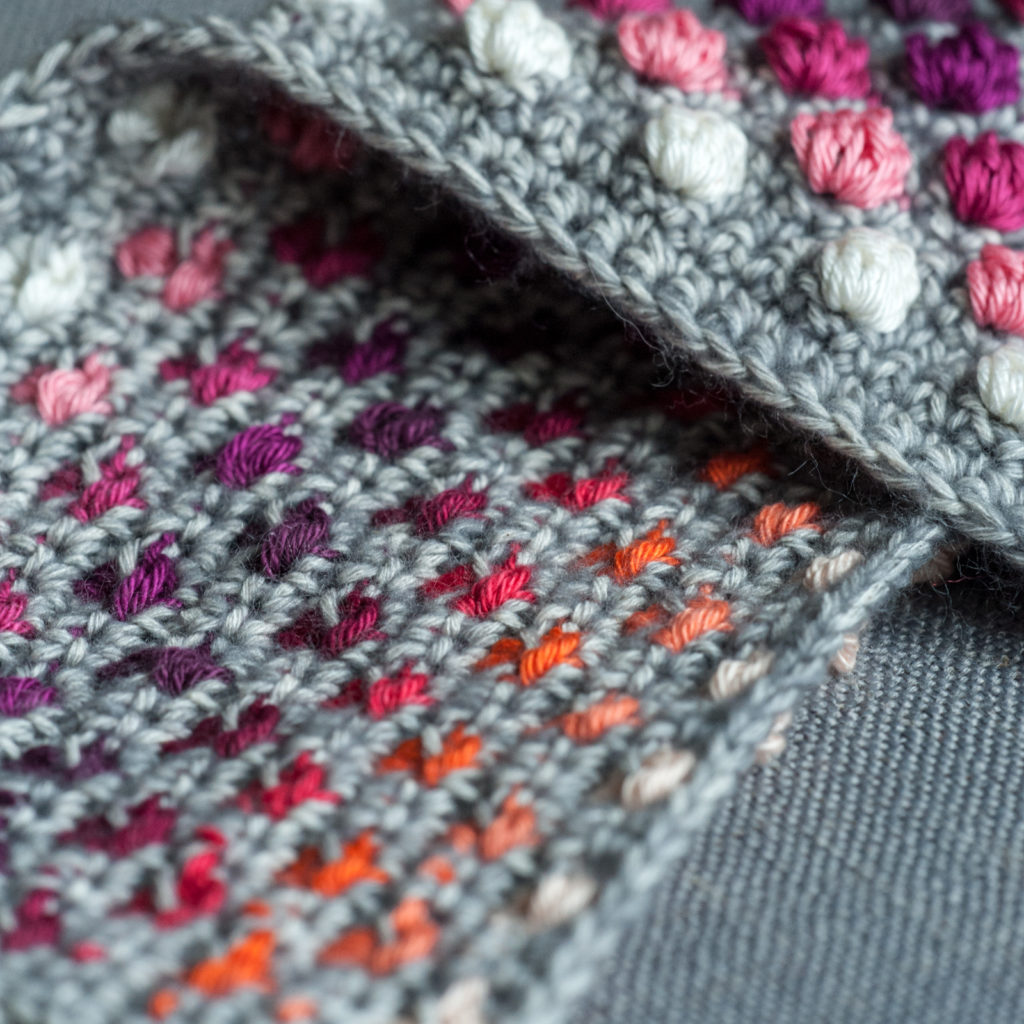
The backside looks like a piece of art as well don’t you think?
The bonus of ordering a ready-packed Hygge kit lies in the details! Scheepjes has included a few lovely goodies. And I totally forgot to share them last week!
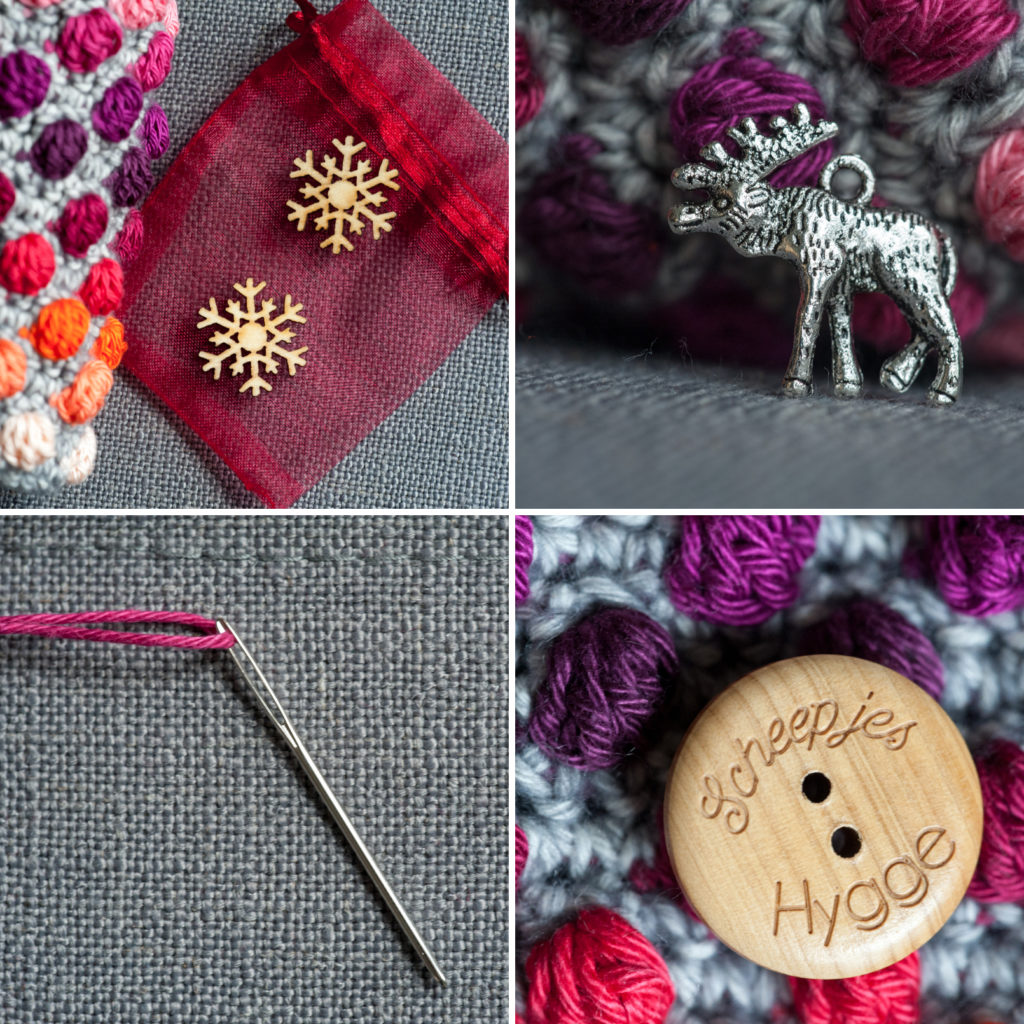
First, there are these lovely wooden snowflakes. I am a sucker for the shape of snowflakes AND for laser cut goodies, so you can imagine how much I like these! Then there is this cute reindeer charm that adds to the Nordic feel of the whole kit. A very handy embroidery needle cannot fail of course (very good, I didn’t have one yet). Finally, they’ve added this beautiful wooden button which will get a lovely place on my finished wrap.
Okay… that was part one. Moving on to part two now: surface crochet and embroidery!
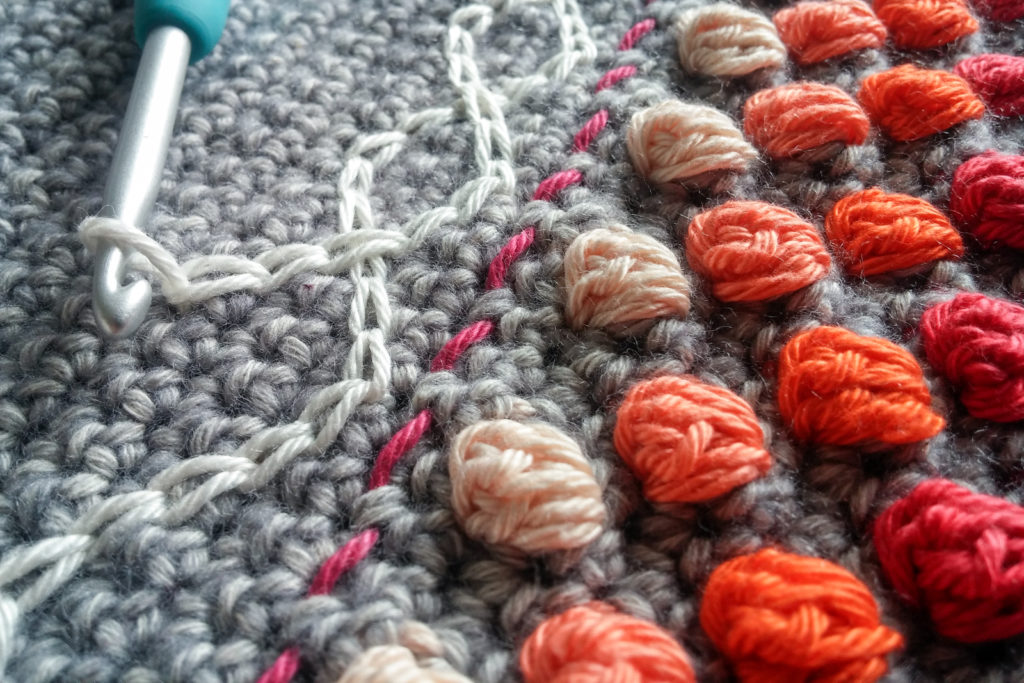
Before we start the actual embroidery part, a diamond-shaped separator has to be put in place. By using a technique called ‘surface crochet’ you basically make slip stitches on the surface of your work. A bit fiddly in the beginning, but not too complicated once you’ve got a few stitches in place. The counting (to position them according to the scheme) here is the most challenging part. The pink thread in the picture is only a guide that is pulled out after finishing the separator.
What you don’t want when adding the separator and doing the embroidery stitches, is your base yarn (the Stonewashed in this case) to get sewn in… Here’s my solution for preventing that from happening.
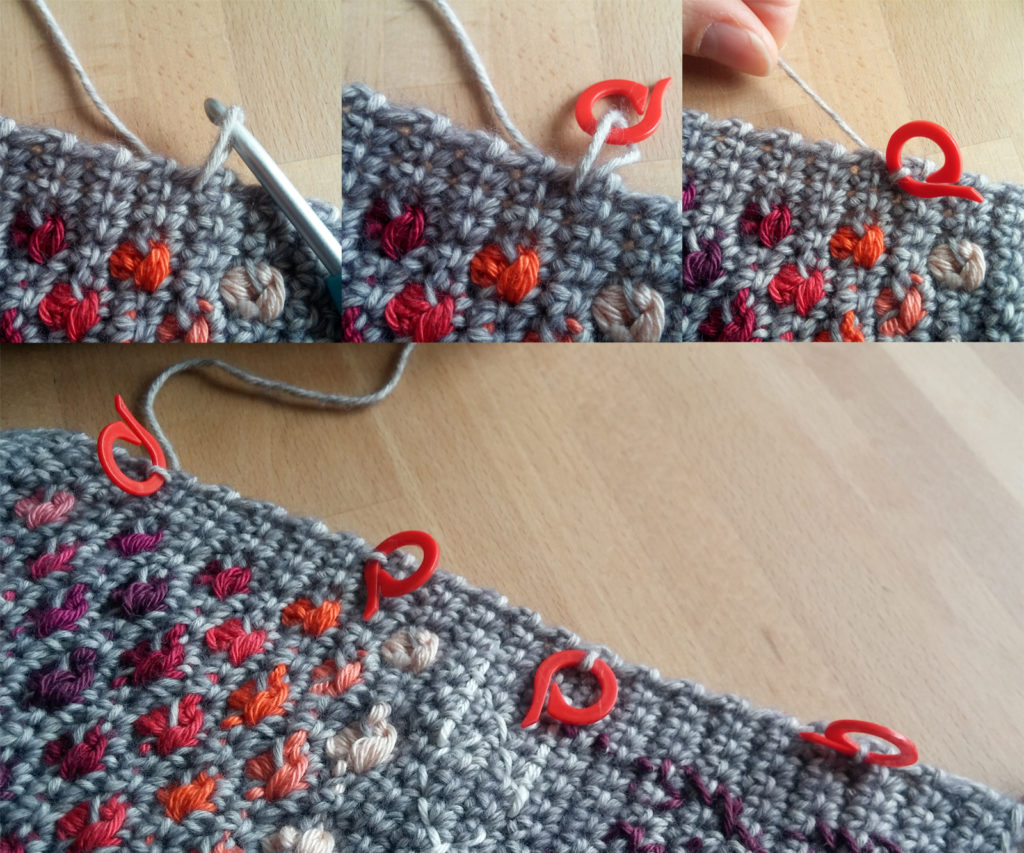
You are going to guide the base yarn out of the way by the following steps:
- along the side of your work, pull up a loop of the base yarn using your crochet hook
- place a stitch market in the loop
- pull the look a little tight to keep the stitch market in place.
Repeat a few times (I have put in four stitch markers here) until your base yarn is out of the way!
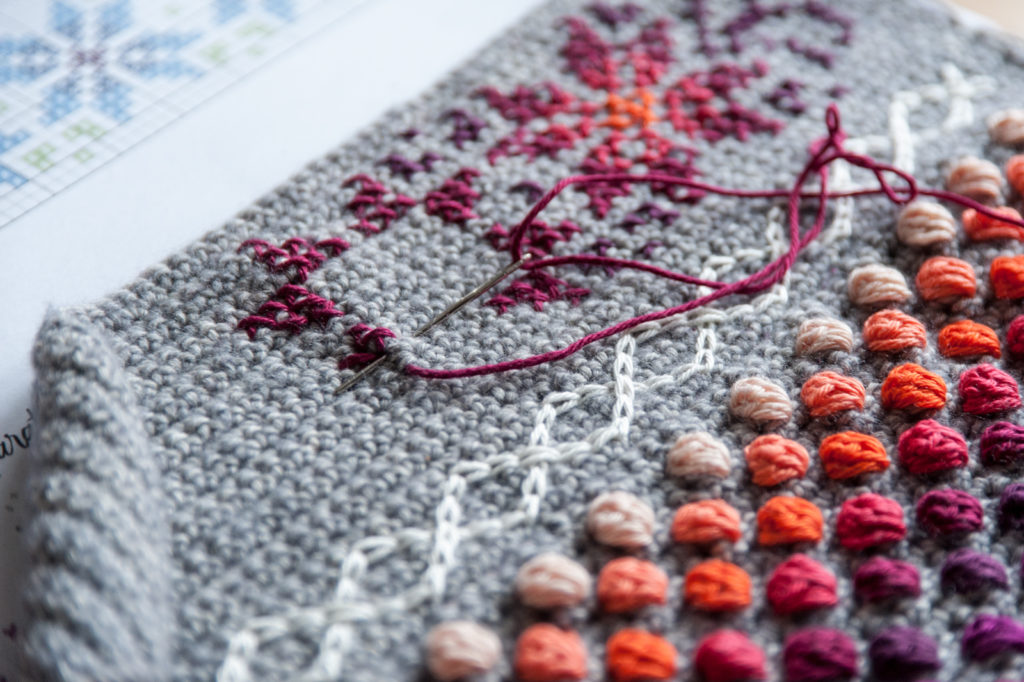
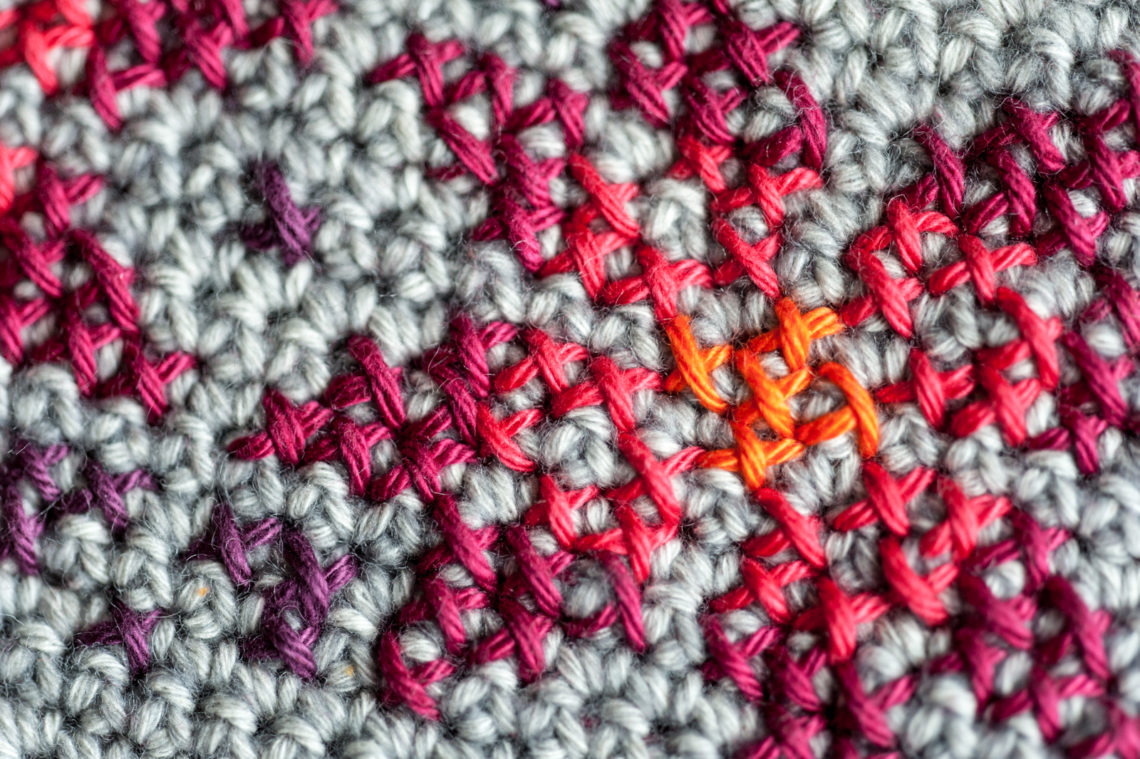
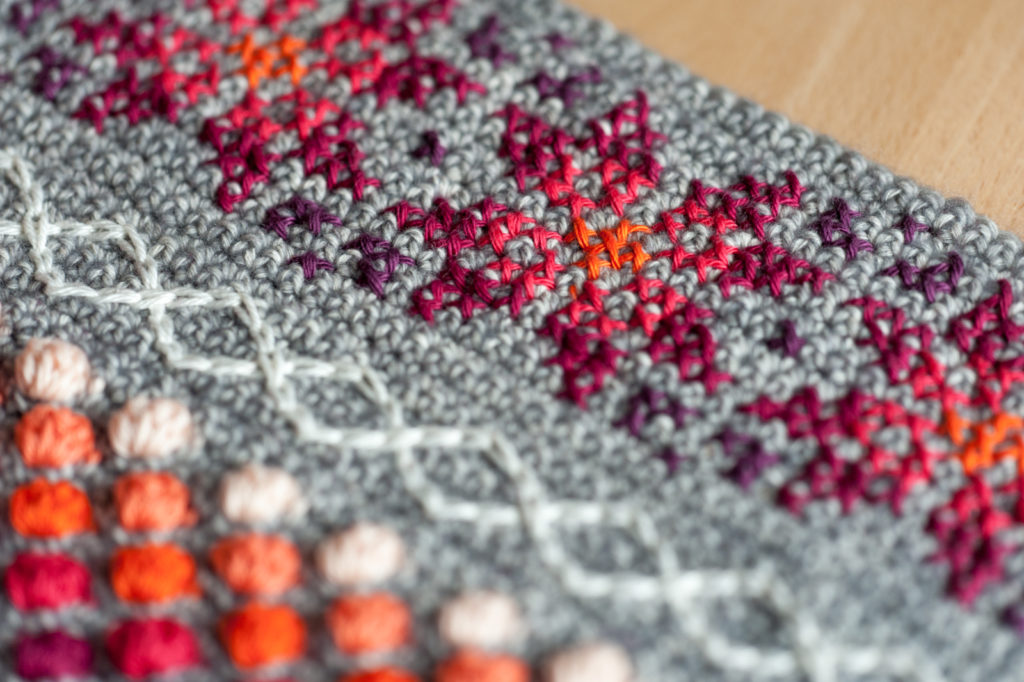
And then the actual embroidery part begins. It’s counting and counting and checking and double checking to see if you are making your cross stitches in the position… and then the beautiful pattern starts to appear…
Again here, the first stitches are the most complicated ones. But then you soon develop a rhythm and it becomes something soothing actually. Listening to the radio playing in the background, coffee on hand… what more do you need?
I’ve finished the last ones this morning and this is what it looks like after part two is finished:
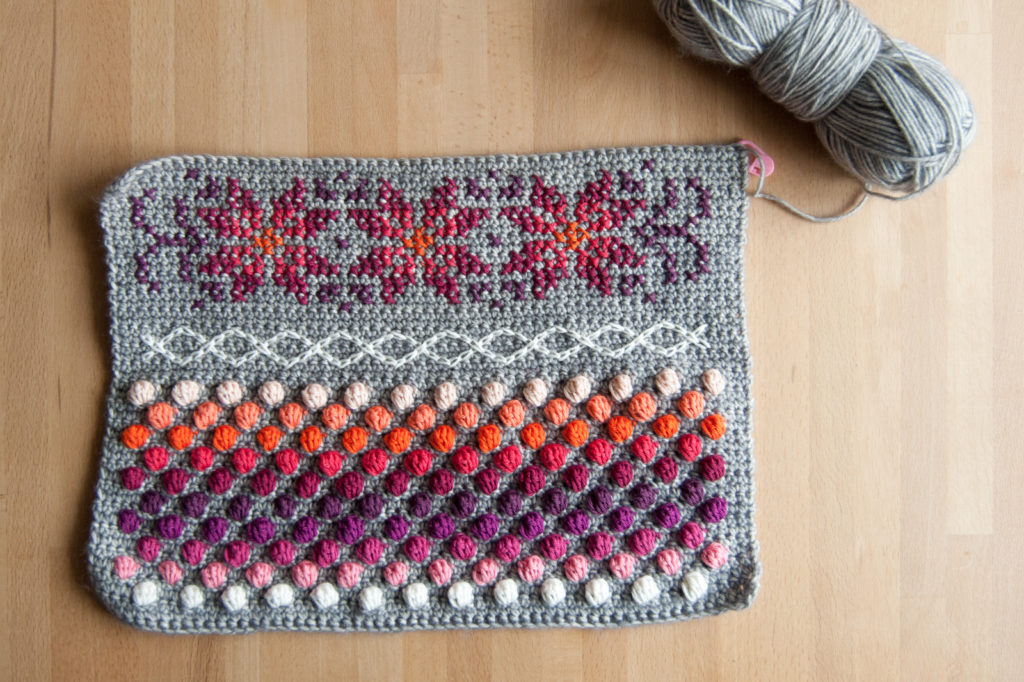
It does look a bit wonky, doesn’t it? I noticed that my tension was a bit tighter when I crocheted the second part (the base for the embroidery) and of course you have the piece of work in your hand the whole time, turning it from one side to the other. I’m not worried about that at this stage because I think that blocking the wrap when it’s finished will make it straight again.
The use of a custom selection of colours makes it a true surprise how the combinations are going to work out in practice. Well, for this part I can only say that I’m very, very satisfied with how the colours are!
All done for this week now. I’ve got my supplies waiting for part three which will be published next Wednesday! In the meantime… I’ll cast on a new knitting project…
You’ll find all the details on this CAL in my first update!

No Comments