
I know. It’s the beginning of March and Spring is (hopefully) just around the corner. But still, I would like to share my winter sewing project with you here now. We had a week of proper Winter weather just a few weeks ago.
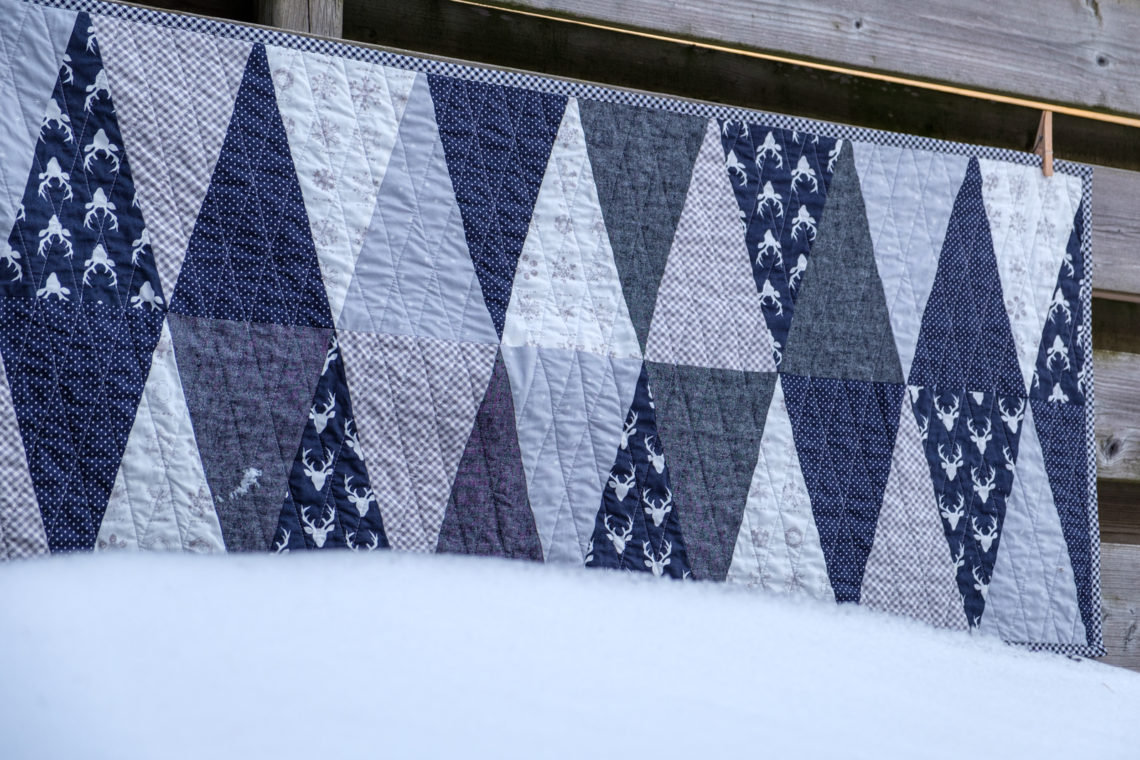
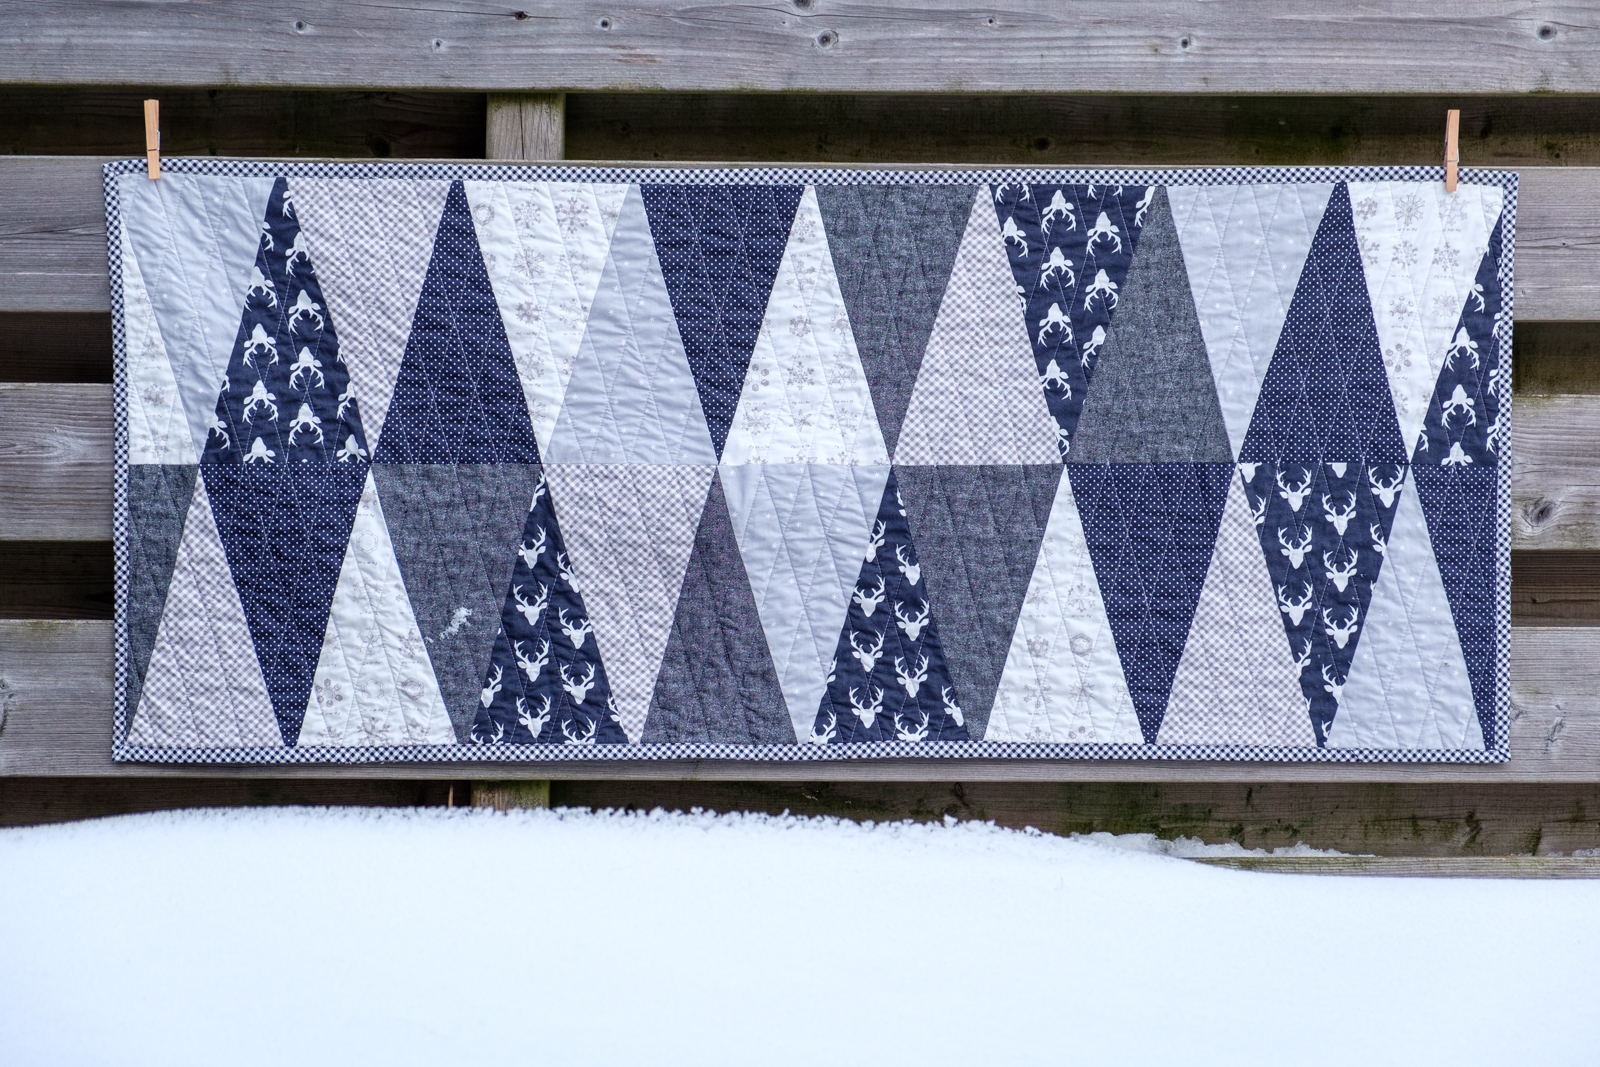
I truly enjoyed this week of snow and frosty temperatures. We went out for a long walk every day and I posted several photos on my Instagram account. During that week, I also made a table runner called Jasper and I used winter-themed fabrics for it.
The Fabrics

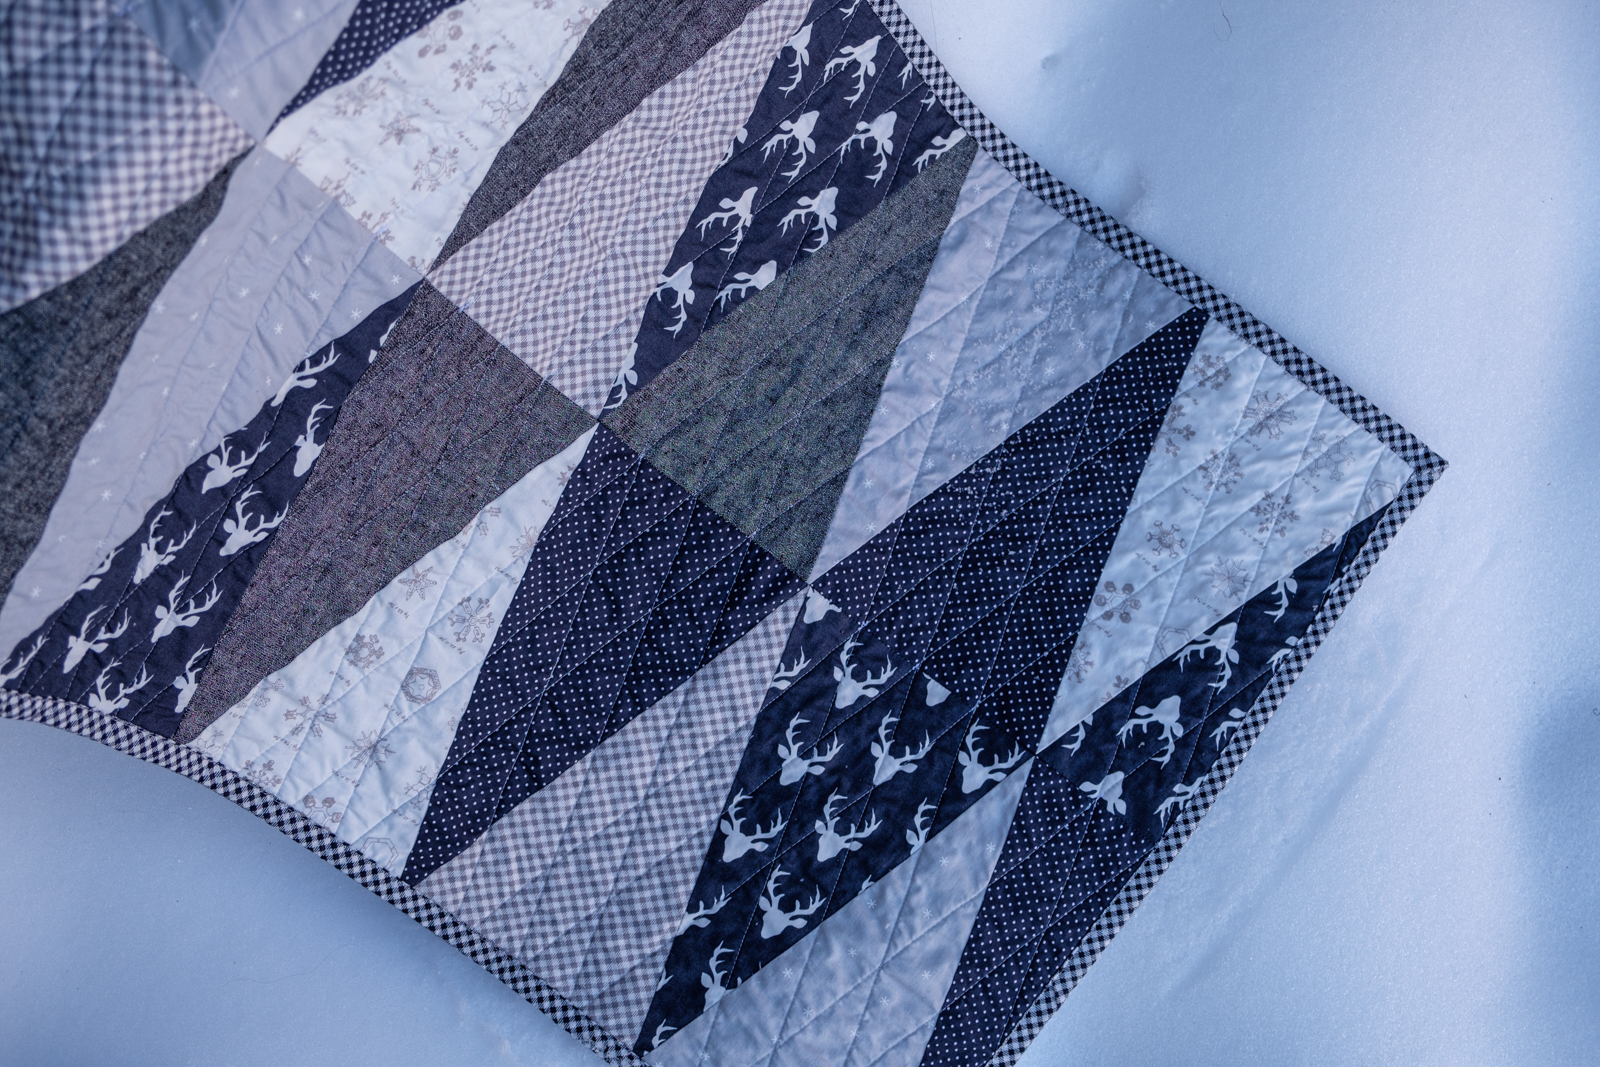
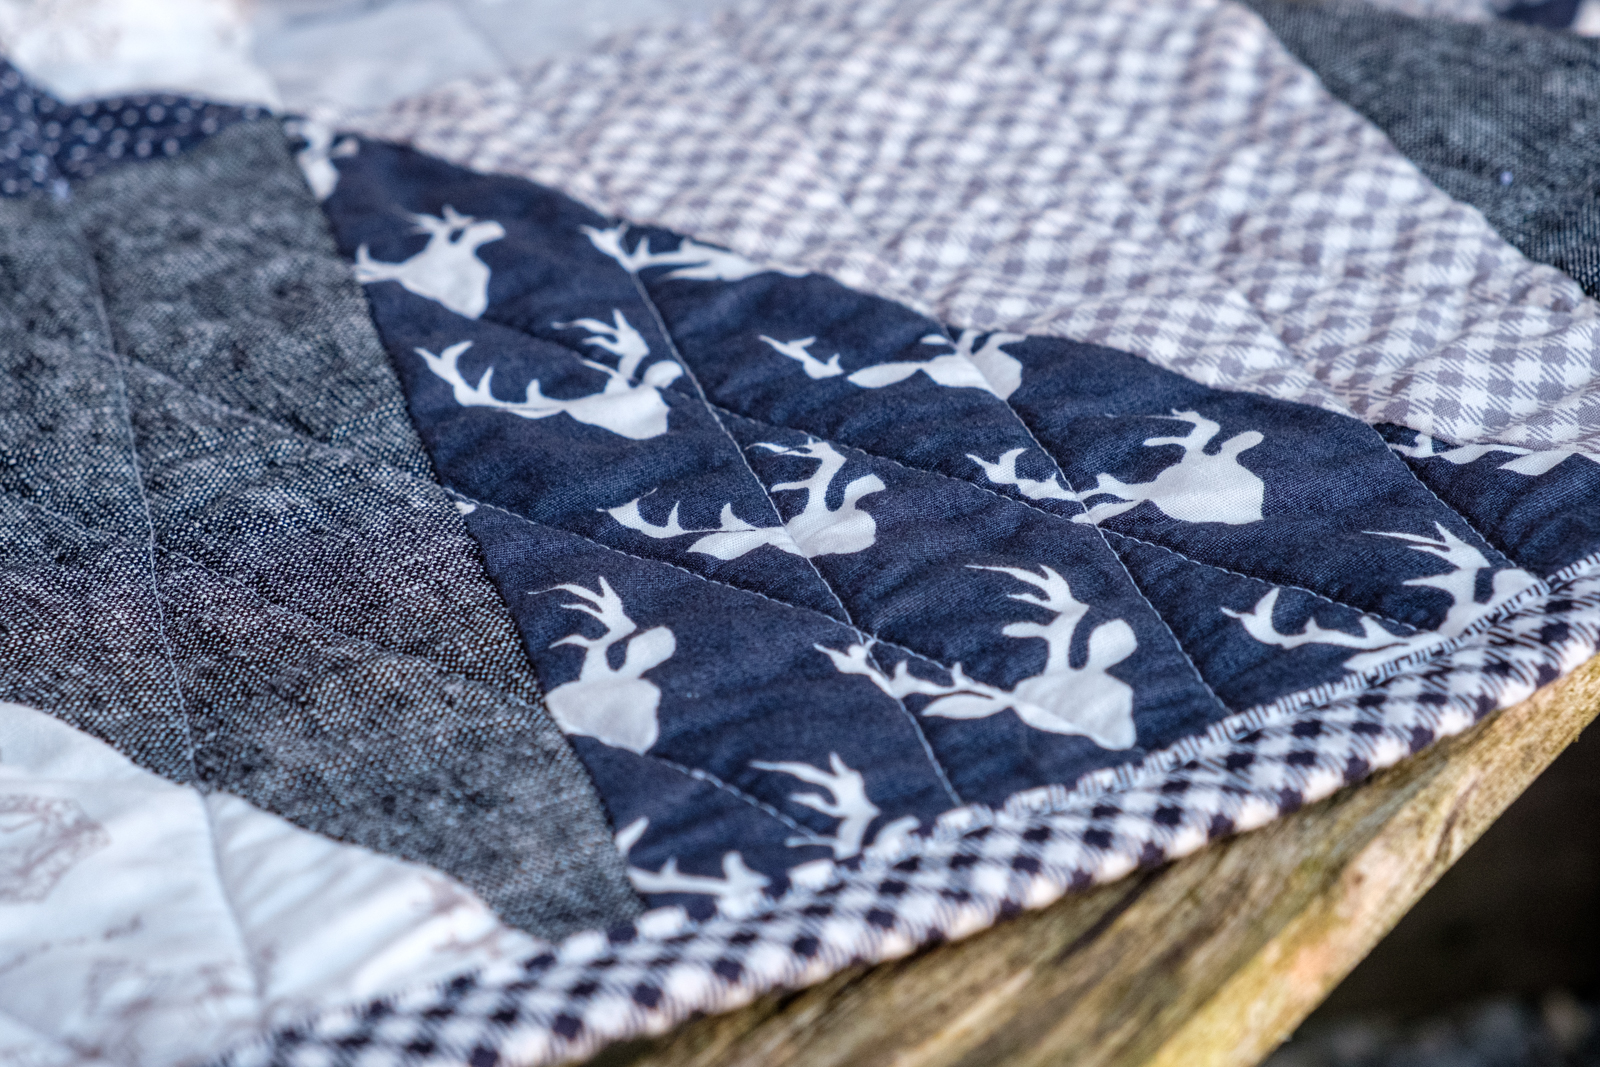
A little while ago, I bought this set of winter-themed fabrics. I like the one with the deer head a lot. That alone almost made me buy this set! The white one with the snowflakes is very pretty too. The semi-solid fabric is a mixture of cotton and linen and has a sparkle in it as well. Most of the fabrics are Art Gallery Fabrics. The cotton and linen is an Essex Yarn Dyed Metallic by Robert Kaufman and, finally, the grey one with the tiny stars is by Ruby Star Society.
All will be used for the triangles in the pattern except for the dark checkered one: that on will become the binding.
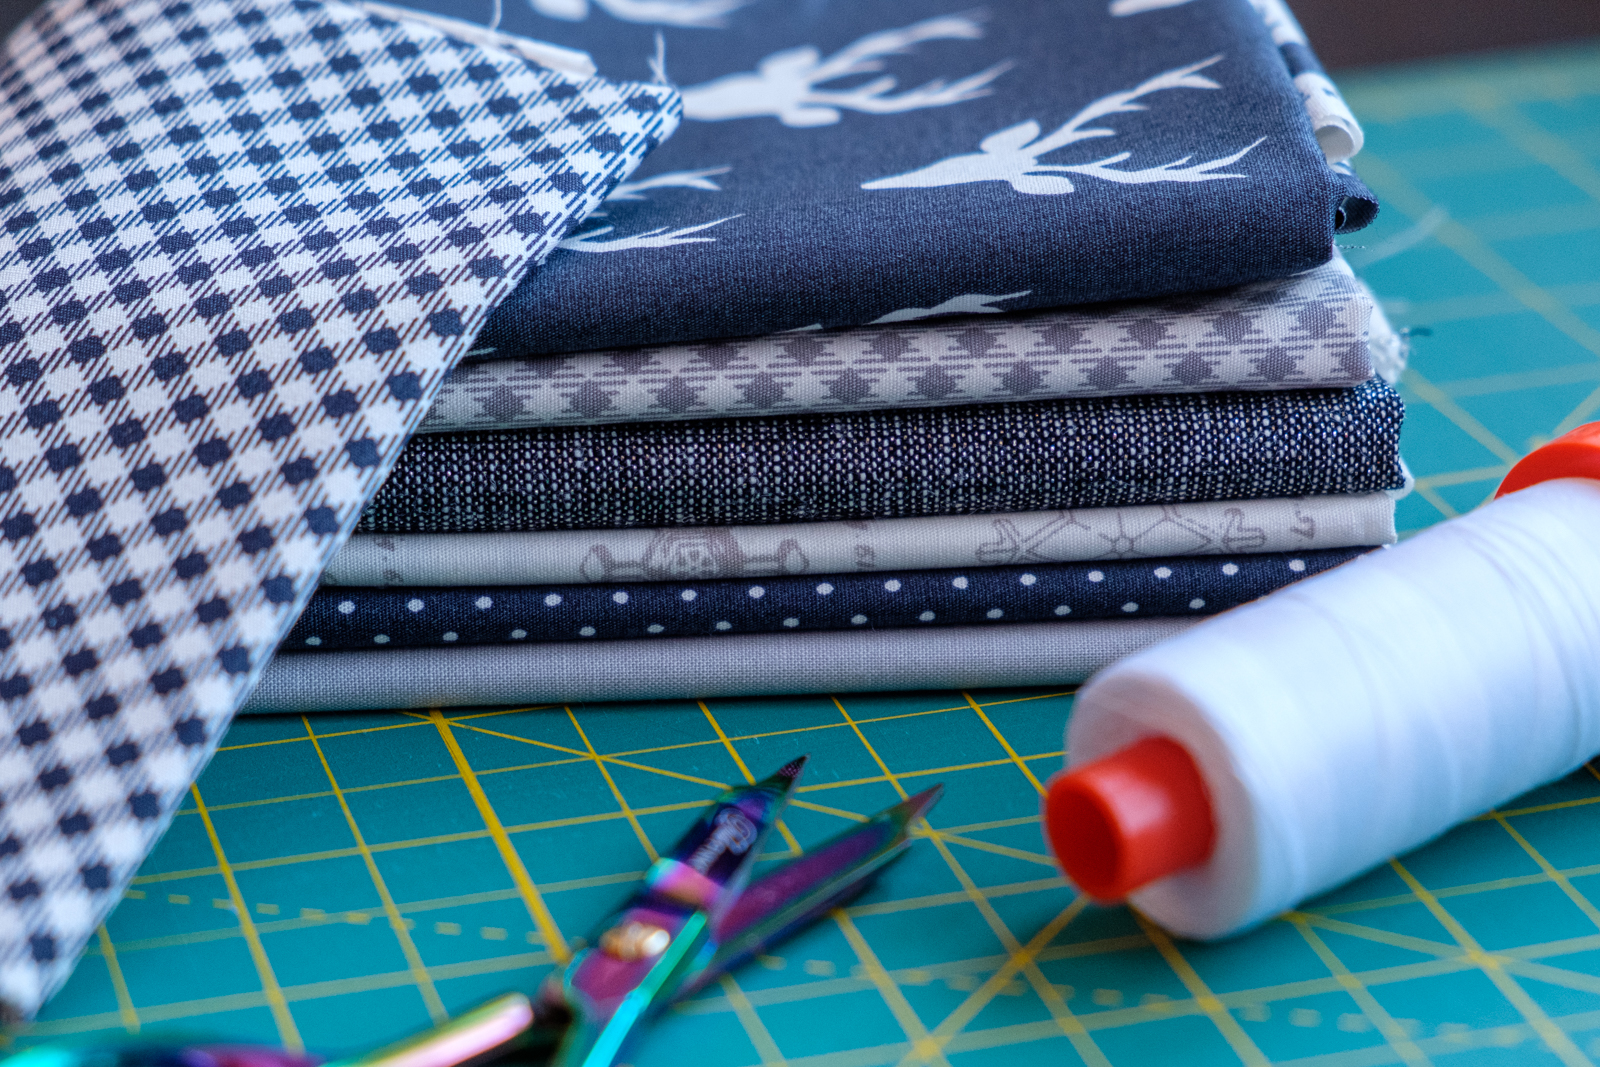
The set is composed by Barbara of Das Mach Ich Nachts (check out her shop, she has lots of beautiful fabrics and sets). You can find the pattern for Jasper in her shop as well (in German only).
Putting the Parts together
Table runner Jasper is made out of triangles that are sewn together. You cut the triangles according to the instructions in the pattern and join them in two rows. The rows are then sewn together and that’s basically it. I think I’ve spent at least an hour arranging the triangles in such a way that all fabrics were distributed nicely. The deer heads and the snowflakes are the only directional fabrics in the set. There is no top or bottom for the other four fabrics. With the deer heads, I made sure that they are not upside down.
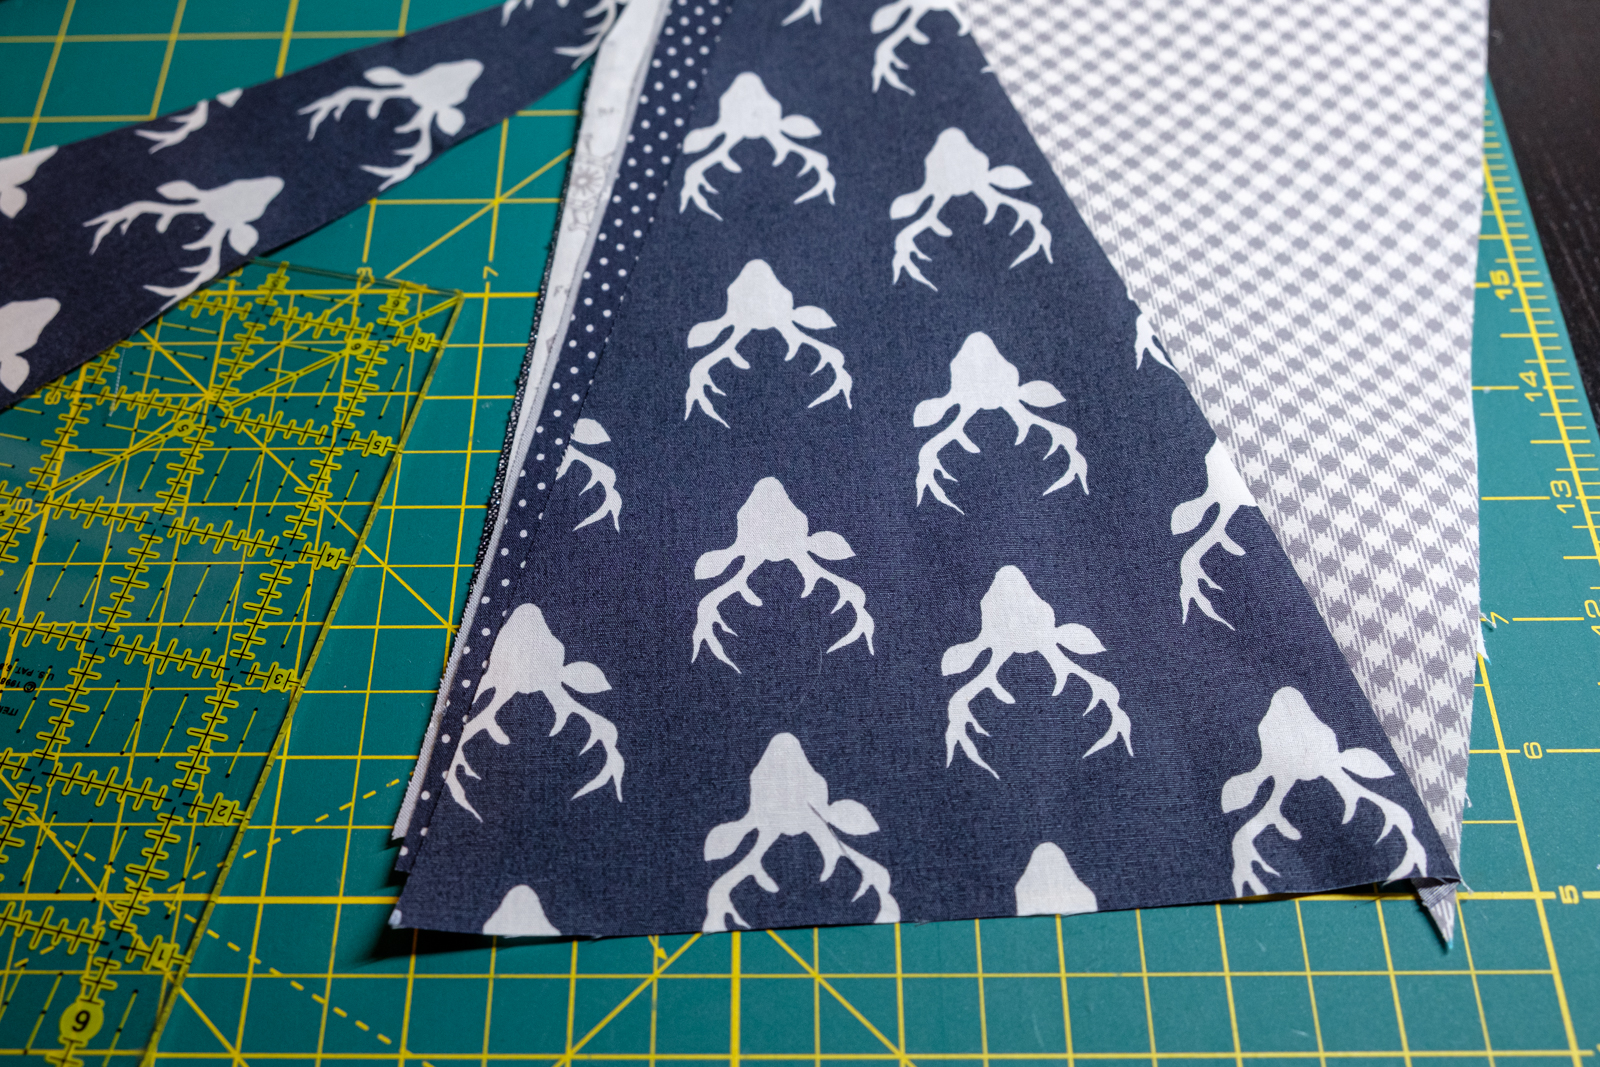
Piecing the top is not very complicated but it is a way of practising my precision sewing skills! After all, there are a lot of points and tips that have to match later on!
The Quilting
This table runner is the first ‘proper’ mini quilt that I have made. It’s the first project where I pieced the top and then created a sandwich with batting and backing. I made placemats before, but that was a single piece of fabric sewn on interfacing. The table runner is a little practice for a large quilt that I’m making.
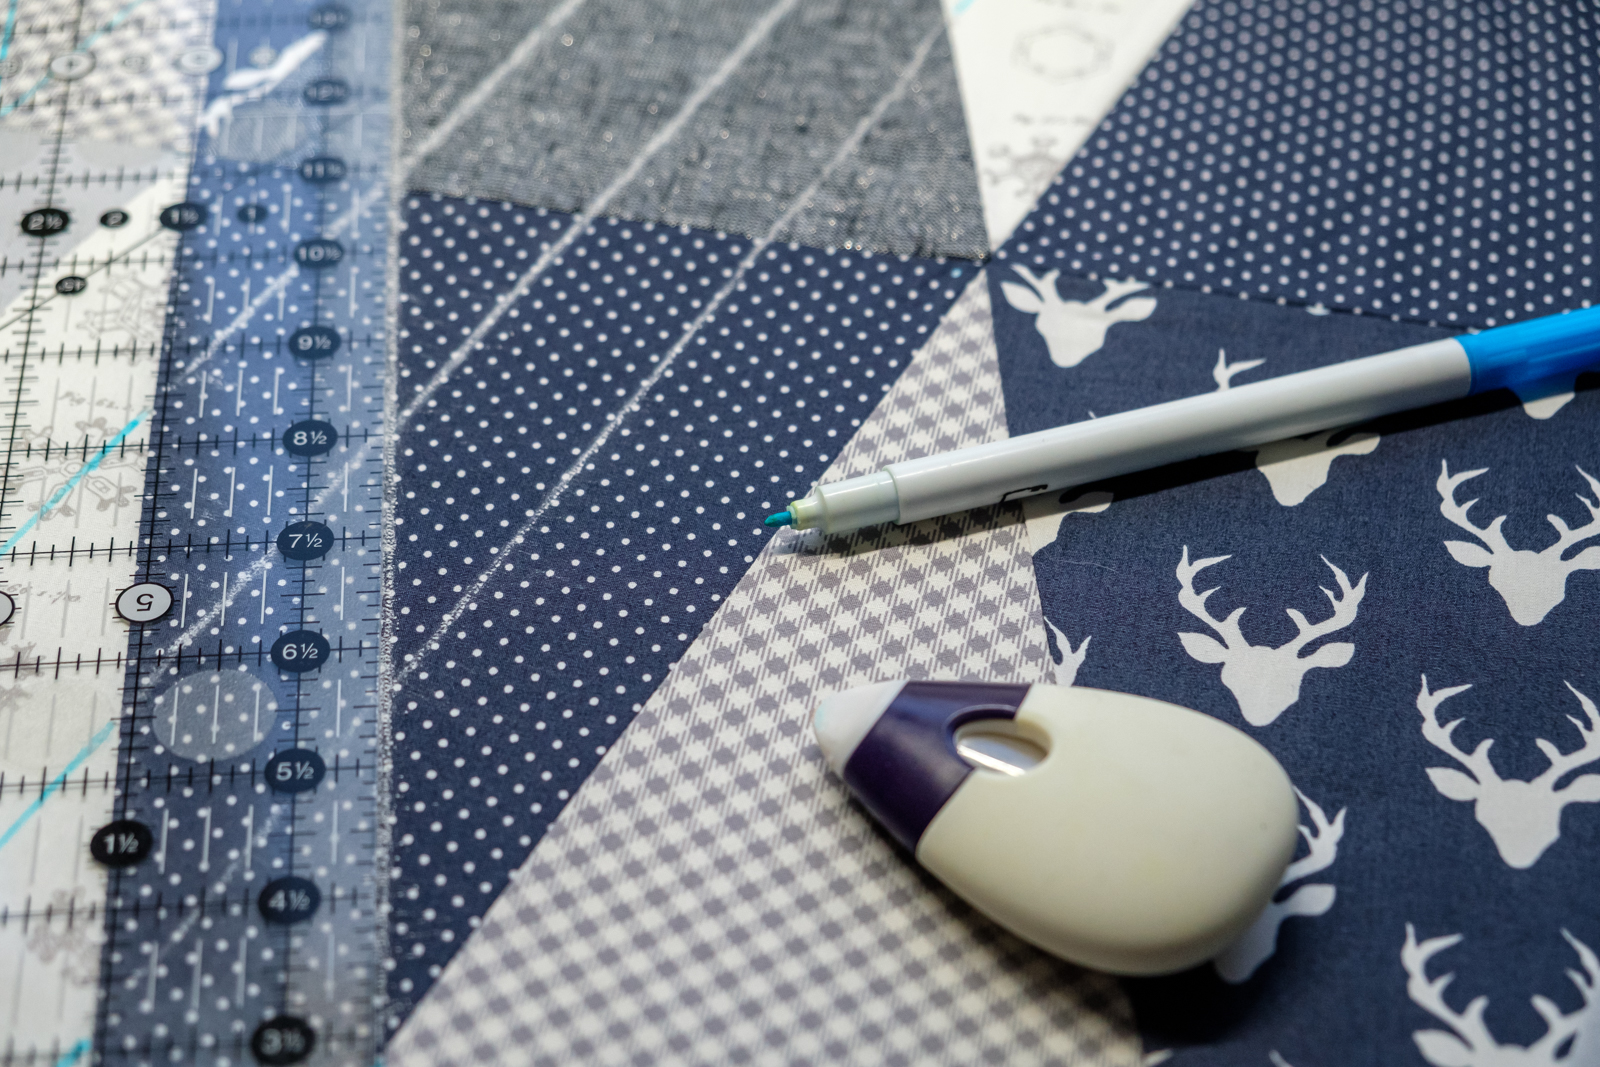
For the quilting, I chose a simple straight-lines design and I used the edges of the triangles as a guide. I marked all of my lines and I can tell you from experience that chalk is not the preferred tool for that, haha! Unfortunately, my white marking pen let me down and the blue one didn’t really show on the darker fabrics…

The quilting wasn’t as smooth as I hoped… there was some puckering now and then and I undid some lines. I adapted my strategy a little and then everything worked out fine.

It looks really professional with the gloves, don’t you think? I was sceptical at first, but the gloves make moving the fabric a lot easier on my shoulders and neck. You don’t have to apply much pressure, because the gloves have non-slip fingertips. I like them a lot!
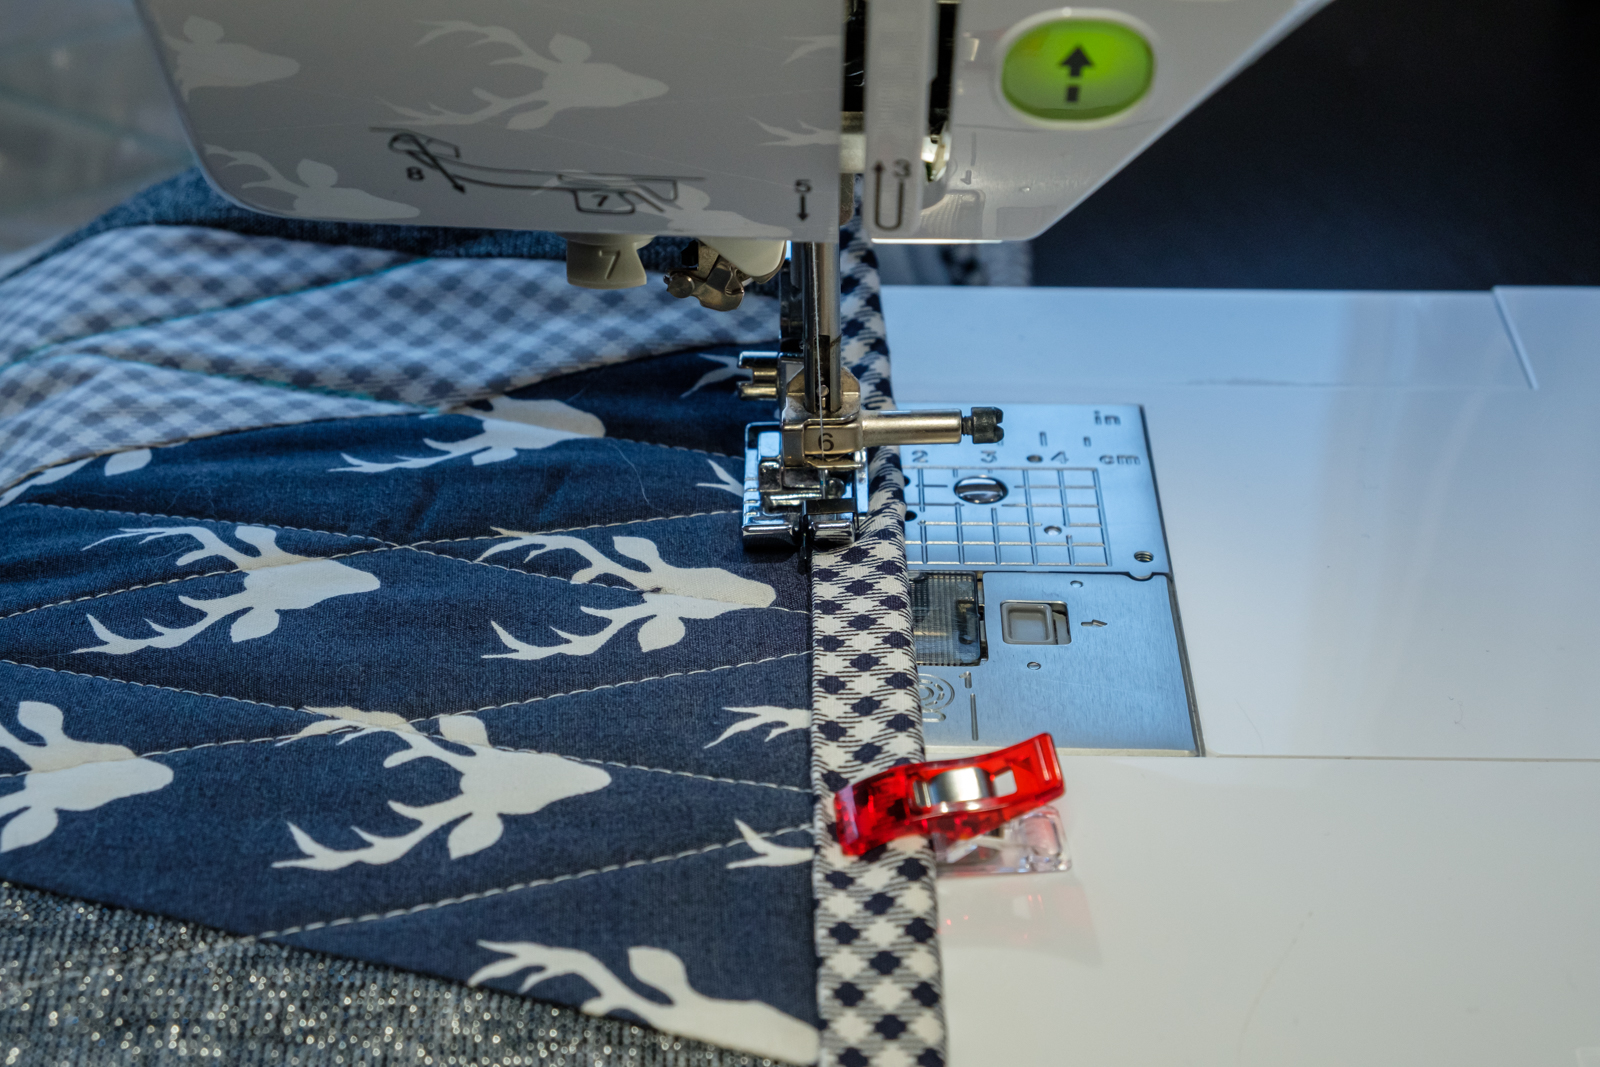
The Binding
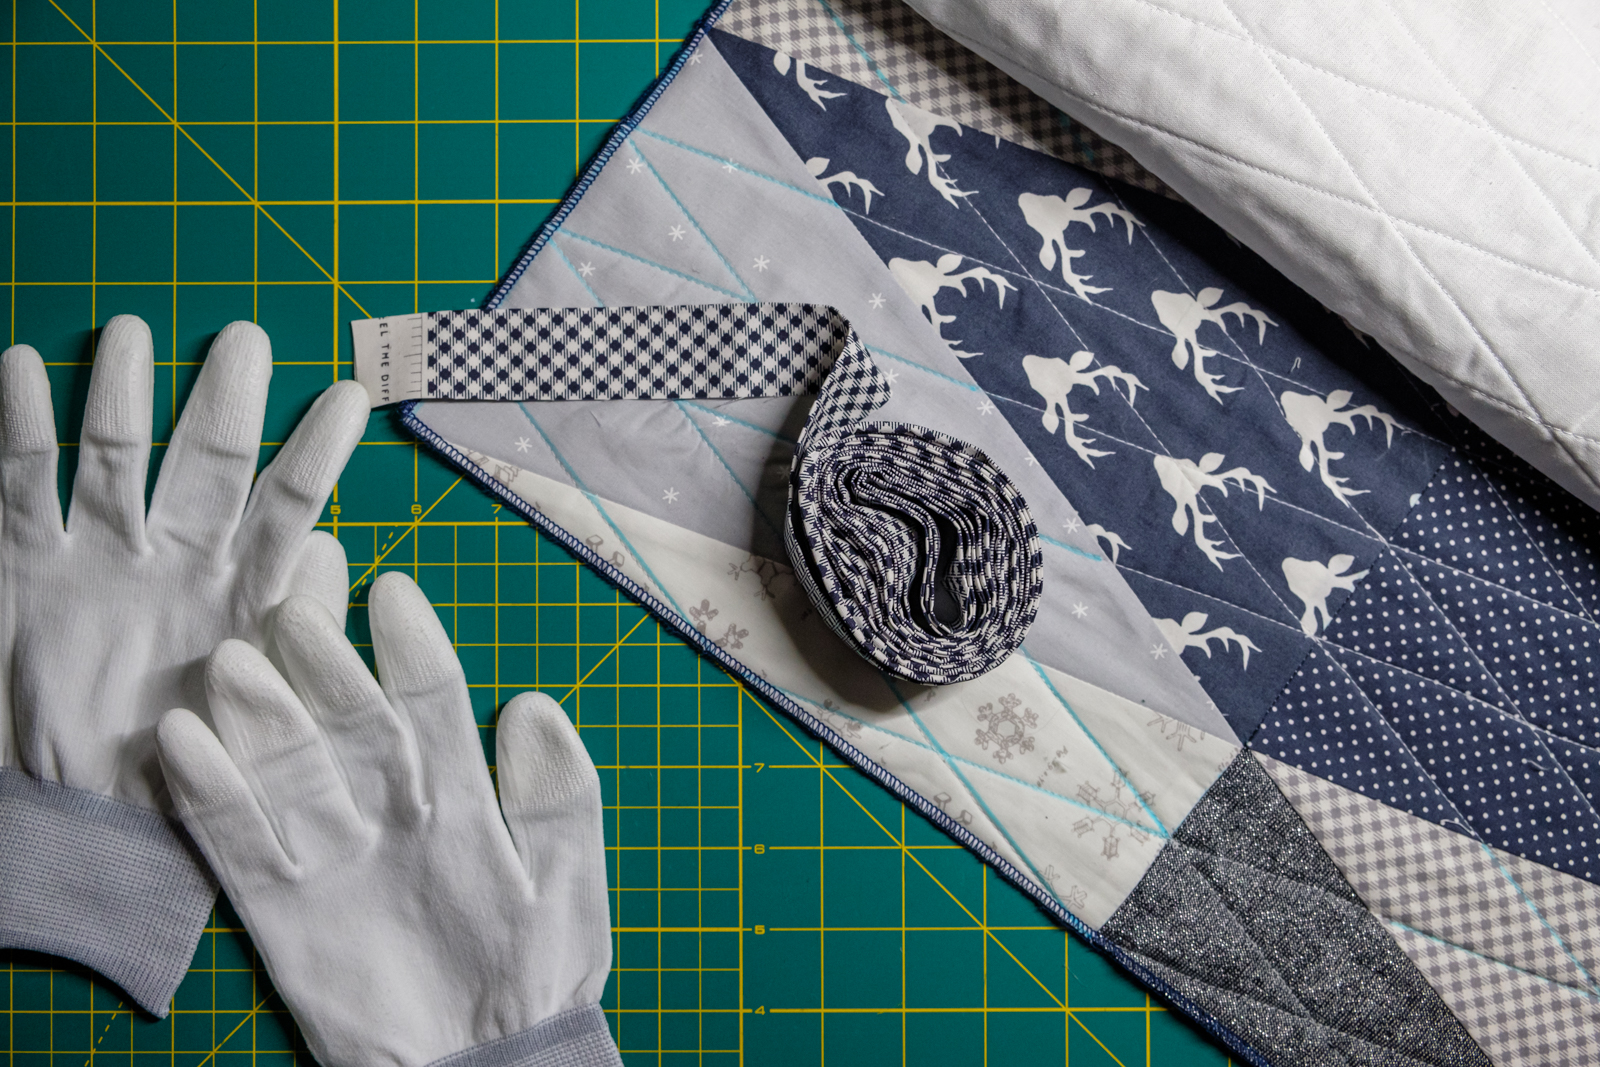
And the last step in the process is applying the binding. There are several ways to apply a binding and for sure, the most beautiful way is to do the last step of stitching by hand. I’m not very good at hand sewing and I fear that projects will remain unfinished in a corner somewhere if I would decide to attach the binding by hand! So, I chose to use my sewing machine to attach the binding. There’s a method where you attach the binding to the back of the project first and then sew it down (with the machine) on the front of the quilt. That’s what I did here. I don’t mind the visible seam!
Ta-dah!
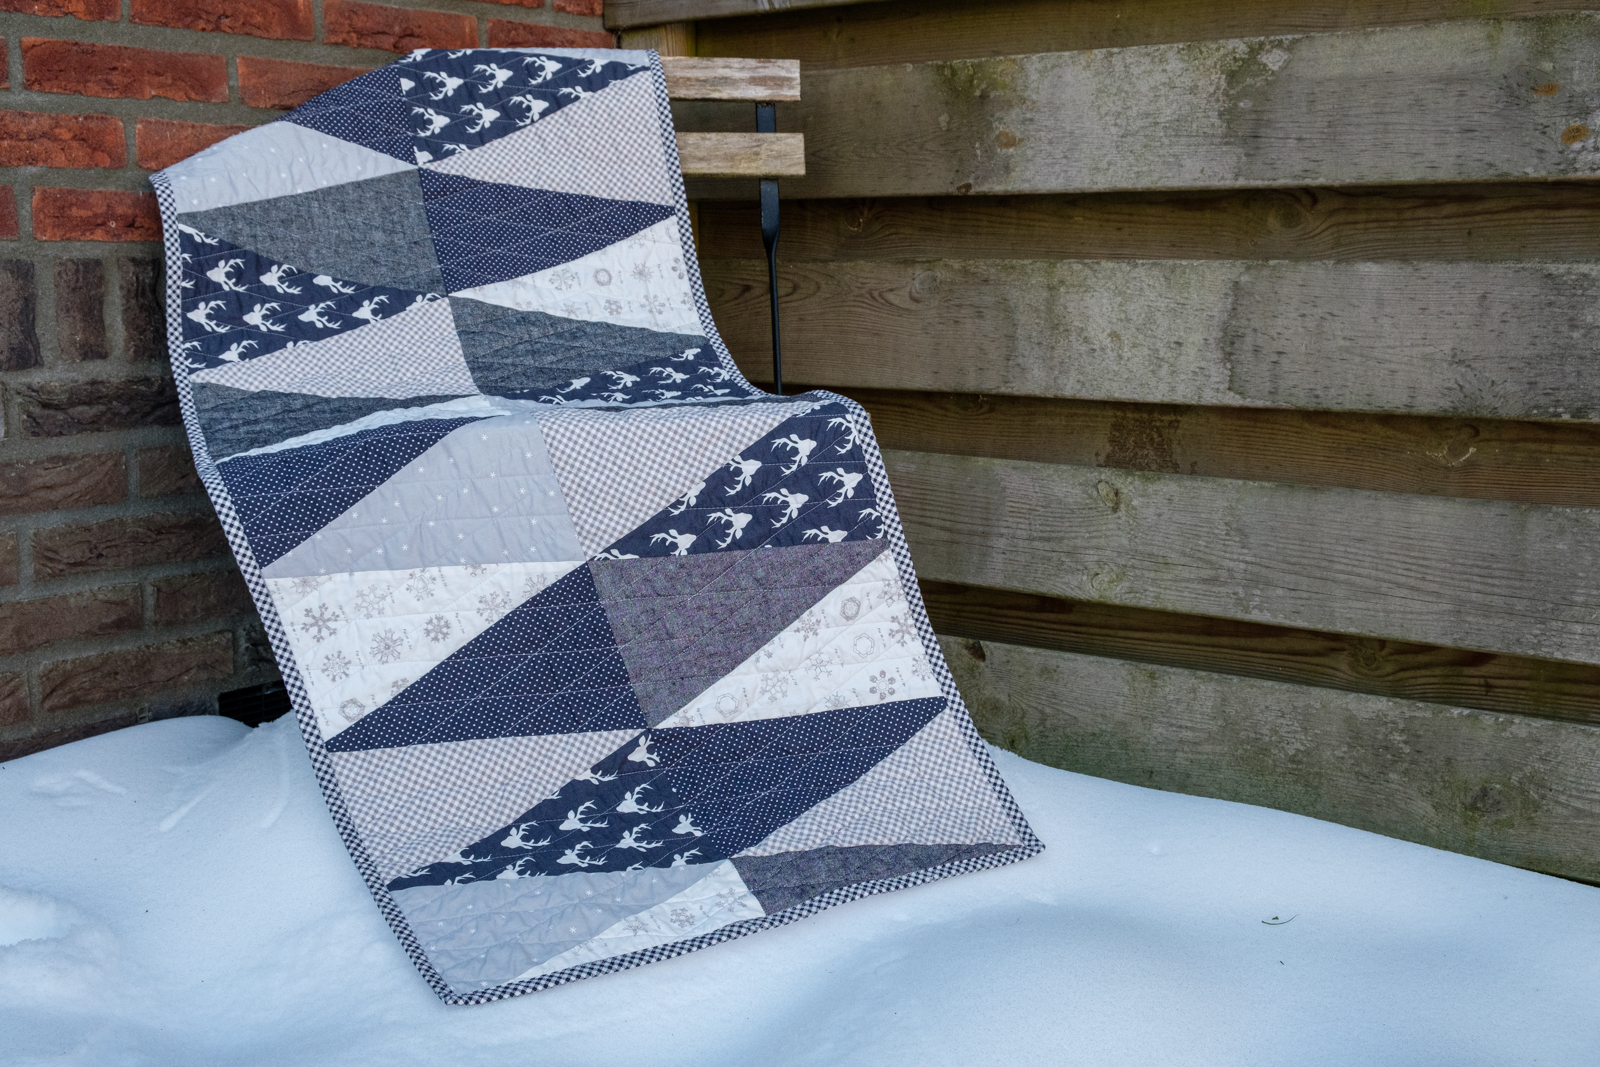
And here it is! I managed to finish this little project just in time before the snow started to melt again… The table runner is still on our dining table though! Maybe I should slowly start to plan a Spring version? Who knows! There are still a lot of other things on my want-to-make-that list. So, in the meantime, I cherish this winter sewing project a little longer!


No Comments