

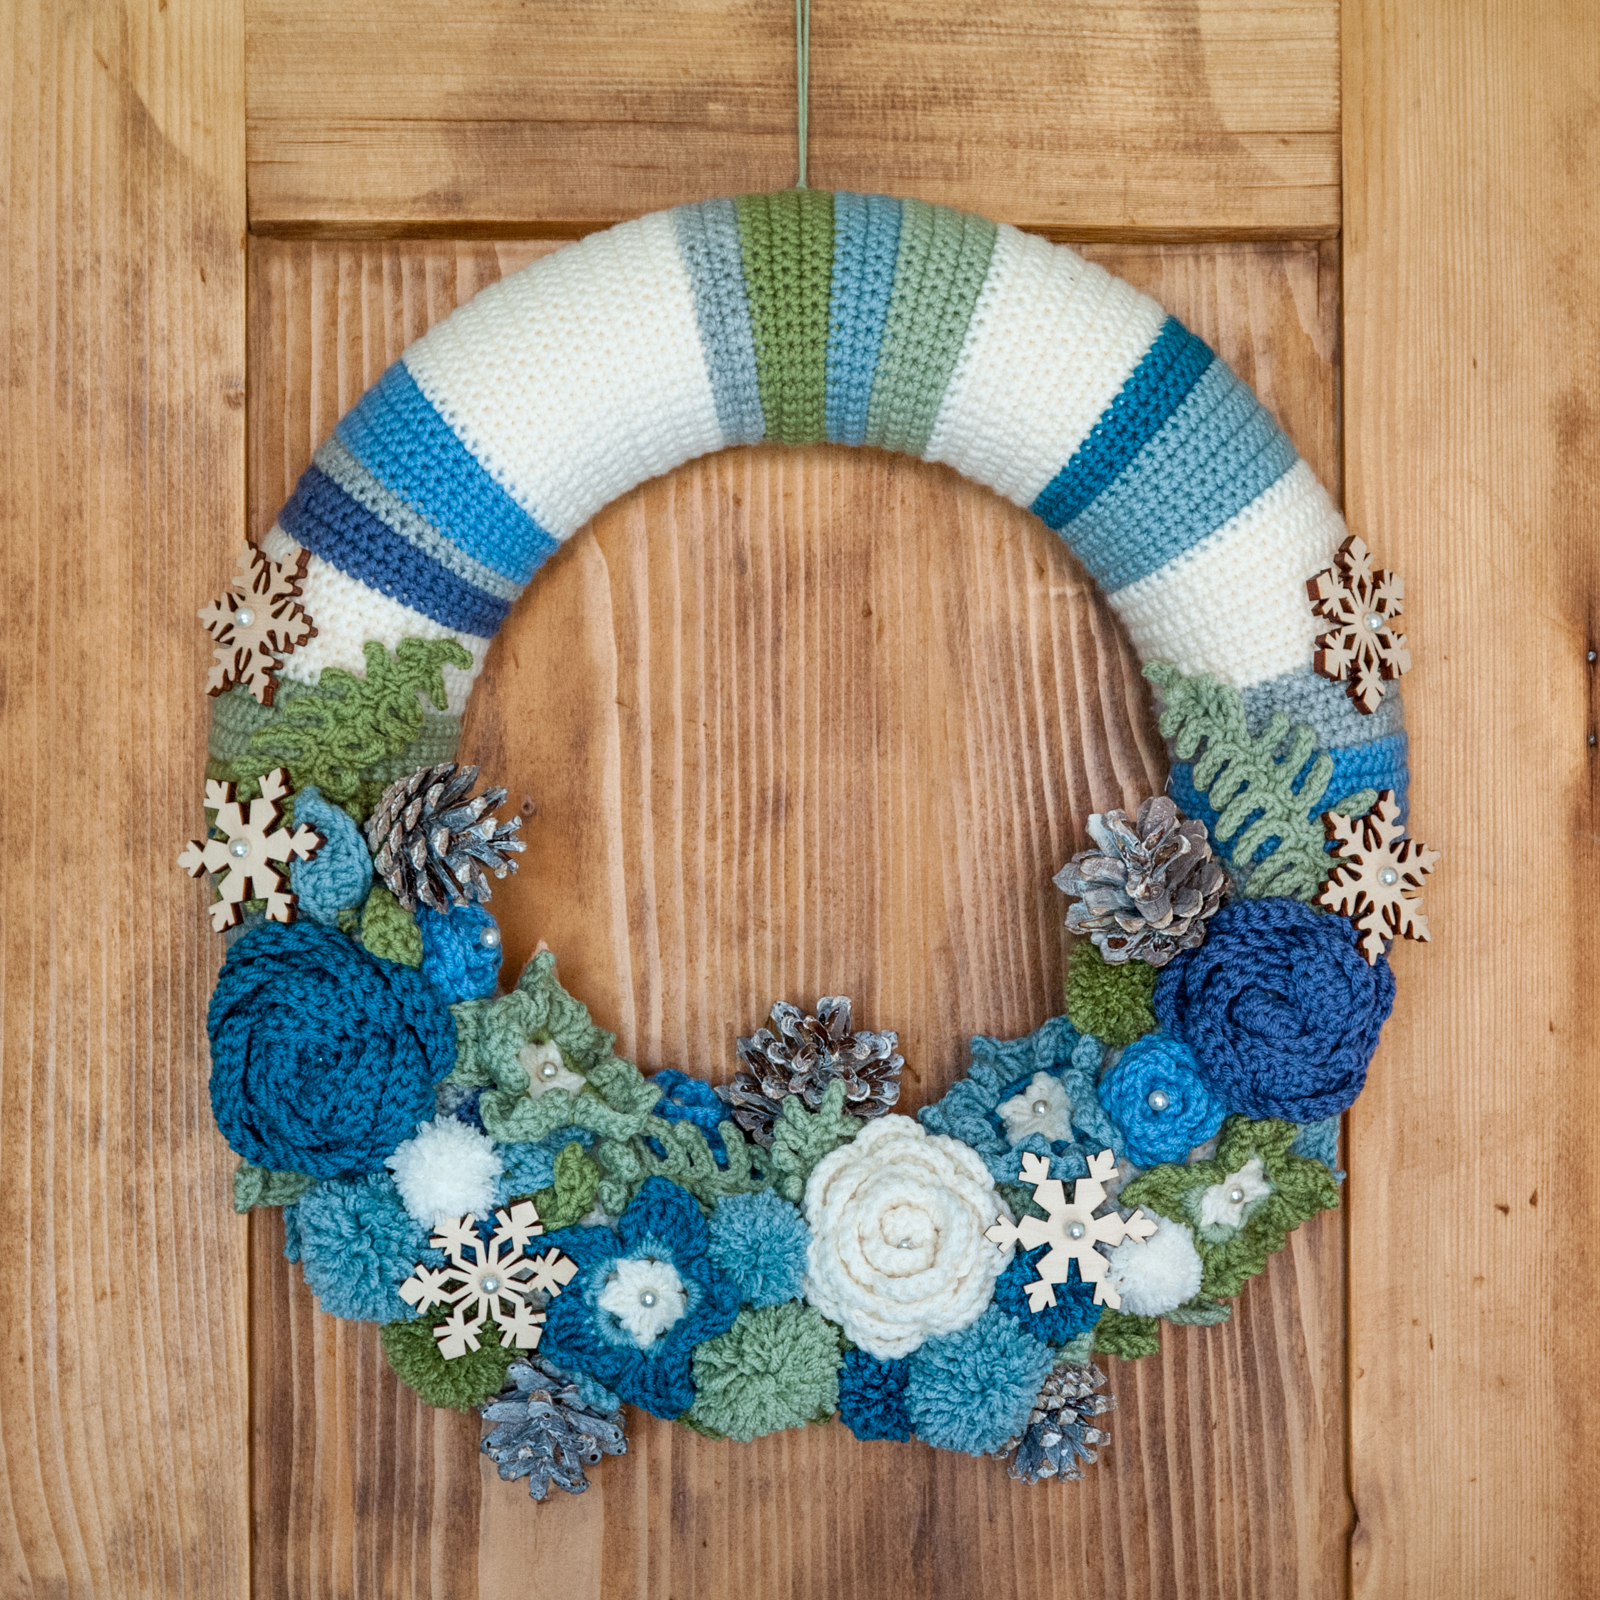
In my previous blog post, I mentioned having loads of photos of older projects on my computer from the time before this blog existed. And I gave you a preview of the first one that I would be sharing with you. Well, here it is… it’s the Winter wreath that I made back in 2015 (yes… that long ago). Each year when the Christmas stuff is returned to the attic, I pull out this one to cheer things up during the Winter months. I love the fresh colours!
Now, I had seen people make crochet wreaths and making one myself was on my list for a while. However, the amount of work making all the small, decorative pieces frightened me a little bit… If you follow Lucy of Attic24, then you know that she makes gorgeous crochet wreaths. She adds a lot of details and she is so fast! She has made one for each season and they are all beautiful.
I remember seeing this photo popping up in my Instagram feed (in December 2014) when she started a Winter wreath:
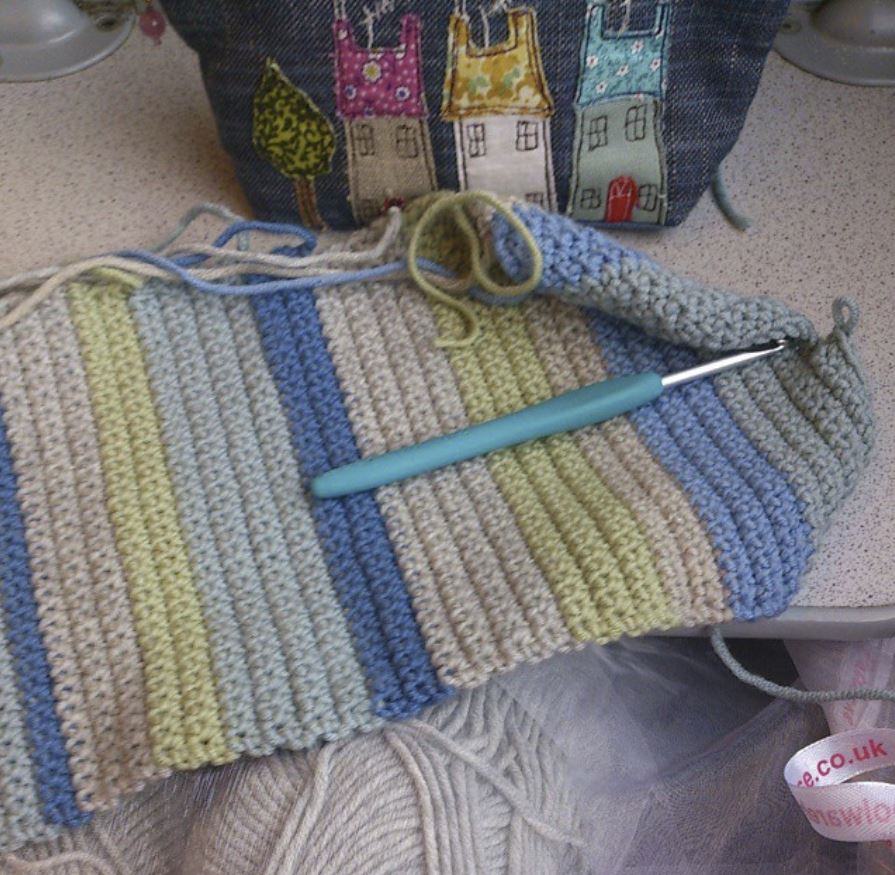
Foto credit: Lucy of Attic24
That was it! I immediately fell in love with the colours and I decided to make one too. Lucy kind enough told me what yarn she was using when I asked her. I went online to have a look at the colours that I would like to use for my own Winter wreath.
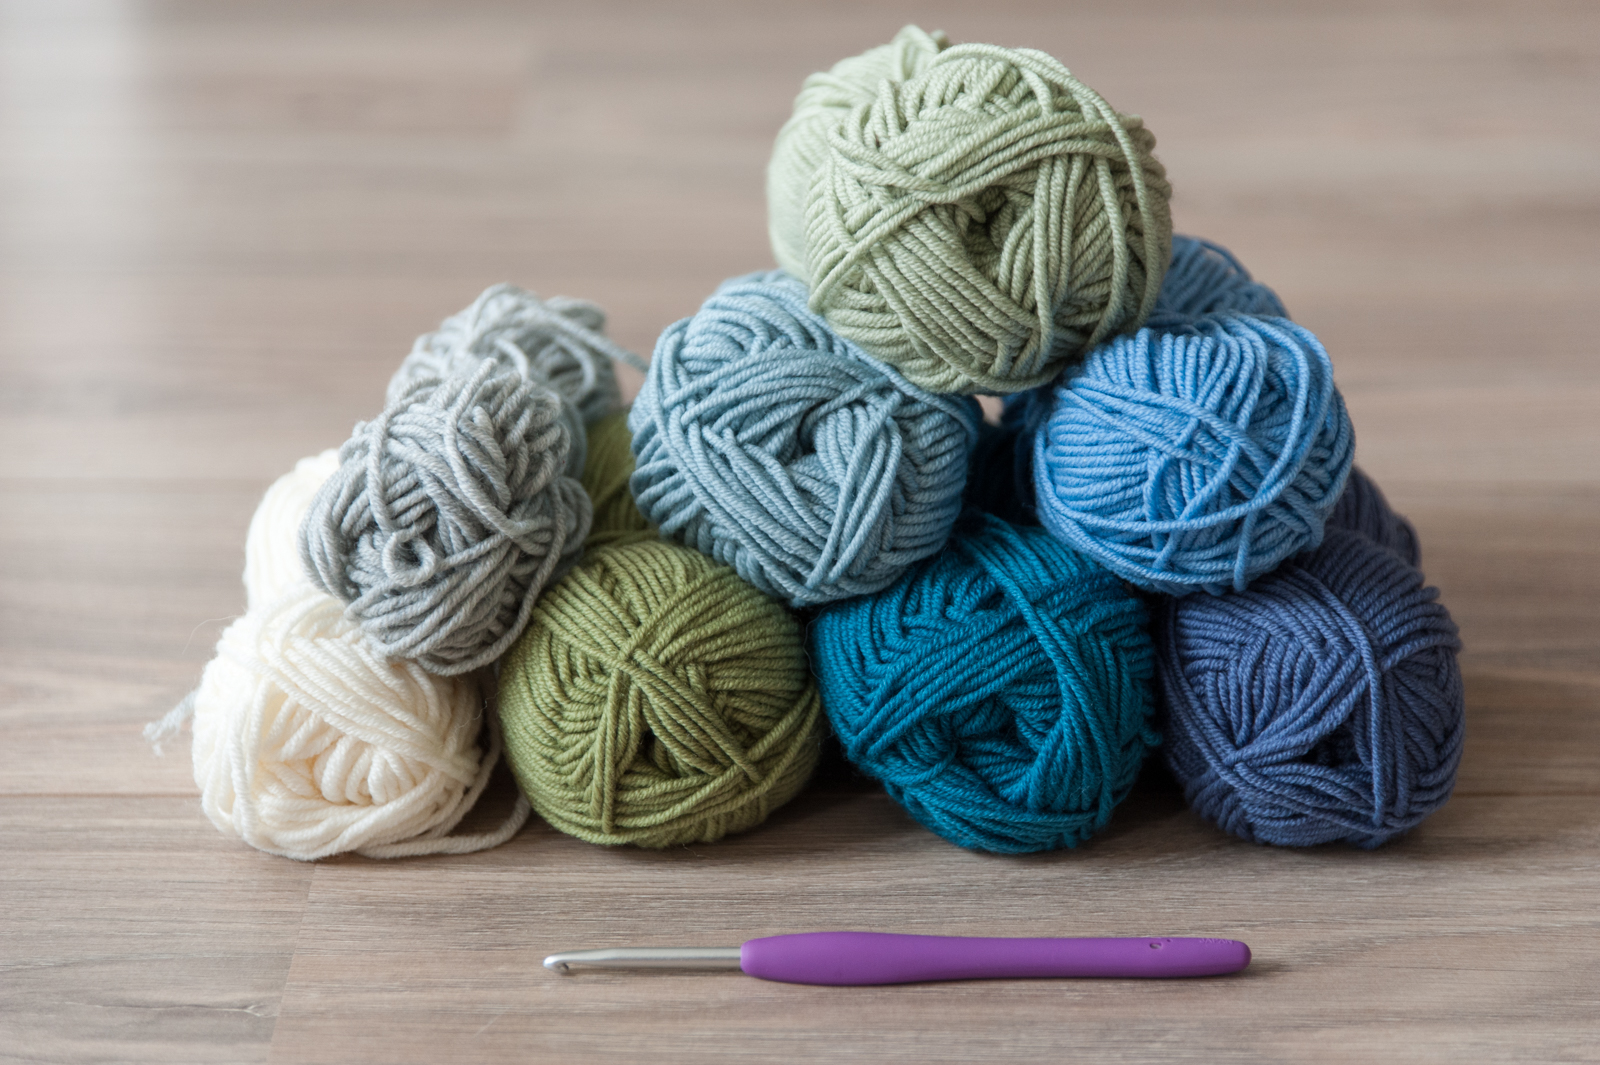
The colour selection process is probably my favourite part of starting a new project. Starting from scratch, everything is open. I have to admit that having all options open sometimes makes it more difficult too because there is so much to choose from. I decided on the eight colours shown in the photo. True Winter hues…

All colours are Drops Merino Extra Fine which is a 100% wool. Each ball has 50g and approx. 105m of yarn and that makes it a DK/Worsted weight. From left to right the colours are: 18 (green), 26 (pistachio), 15 (light greyish green), 28 (north sea), 13 (denim blue), 19 (light grey-blue), 05 (light grey), 01 (off-white).
Through her blog, Lucy shared her inspiration and progress. I used her method for making the base of the wreath, the piece of crochet fabric that covers the polystyrene ring. You can find her finished wreath here.

The polystyrene ring that I used has a flat back and measures a diameter of 35cm. I found it on sale at a craft store but you can most certainly find them at online stores too. I have used a 4,0mm crochet hook to make the cover for the wreath and I have made it 35 stitches wide. I don’t remember how many rows of single crochet (US) I made… just make sure to measure your piece every now and then around the outside of your ring.
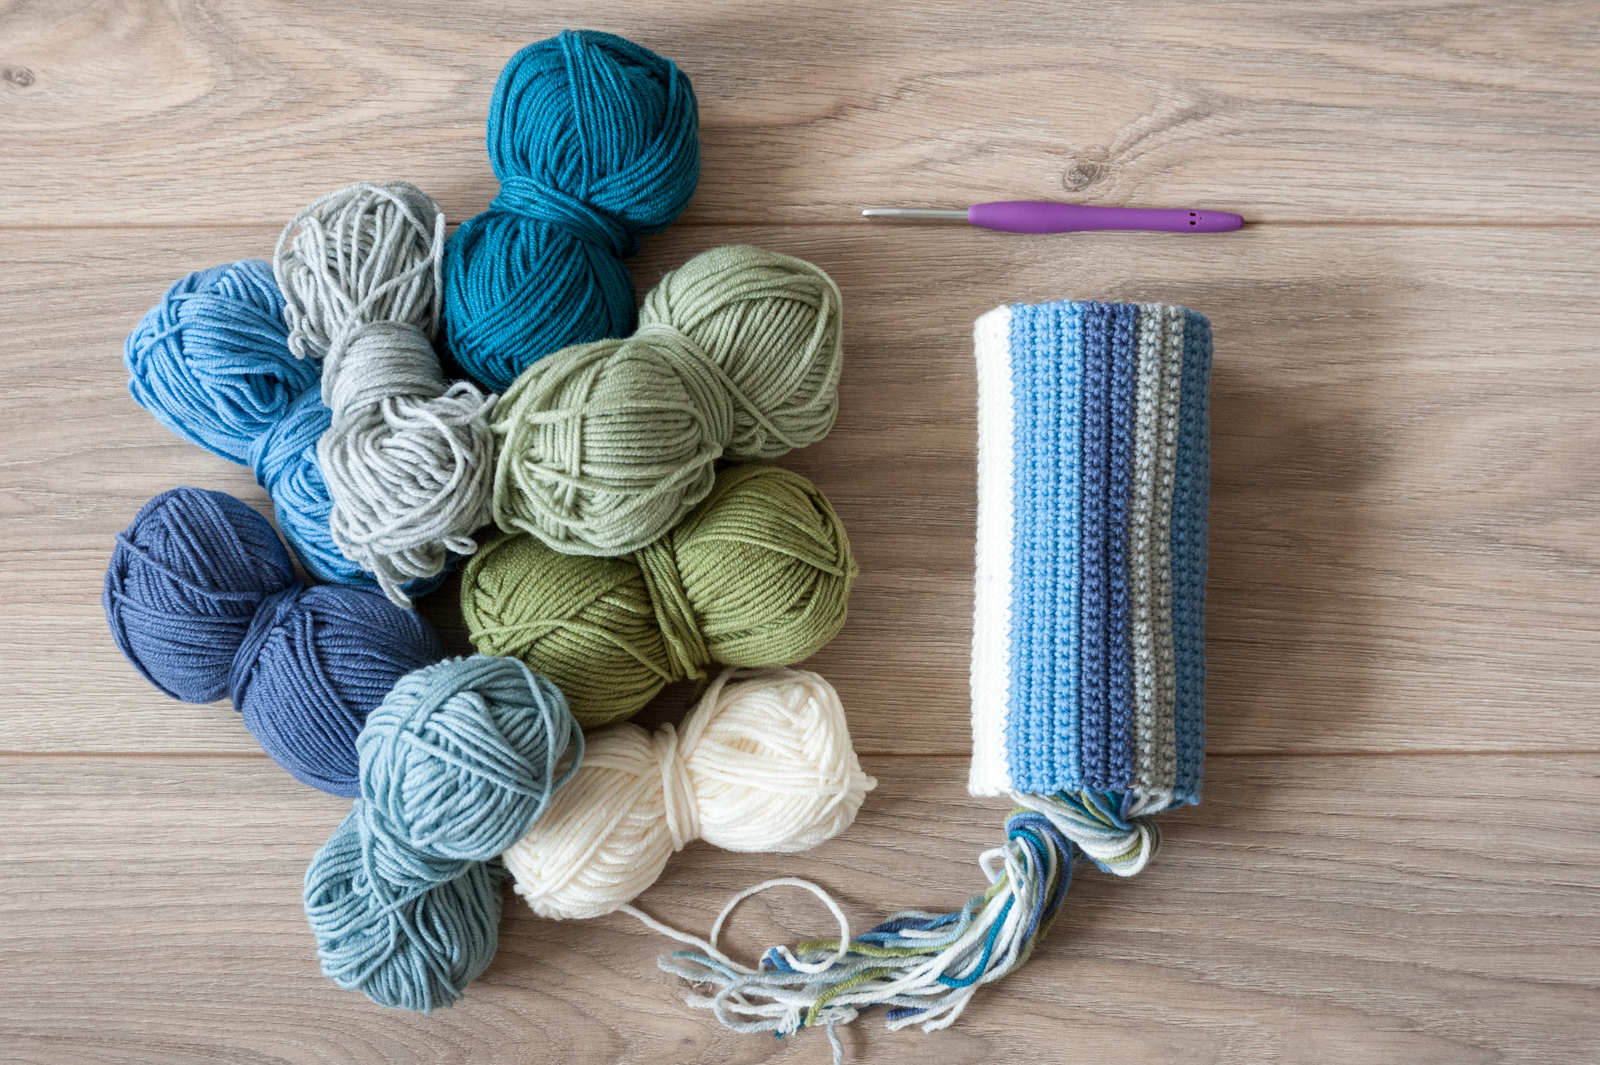

I really love these cool colours…

Make sure to leave one long tail of each colour when changing colours… you will use them later!
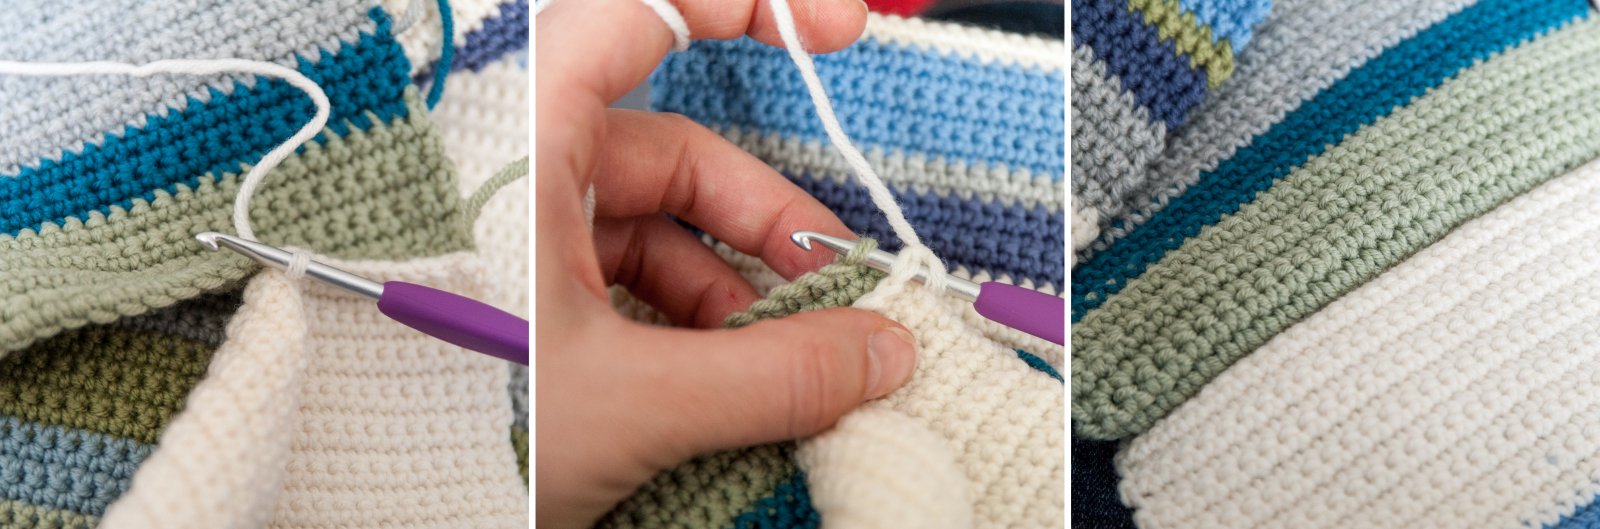
When the base is large enough to cover your ring, it is time to join the top and bottom and turn it into a loop. I found that crocheting the two together was the easiest and neatest way. To do so make sure that you do not cut your yarn after finishing the last row! Fold your piece in half by joining the top and bottom, right sides together on the inside (the wrong side is facing you). Now chain 1 and make a slip stitch by inserting your hook under both loops of the first stitch closest to you and under both loops of the first stitch on the back part. You will understand what I mean when looking at the photos above. Continue making slip stitches in all remaining stitches. Cut the yarn when finishing the last one and sew in your ends. Turn the inside out and you have a very neat join.
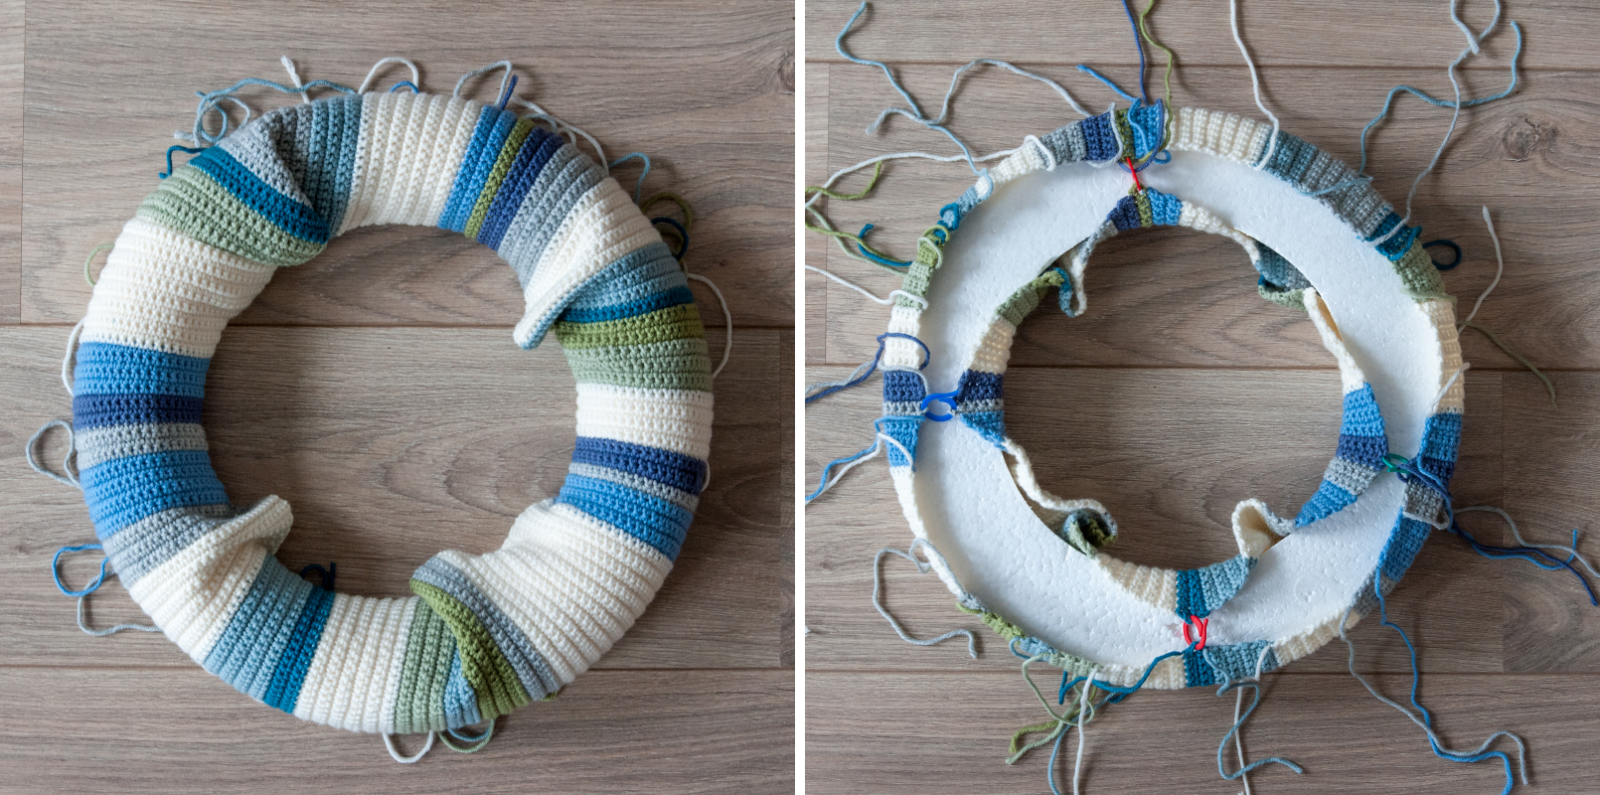
Now it’s time to put the loop around the polystyrene ring to cover it up. It looks a little bit messy at the beginning… but it will turn out fine. I have used stitch markers to keep everything in place.
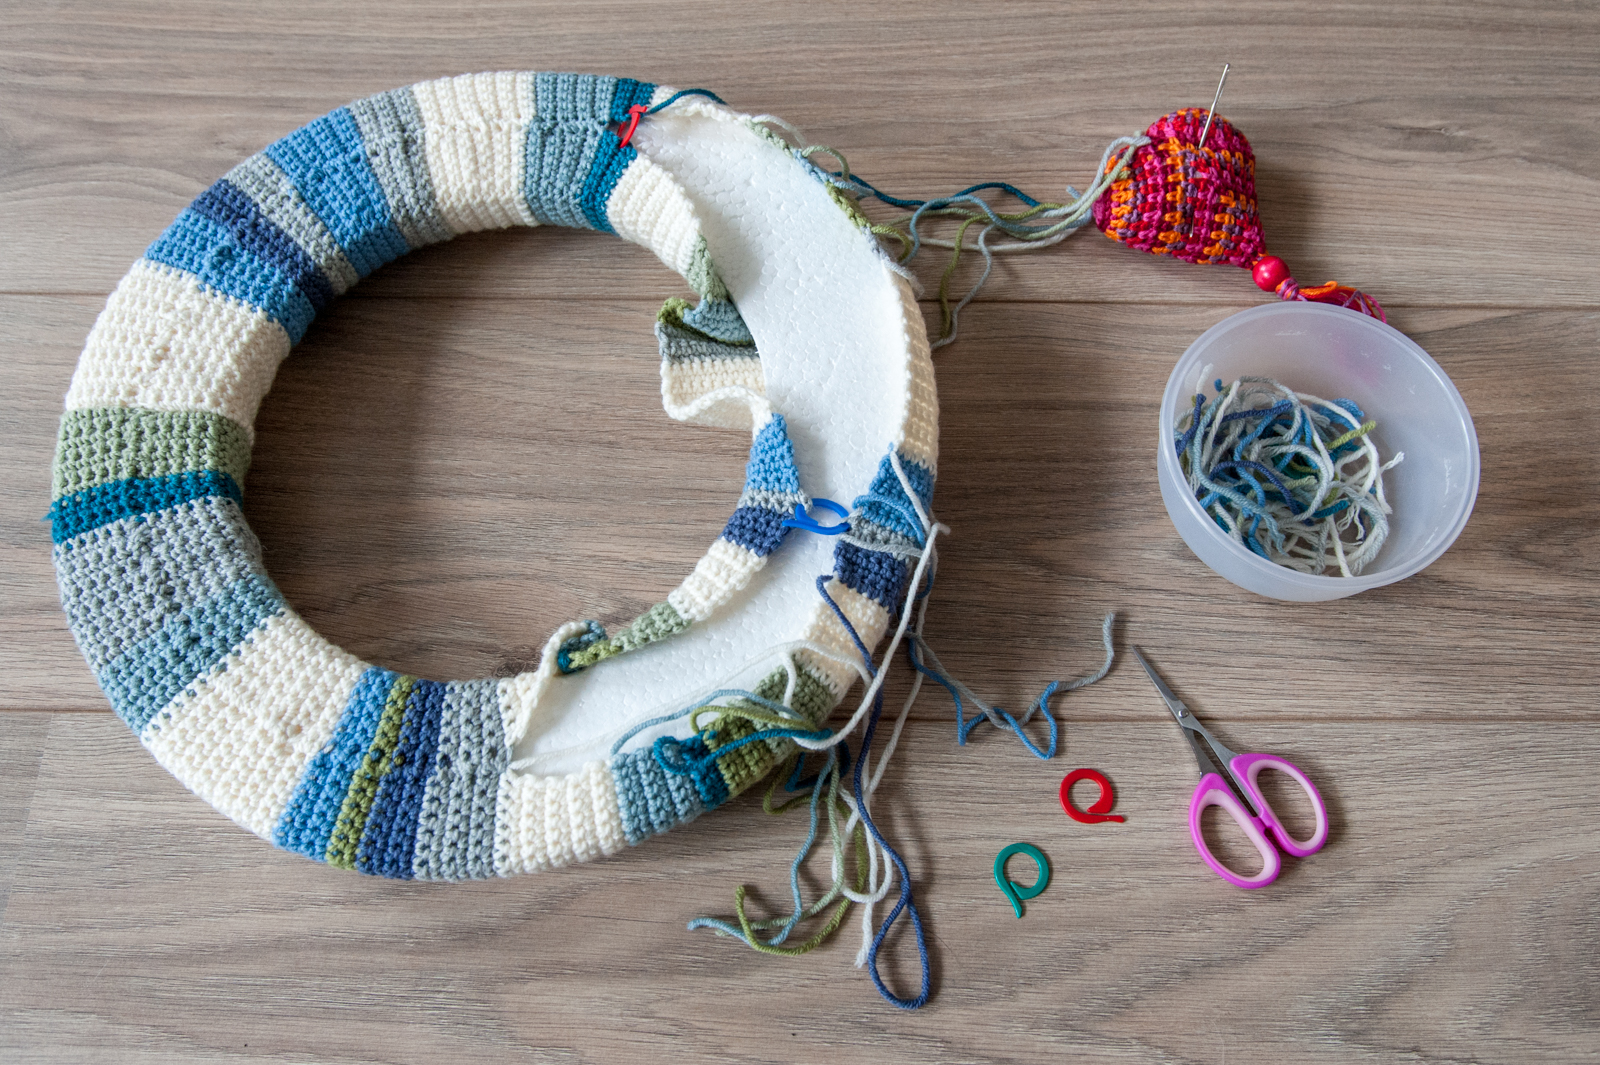
And see, this is where the long tails come into play: they are used to sew the back together, each part with its own colour. Thank you for that brilliant idea, Lucy!
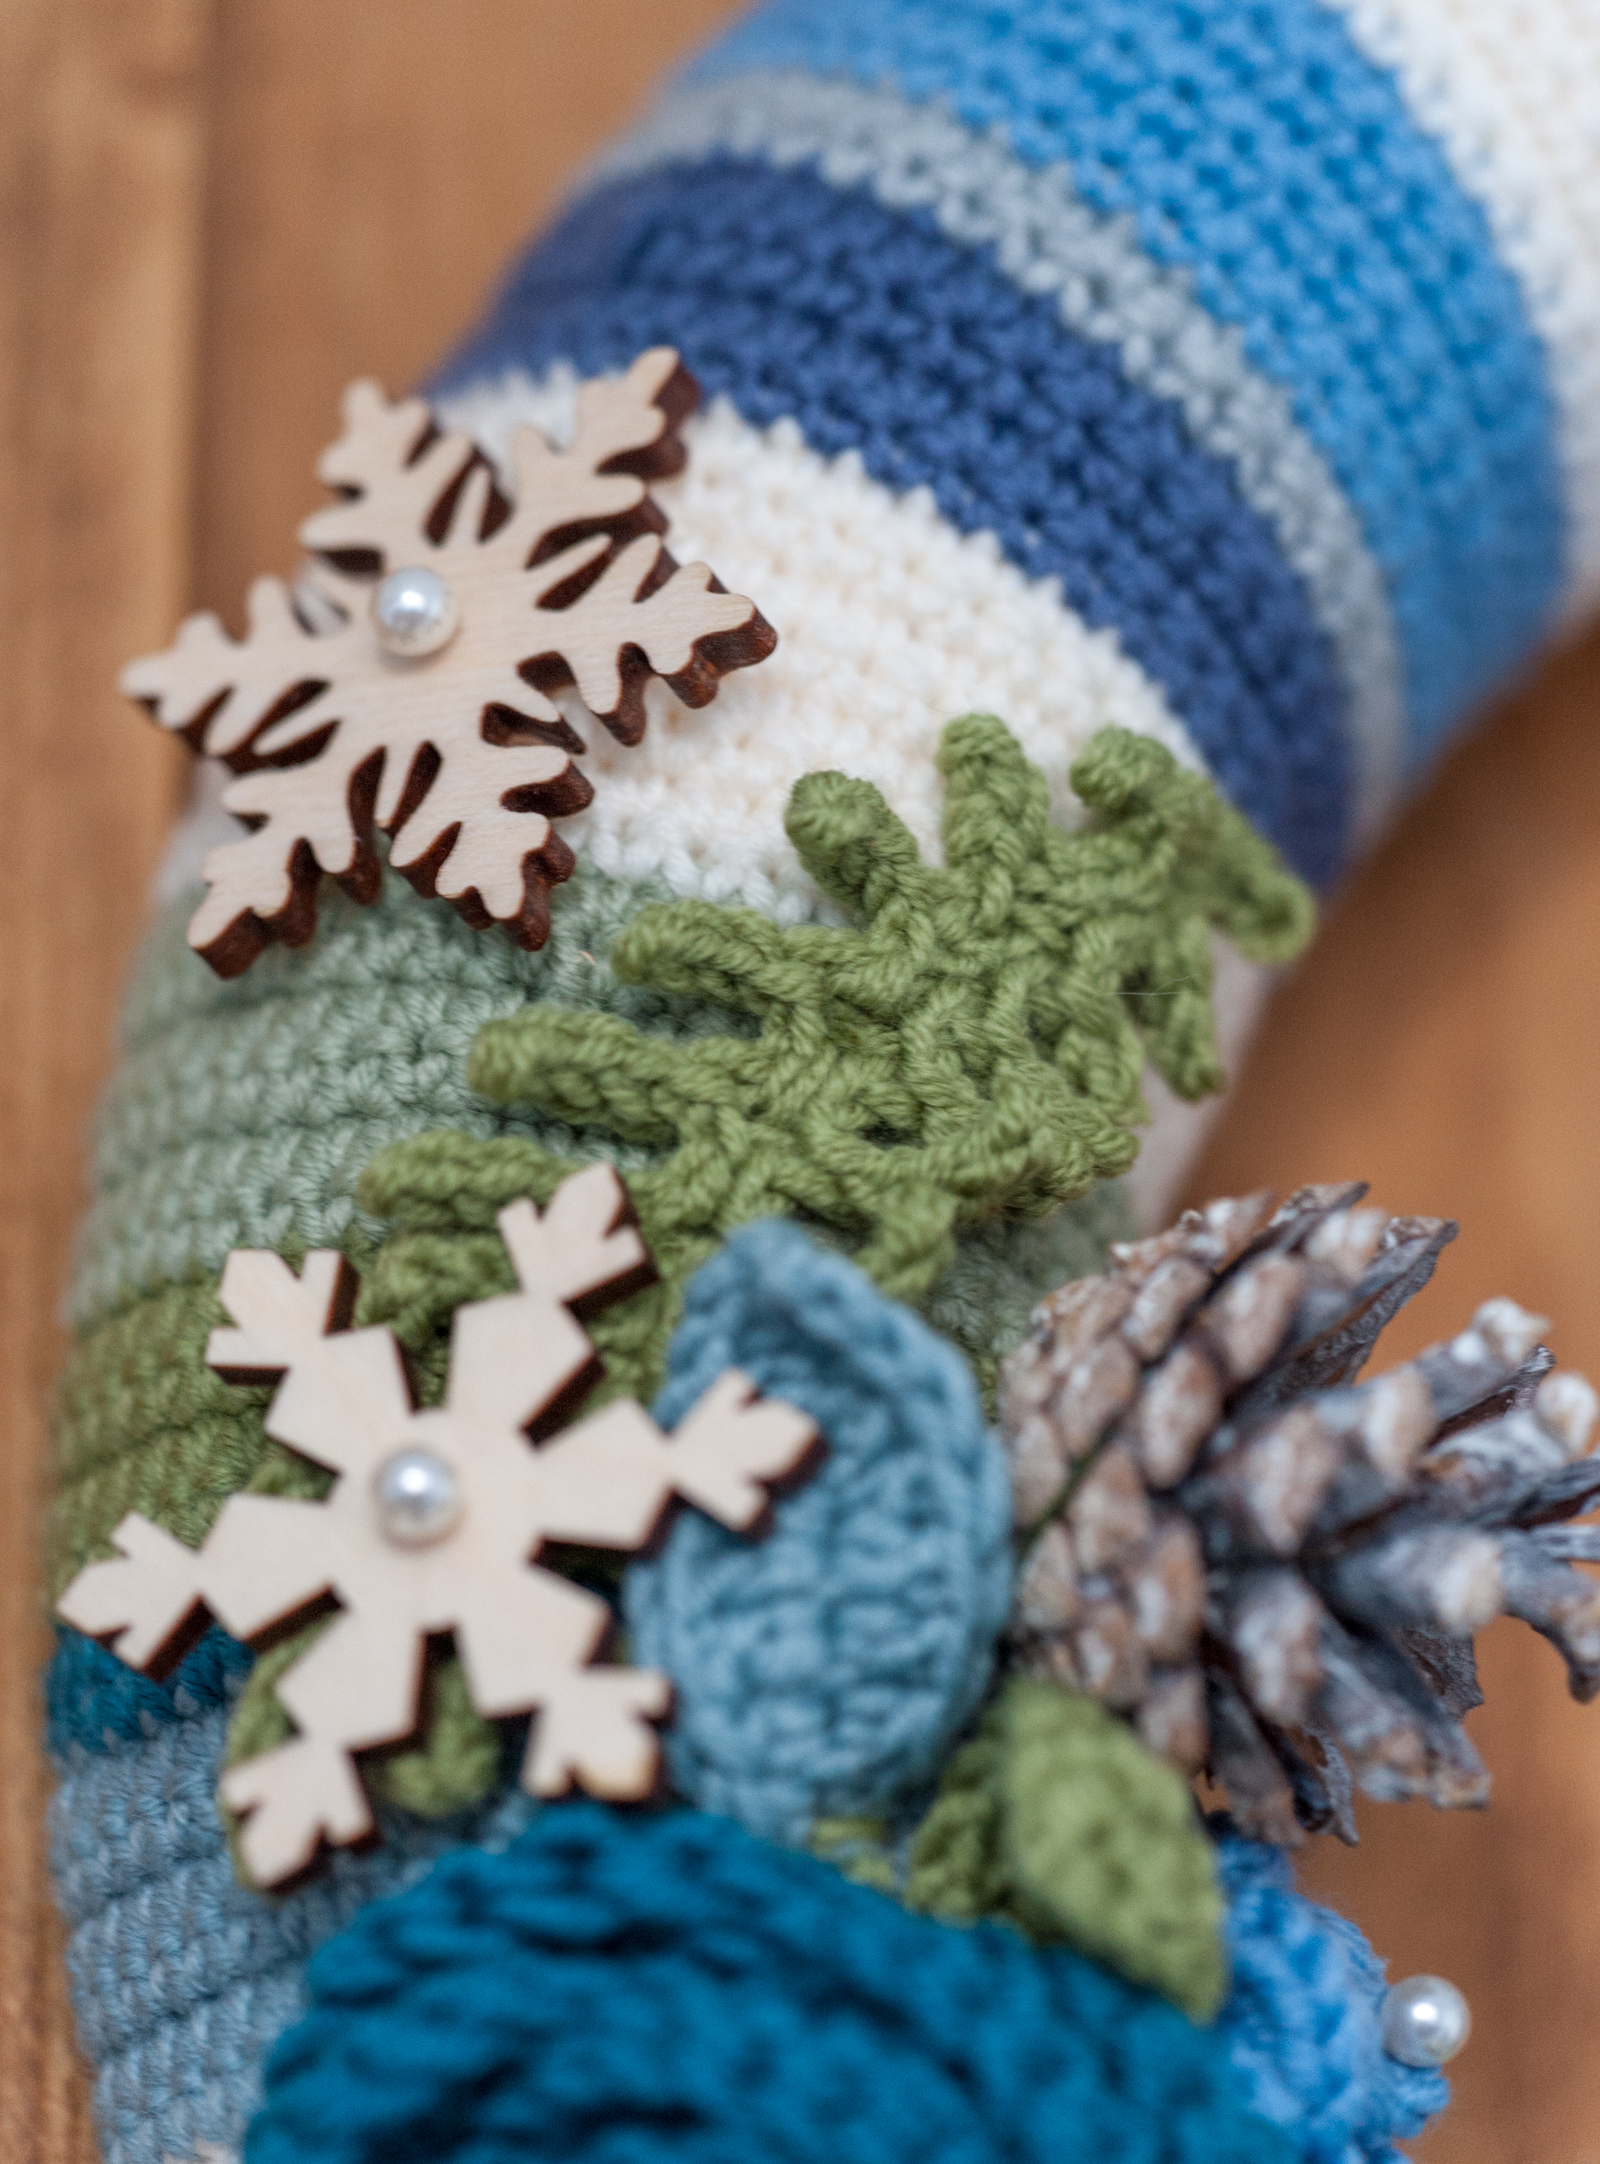
This was the easy part… now it is time to think about the embellishments: flowers, leaves, snowflakes, pine cones… All things Winter. For my wreath, I wanted to use a combination of crochet items and natural materials. On one side because I simply like that combination. On the other side because I feared to make all of those tiny crochet items. I’m not so good with small and fiddly things.
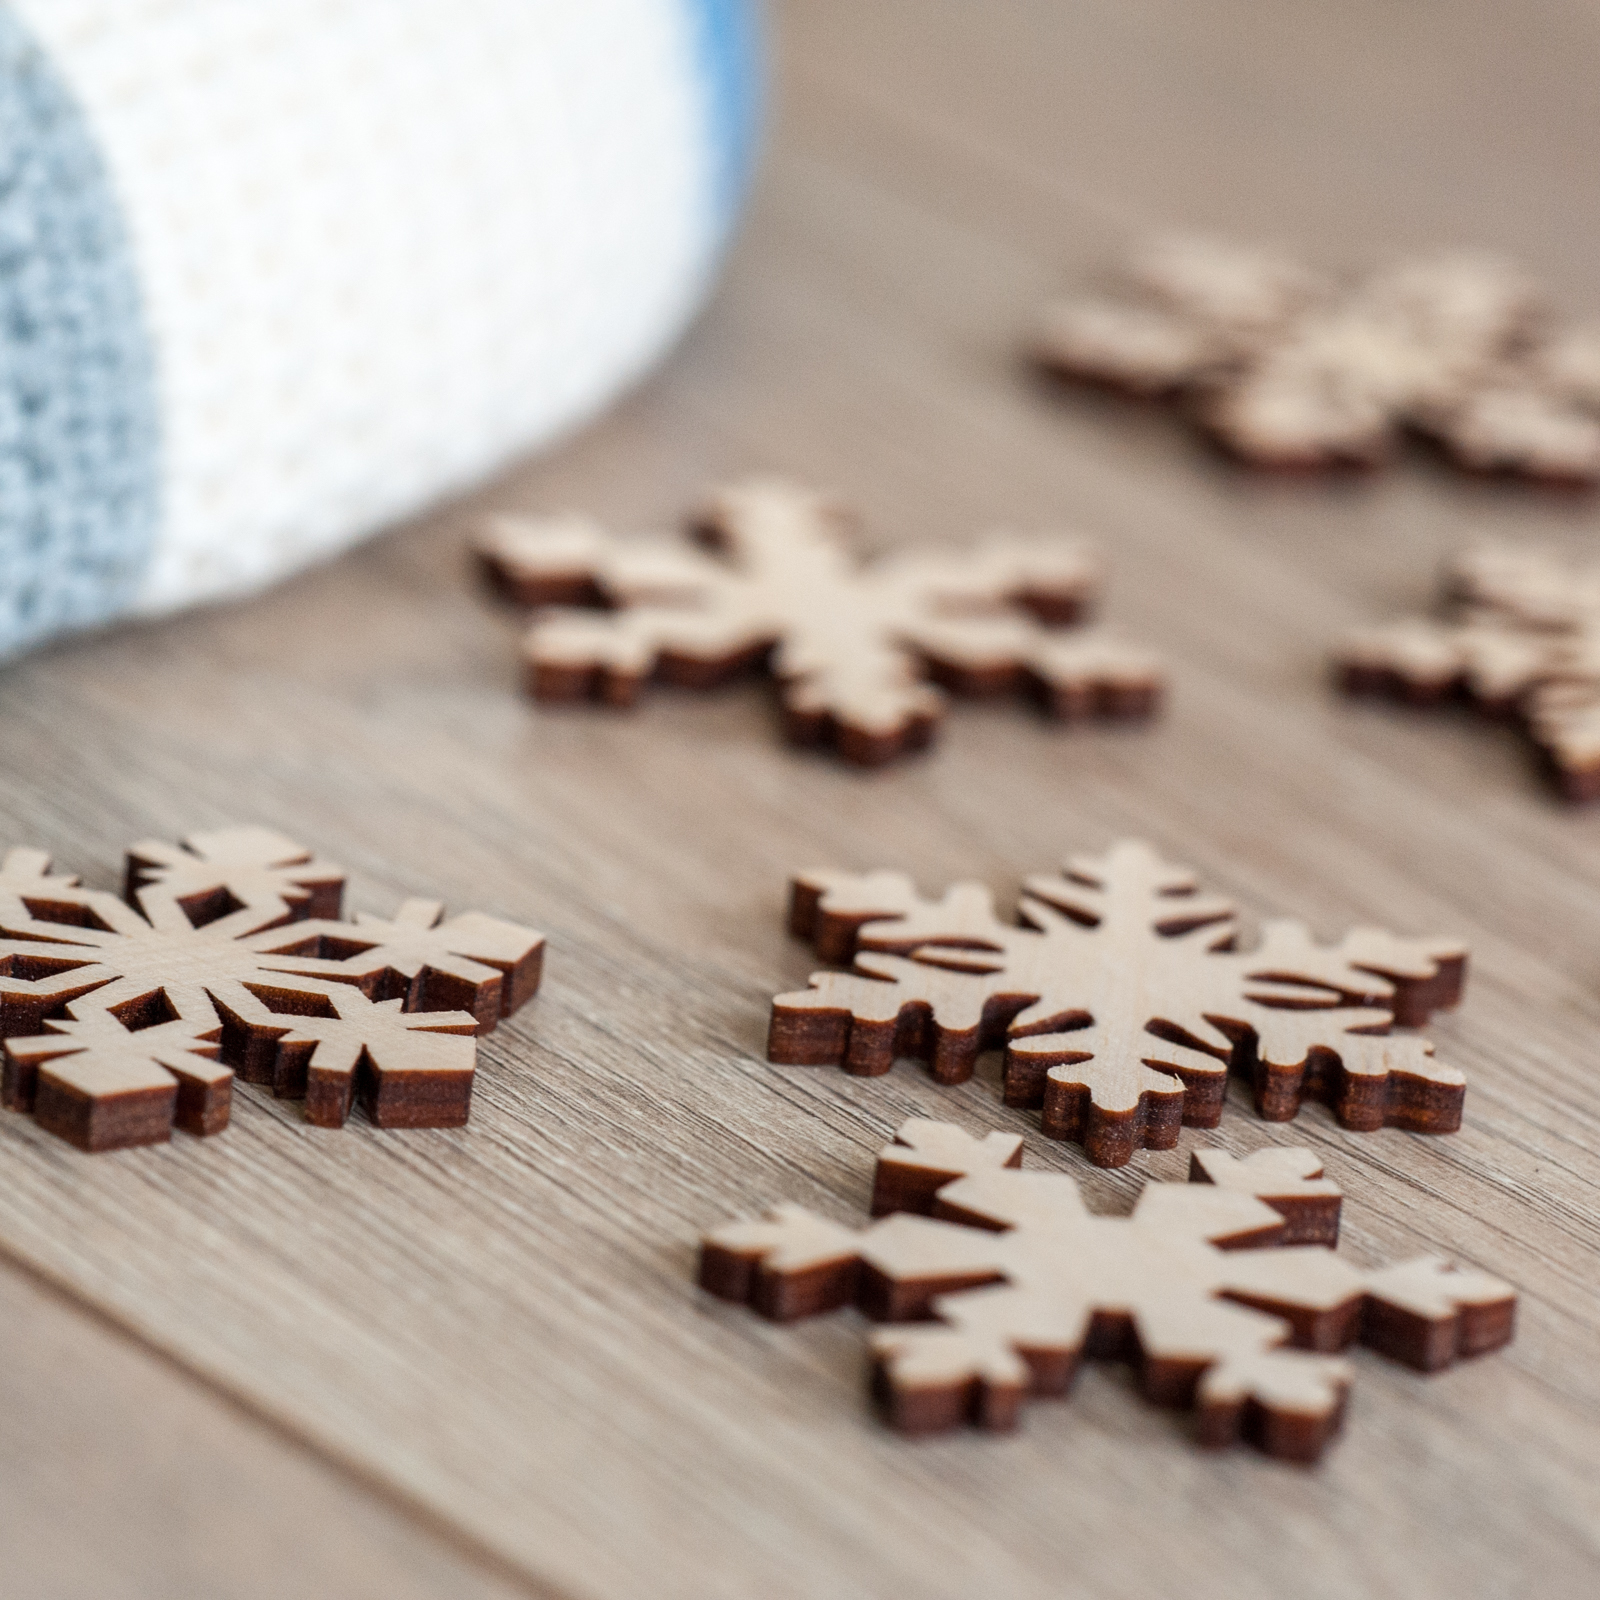
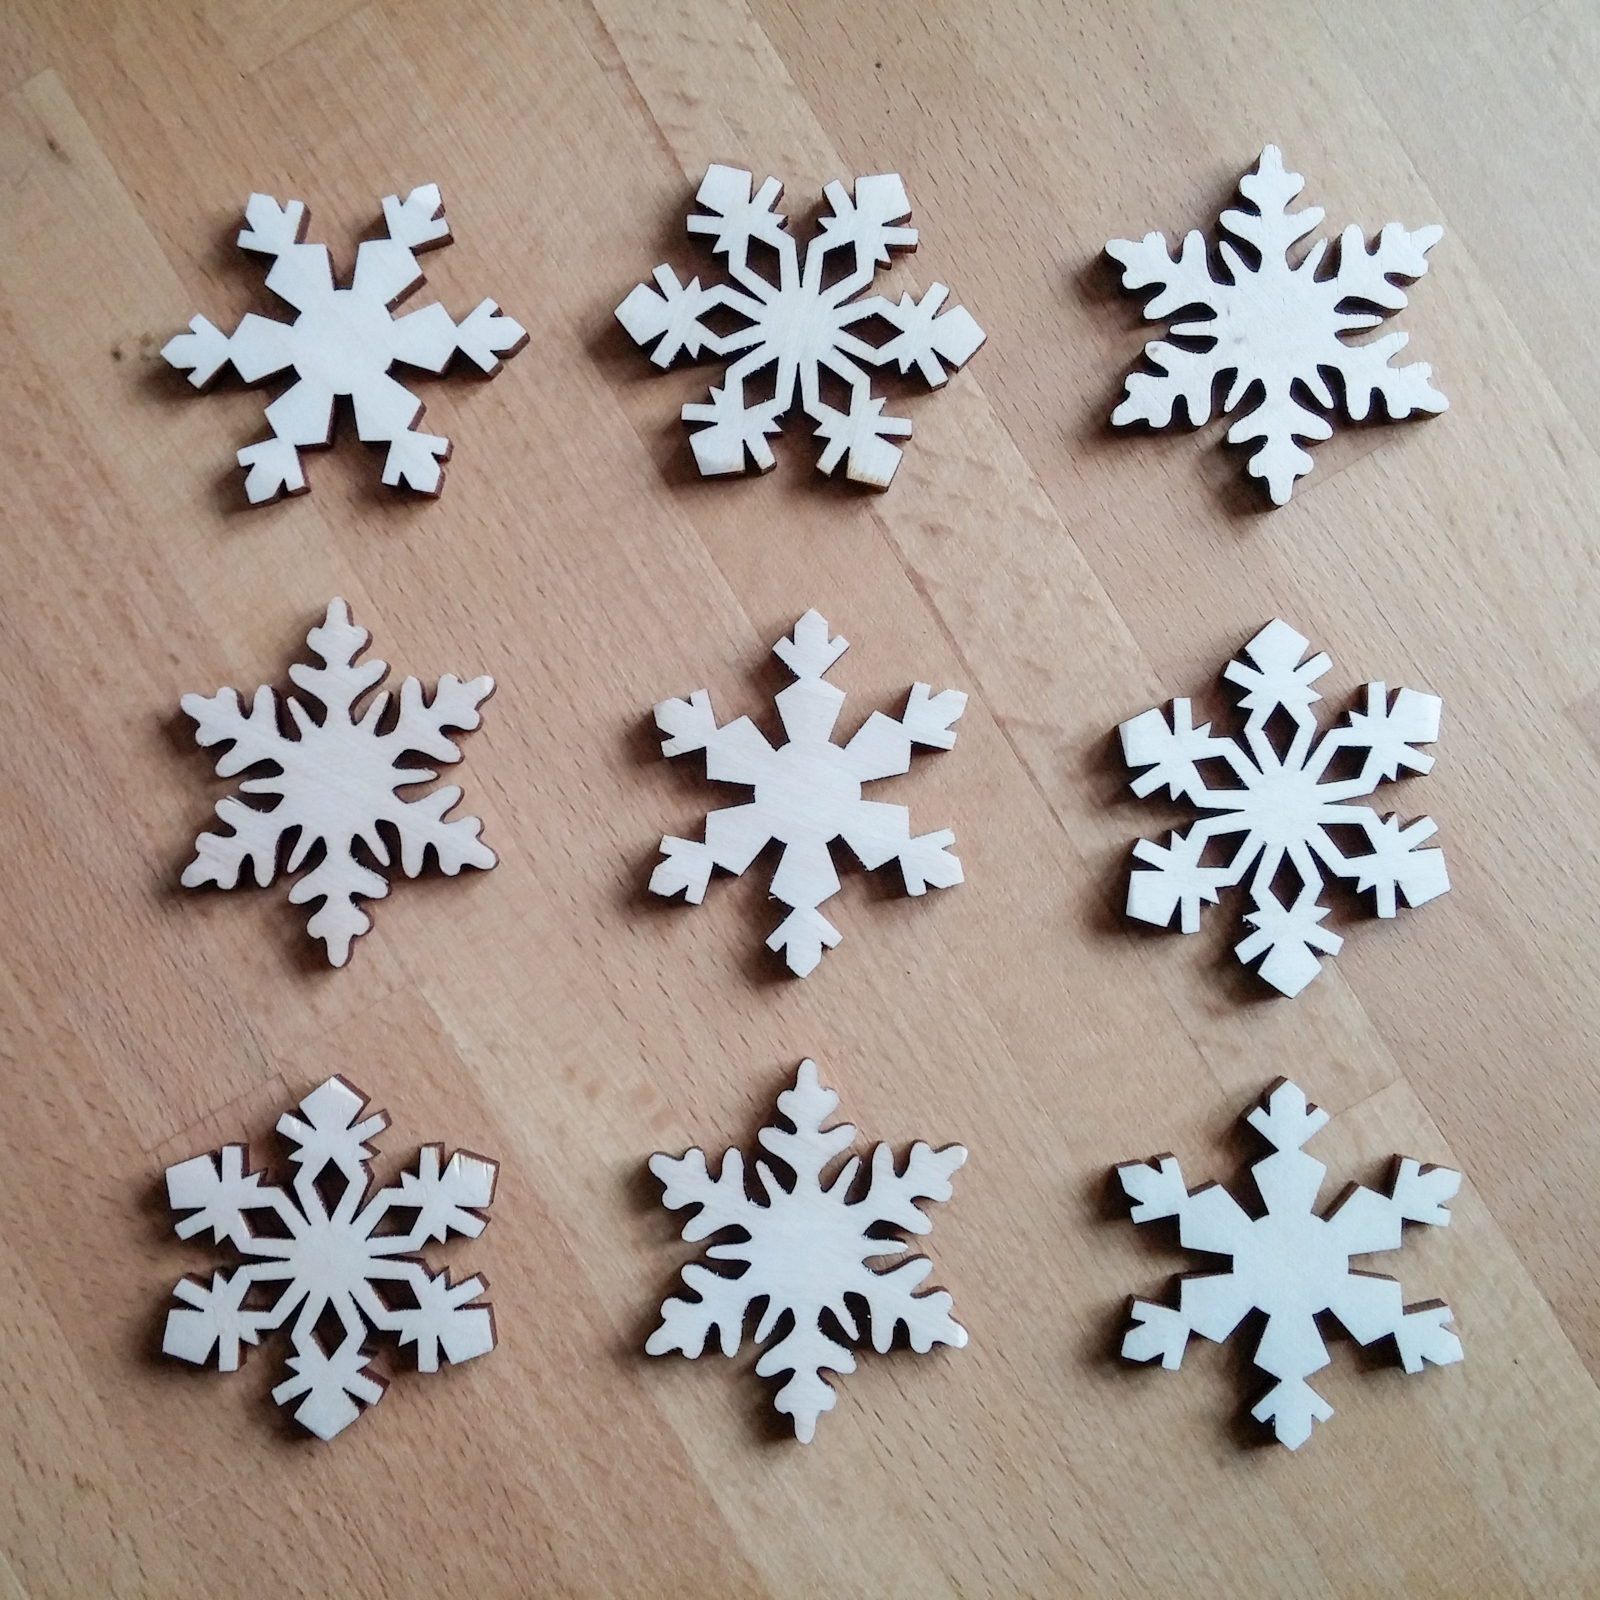
Snowflakes definitely had to go on the wreath. After all, it should become a Winter wreath. I am not sure where I got the idea of adding laser-cut wooden snowflakes, but I found K-WUD on Etsy and they made me custom sized snowflakes.
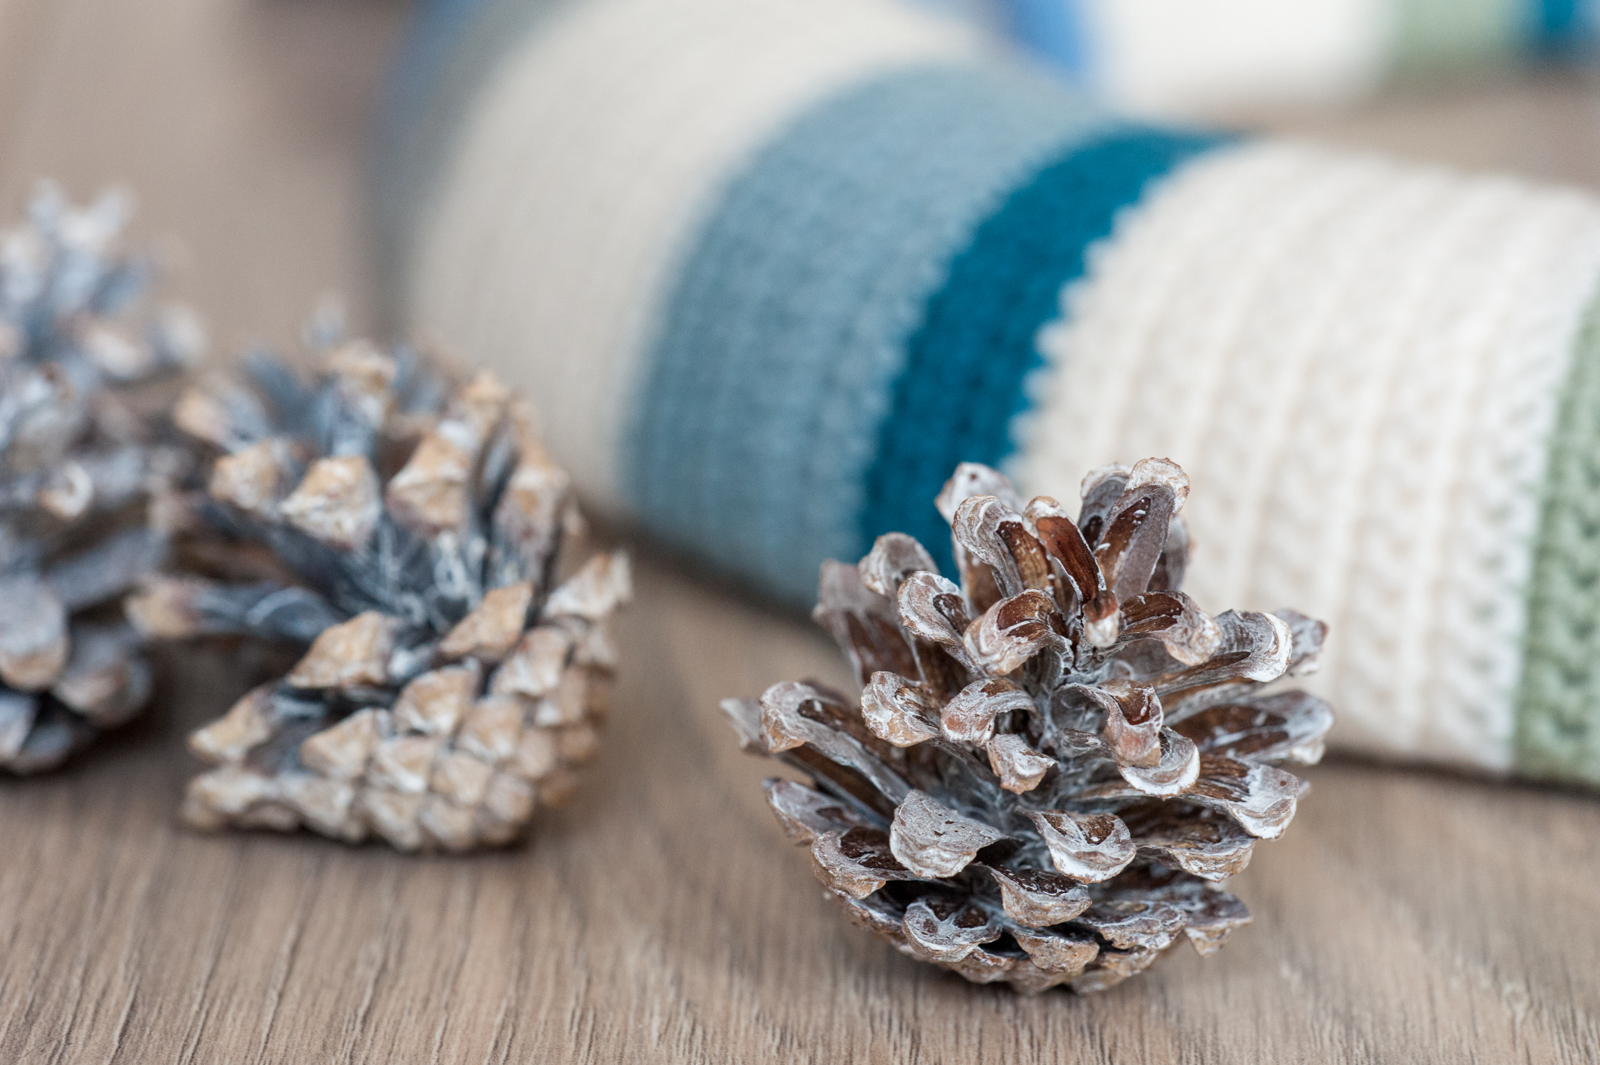
I had some small pine cones left from something as well. So they were added too.
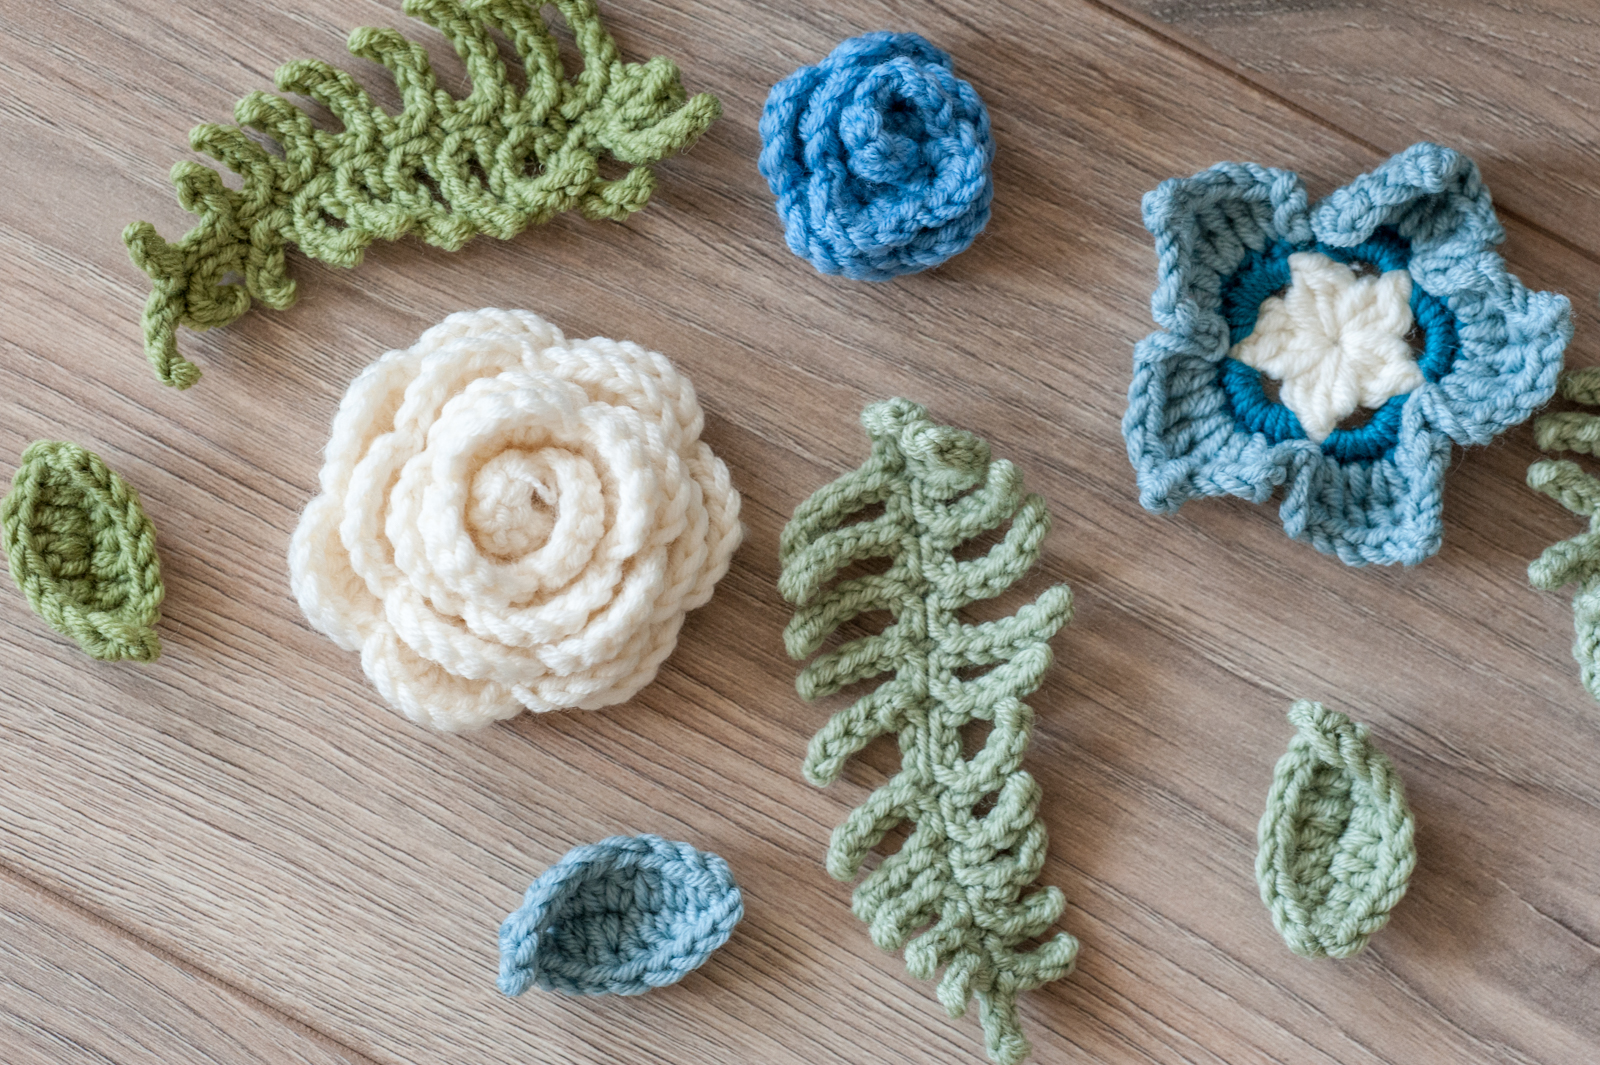
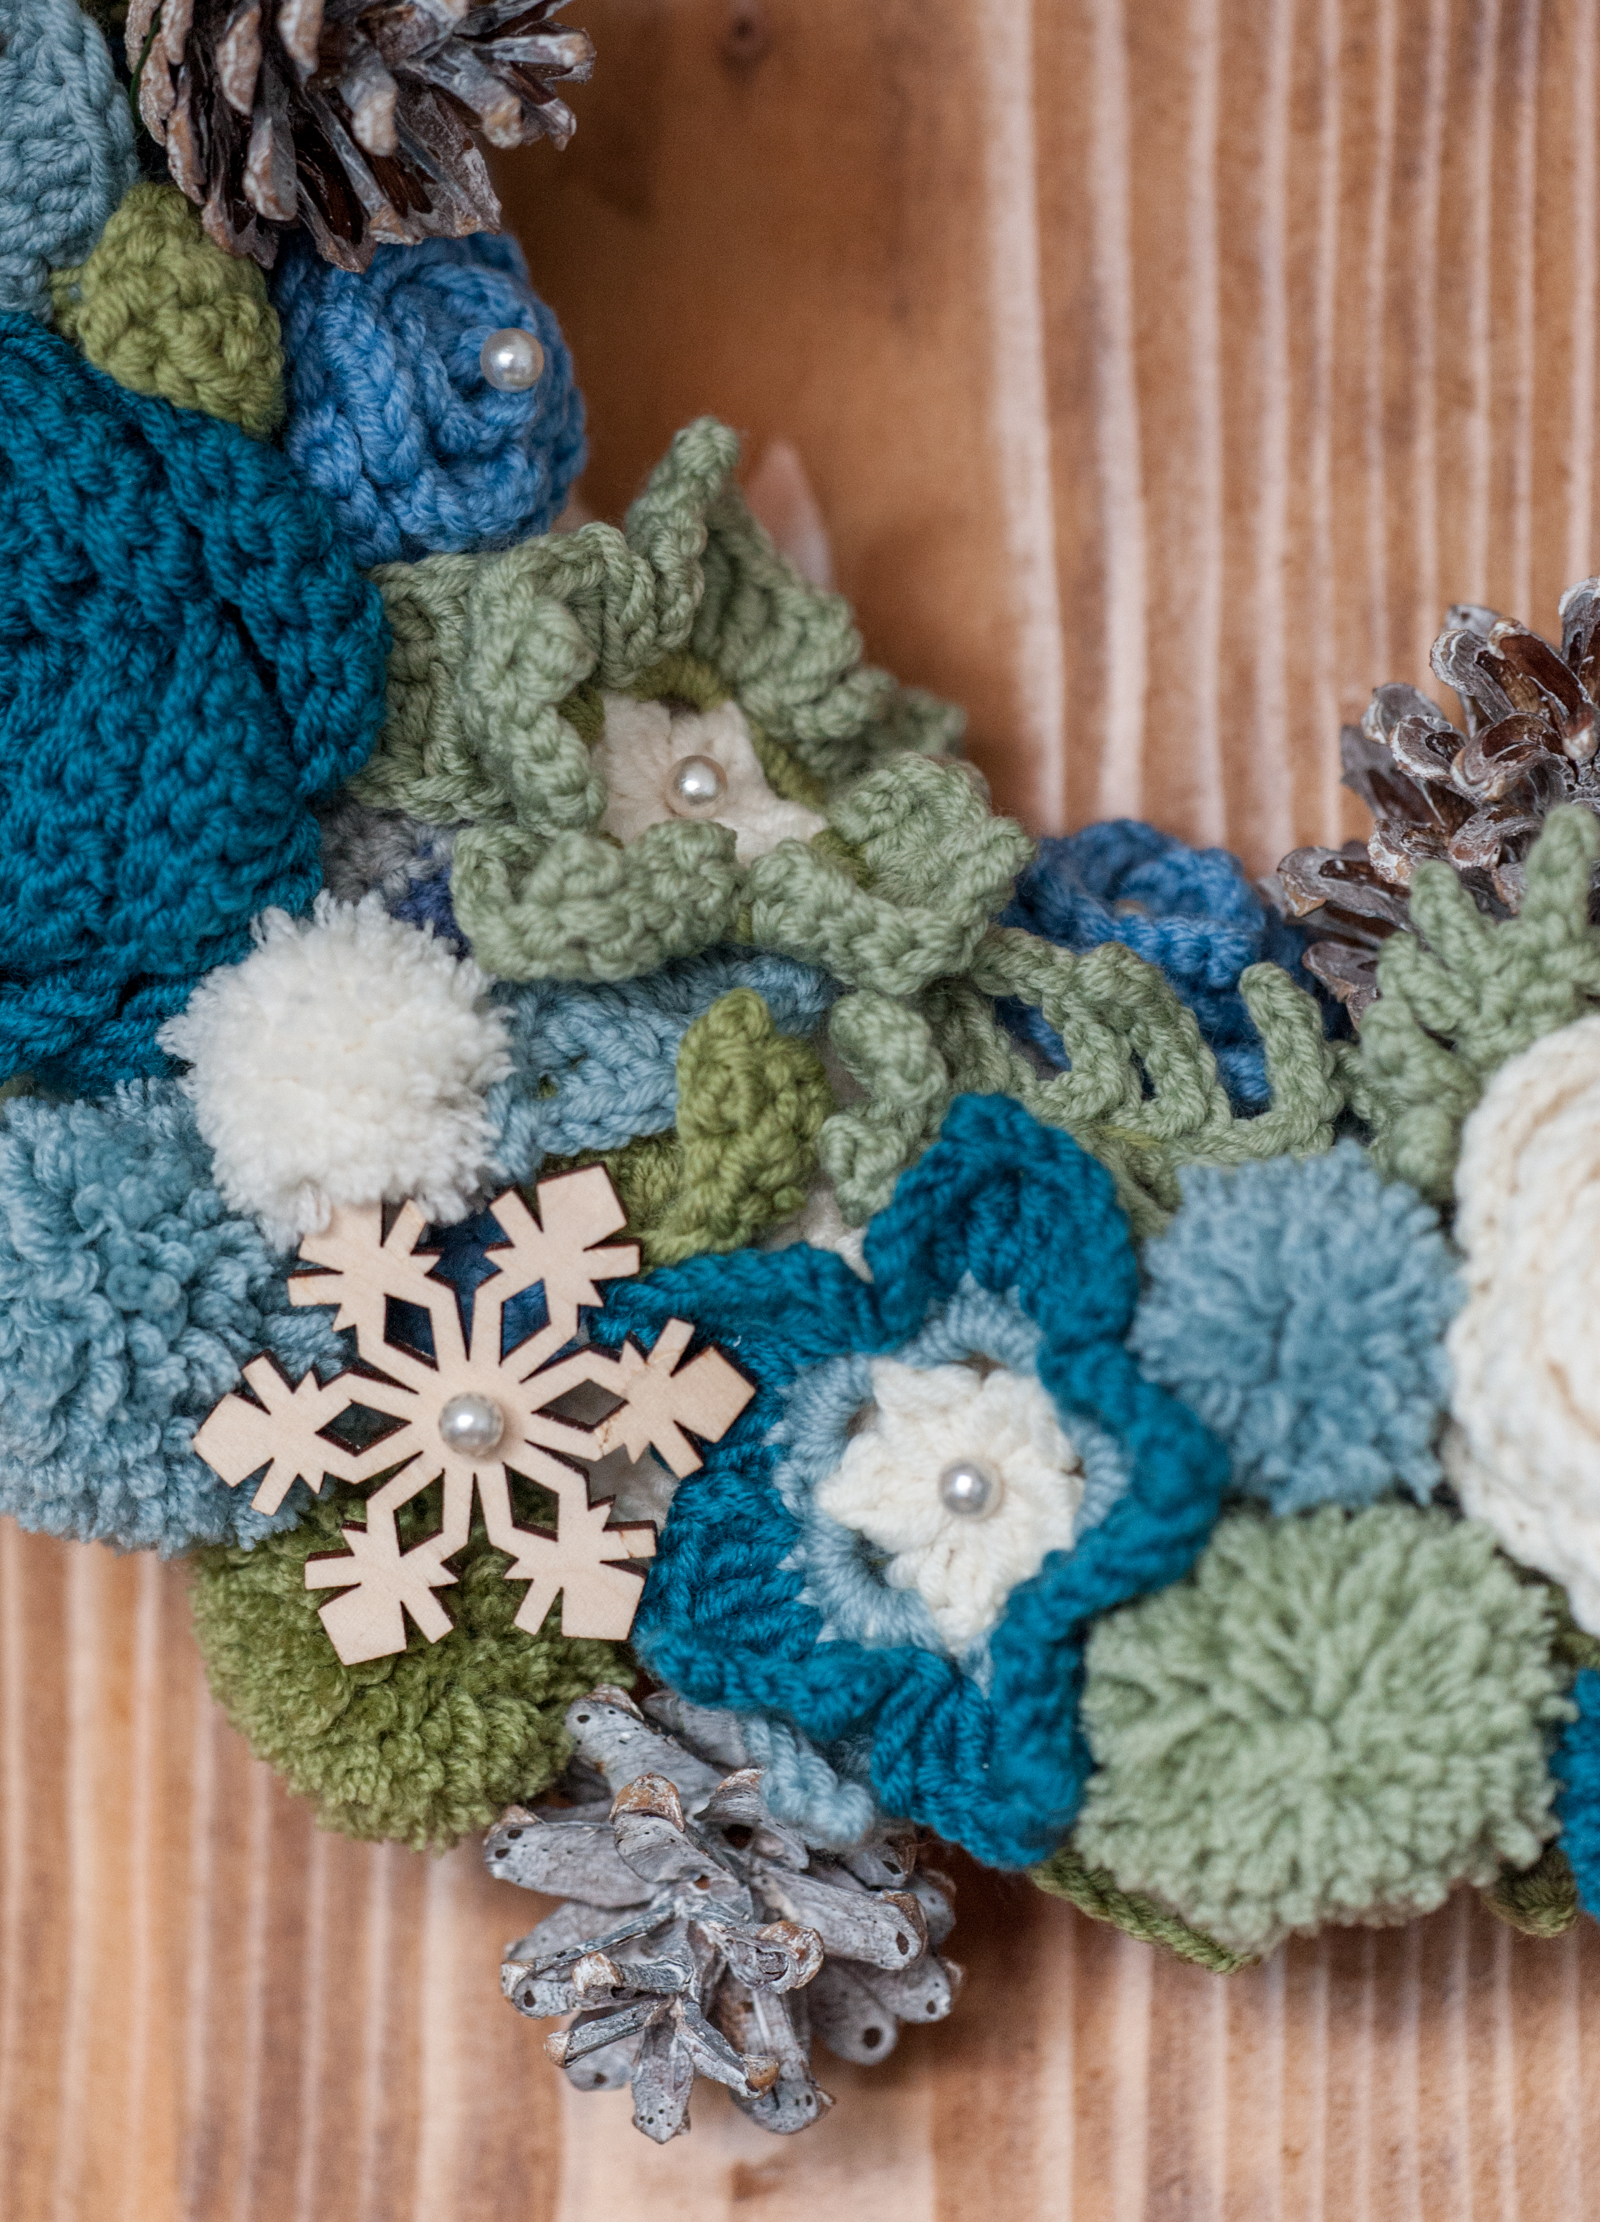
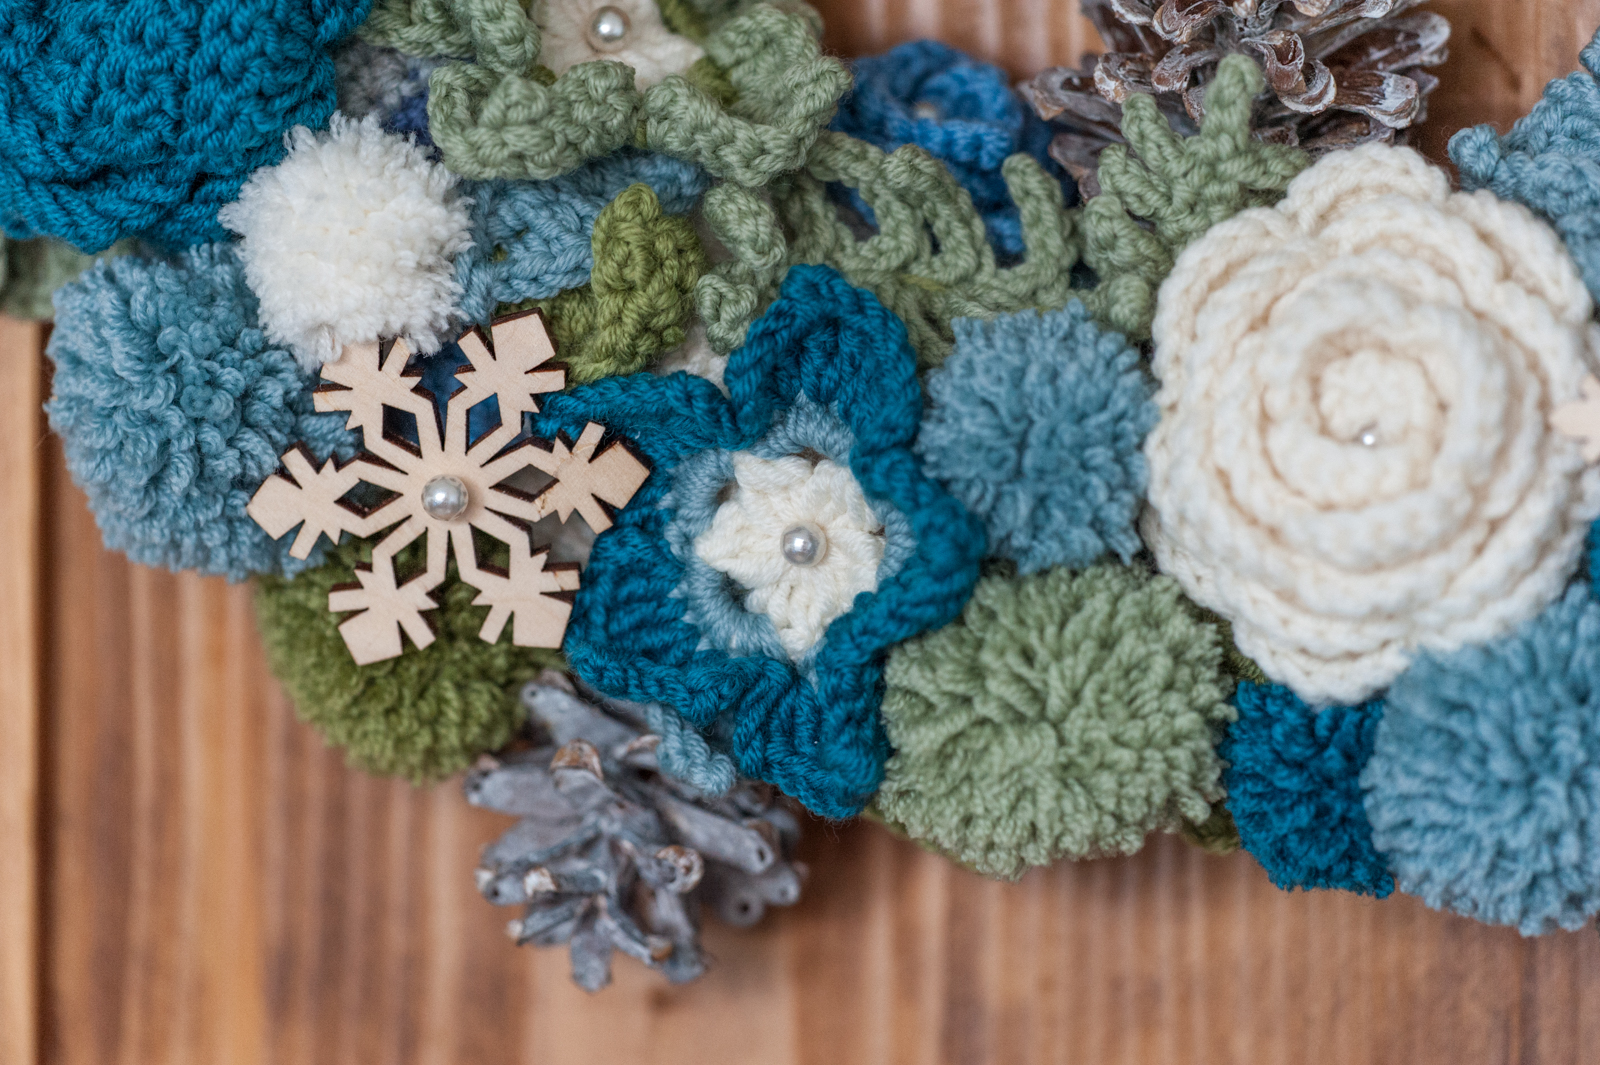
The flowers and leaves are made using patterns that found on the Internet:
- Fern leaves: pattern by Lucy, find it here
- Little leaves and small roses: pattern also by Lucy, find it here
- Large roses: pattern by Cre8tion Crochet, find it here
- Hellebore flowers: pattern by Helen, find it here
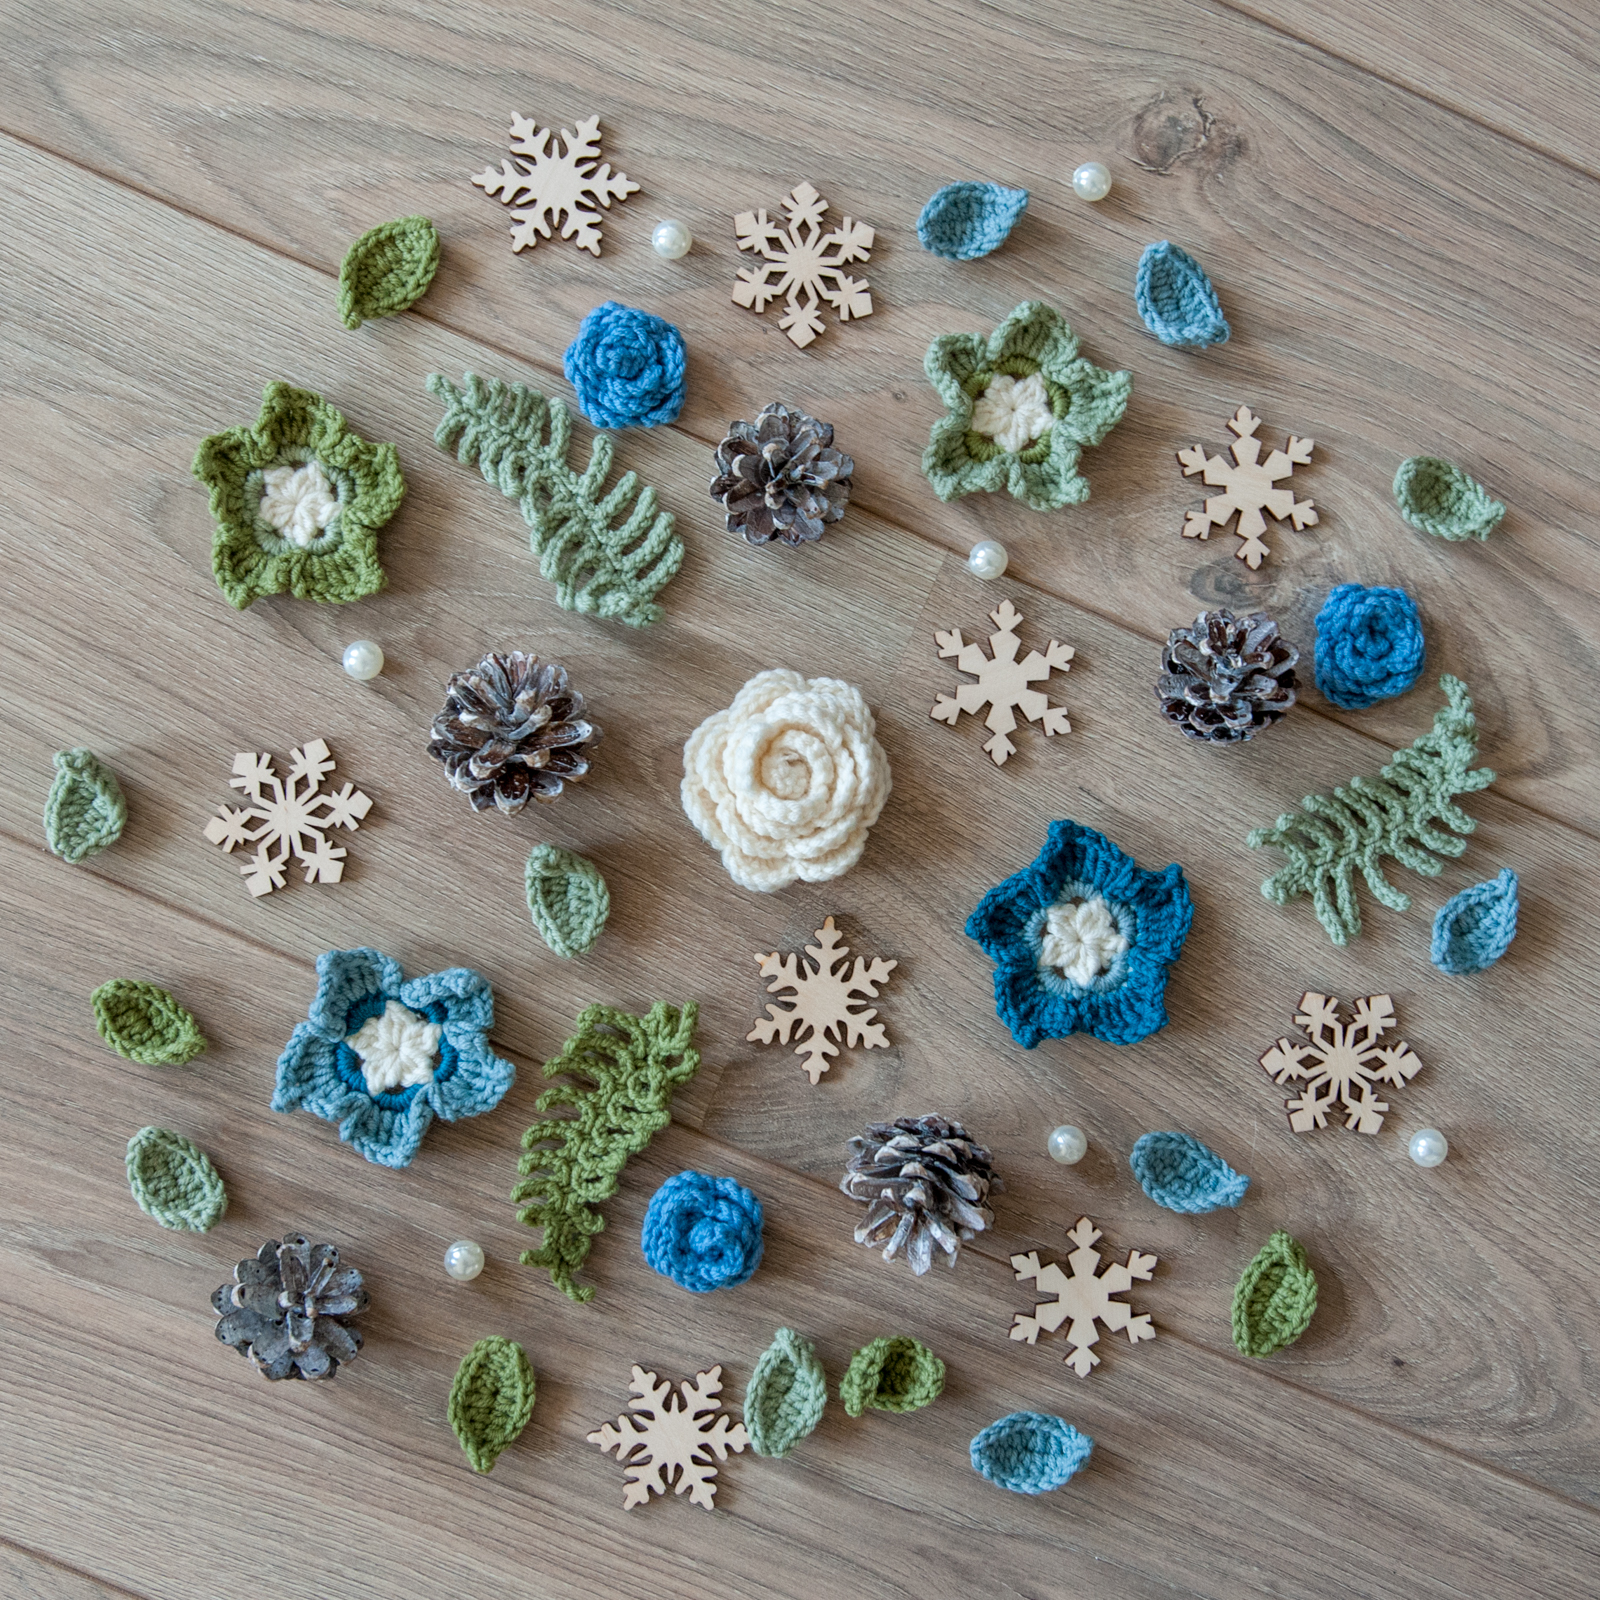
And this is the entire collection all together. I love this photo! Maybe I should frame it ha-ha!
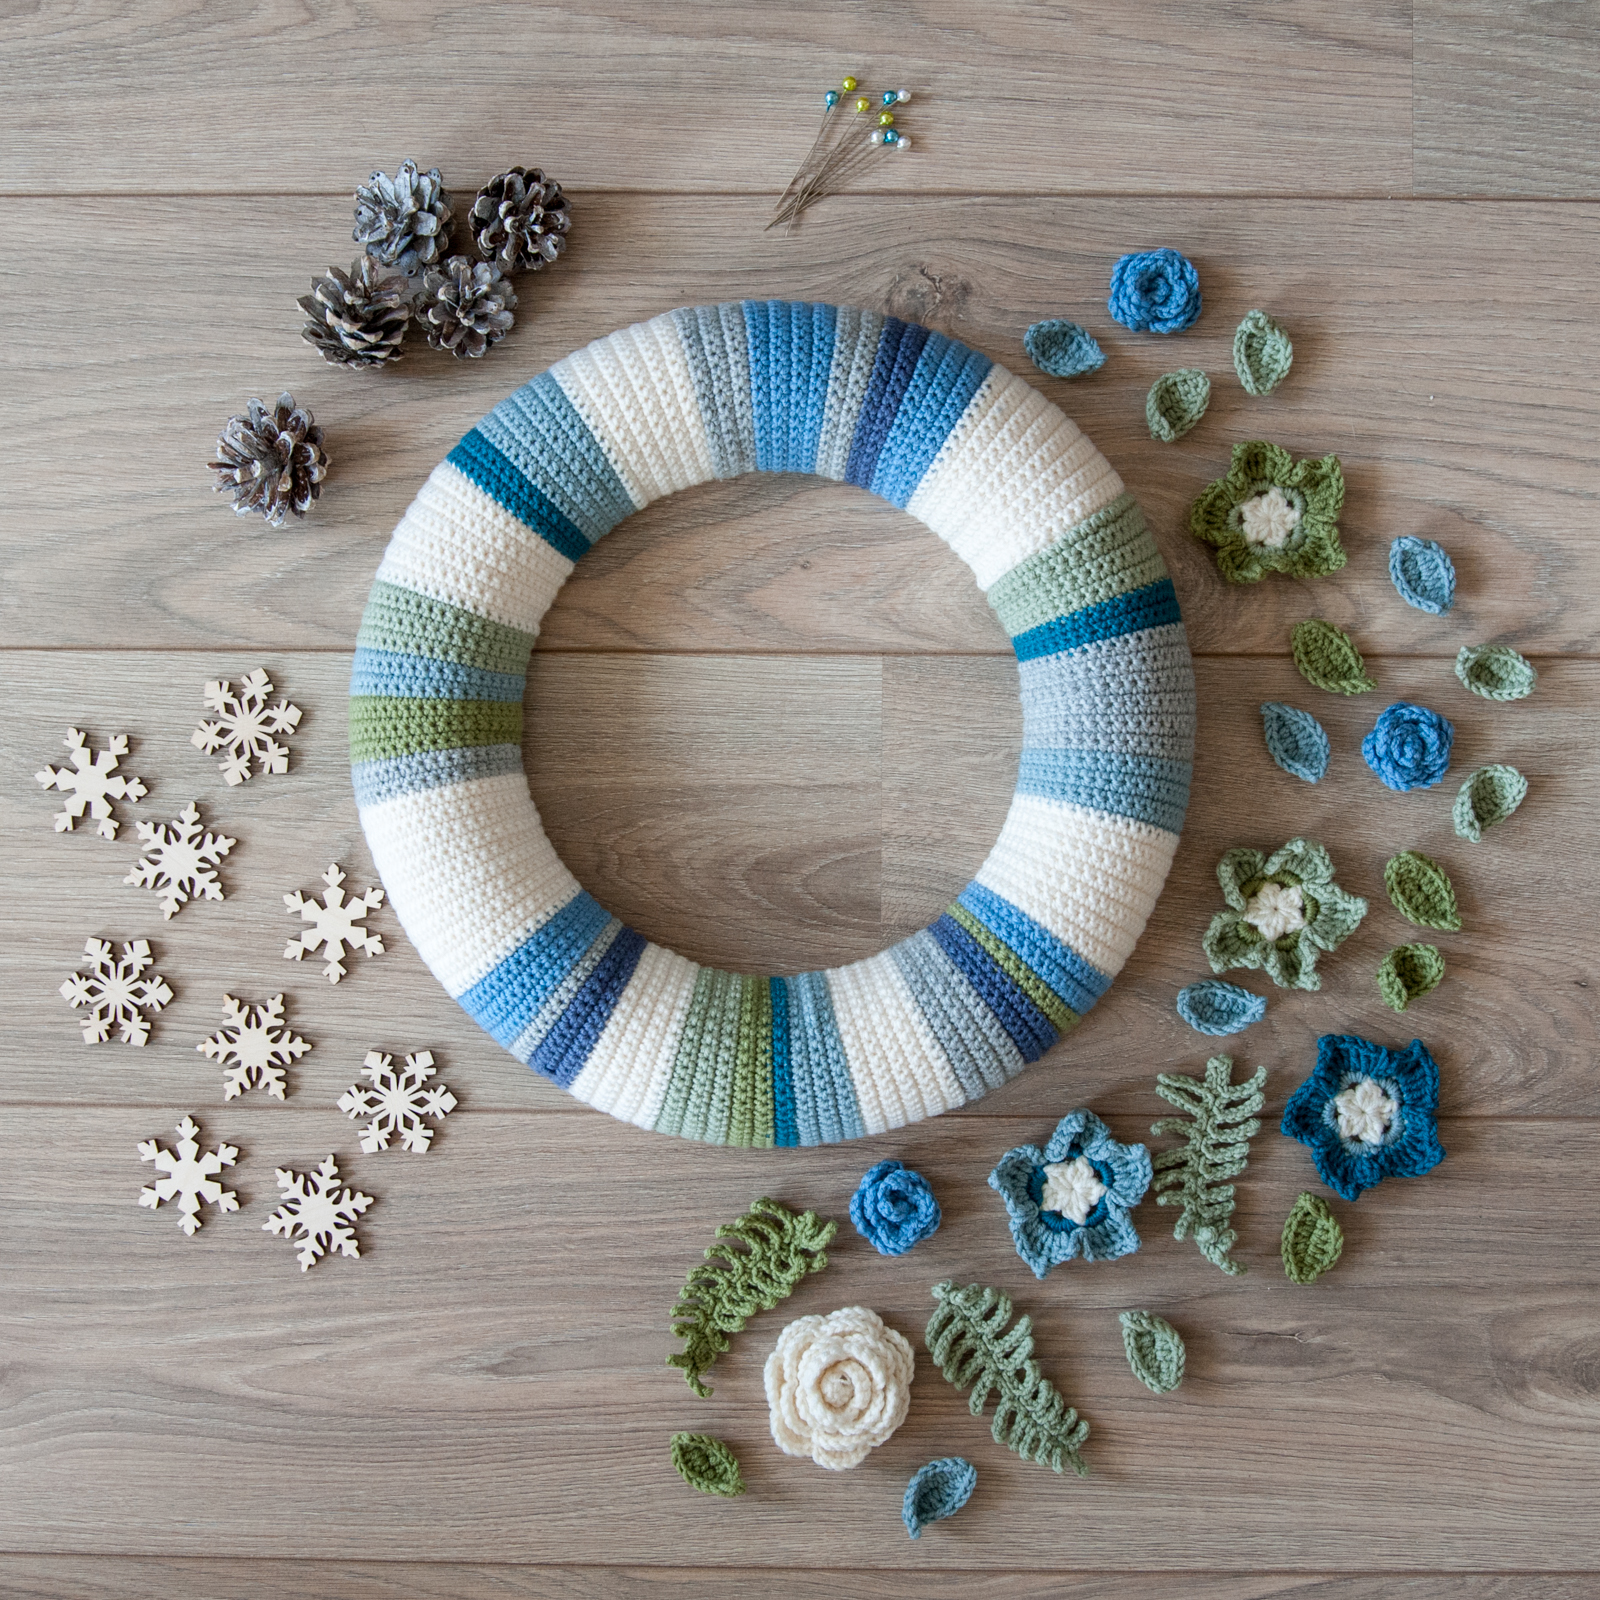
Then came the (for me at least) most difficult part… joining all the flowers, leaves, snowflakes and pine cones on the crochet base. To glue or not to glue… that was the question. I decided to sew them on instead of using the hot glue gun which would have been the faster way. I figured that I could simply pin some of the items on the wreath, like the flowers and the snowflakes for instance.
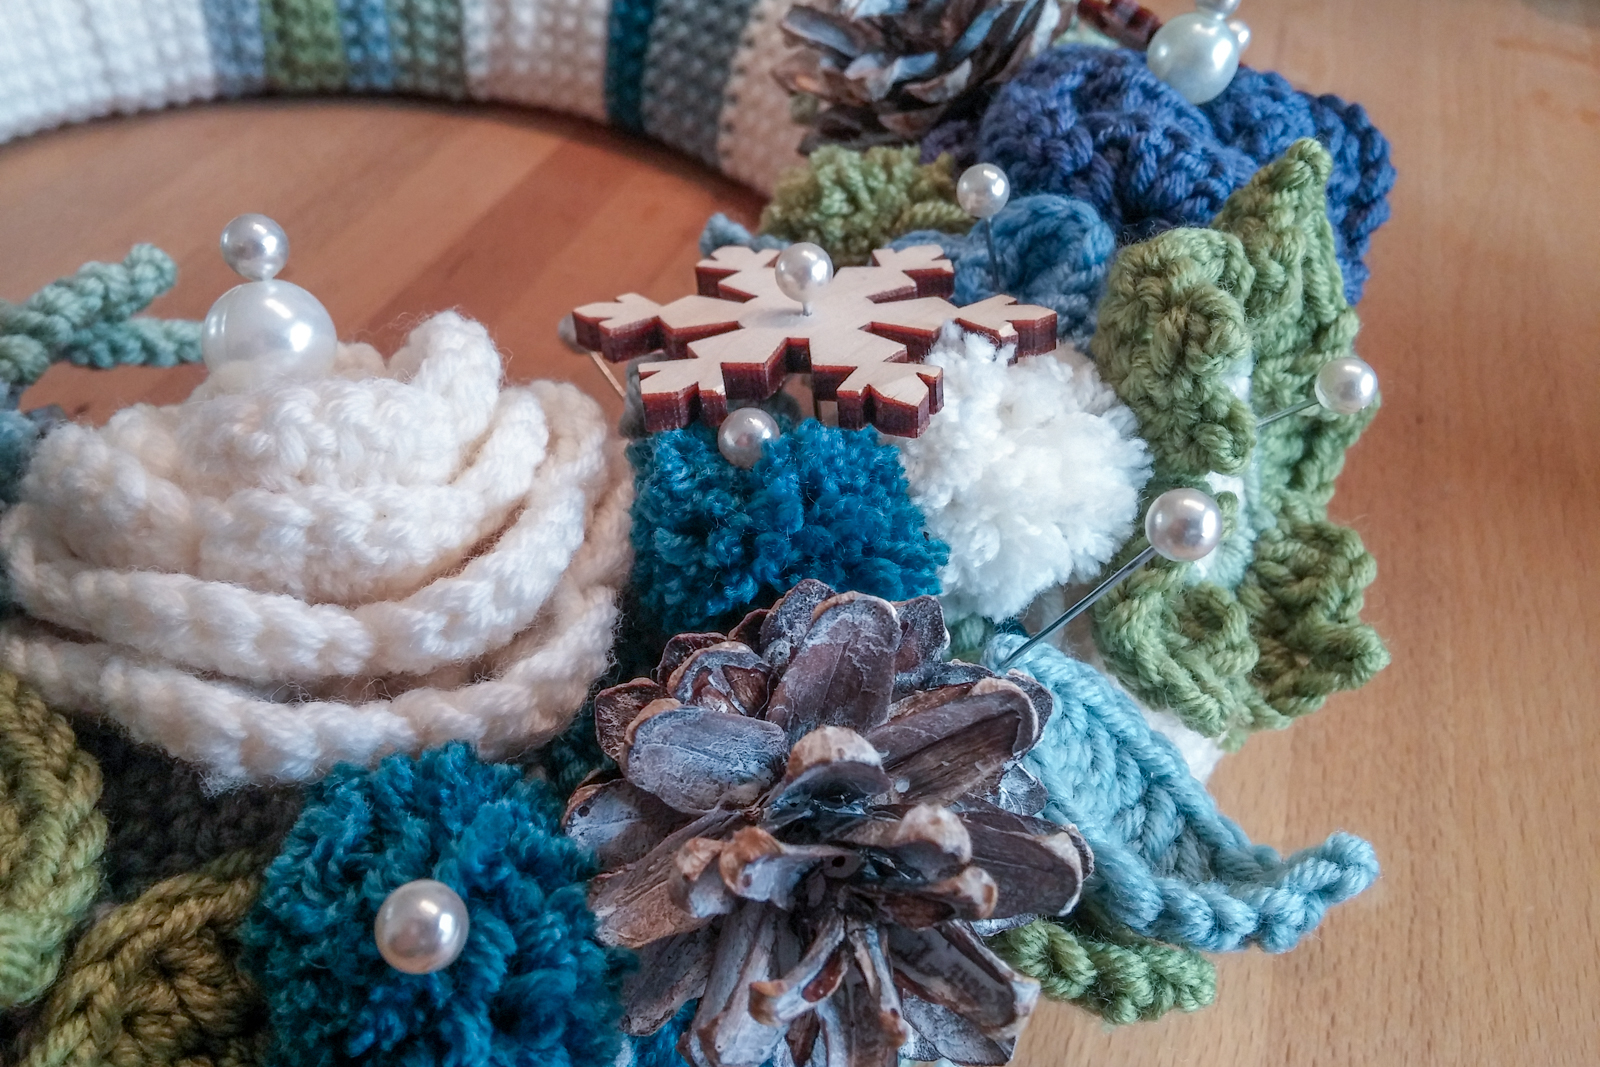
I started by arranging everything on the base and I used pins to hold all of the items in place. You have to put all the items fairly close together which meant that I had to make some more leaves and roses to fill the holes. I added pompoms too. They are a quick make and they cover open spaces perfectly! So after arranging everything, I added as much pompoms as I needed to create a dense composition. I initially used a thin metal wire wrapped around the base of the pine cones to pin them onto the wreath. However, that didn’t work… they kept falling off! So that is where the hot glue gun came into play at the end.
Let’s take a look at details of the finished wreath first…
And here is my Winter wreath in full glory!
It was a bit of a challenge to make is, but I truly love it! Thank you for documenting your process of making yours so well Lucy! I have one polystyrene ring left… I’m thinking about a Christmas themed version… Let’s see!


No Comments