
How are your Holiday Season preparations going? Are you ‘Team Well-Prepared’ and did you start making gifts early last summer? Or are you ‘Team Last-Minute’ and are you desperately searching for spare minutes and hours to finish the last bits and bobs? I definitely belong to the second group… so much so that I’ve removed one gift from the list. I will not be able to finish that!
If you’re looking for a last-minute gift idea, then maybe I can help you.
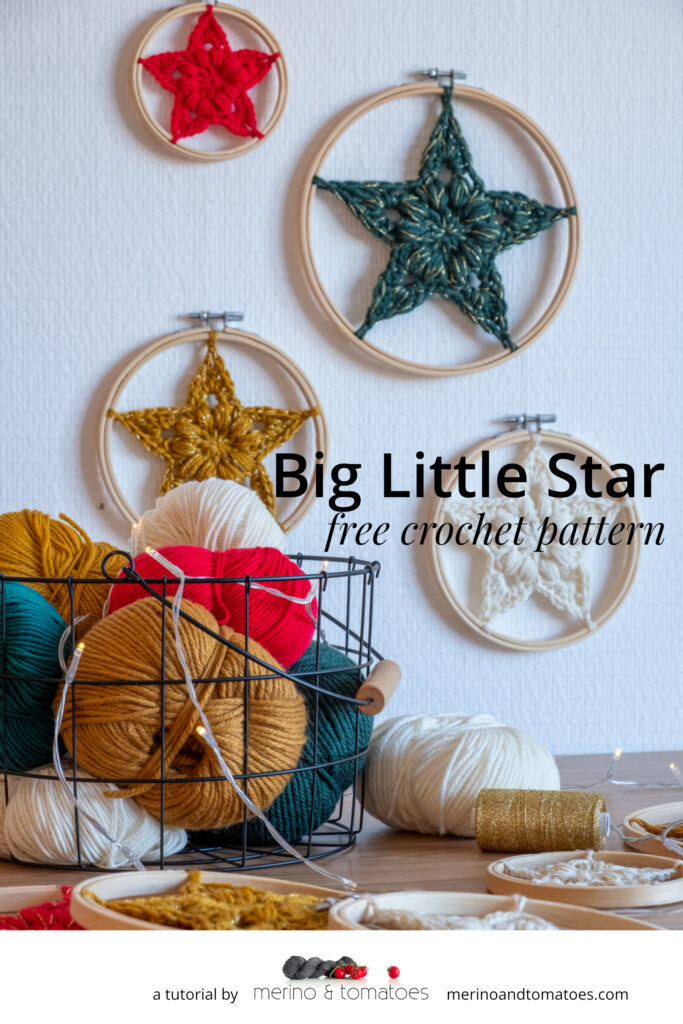
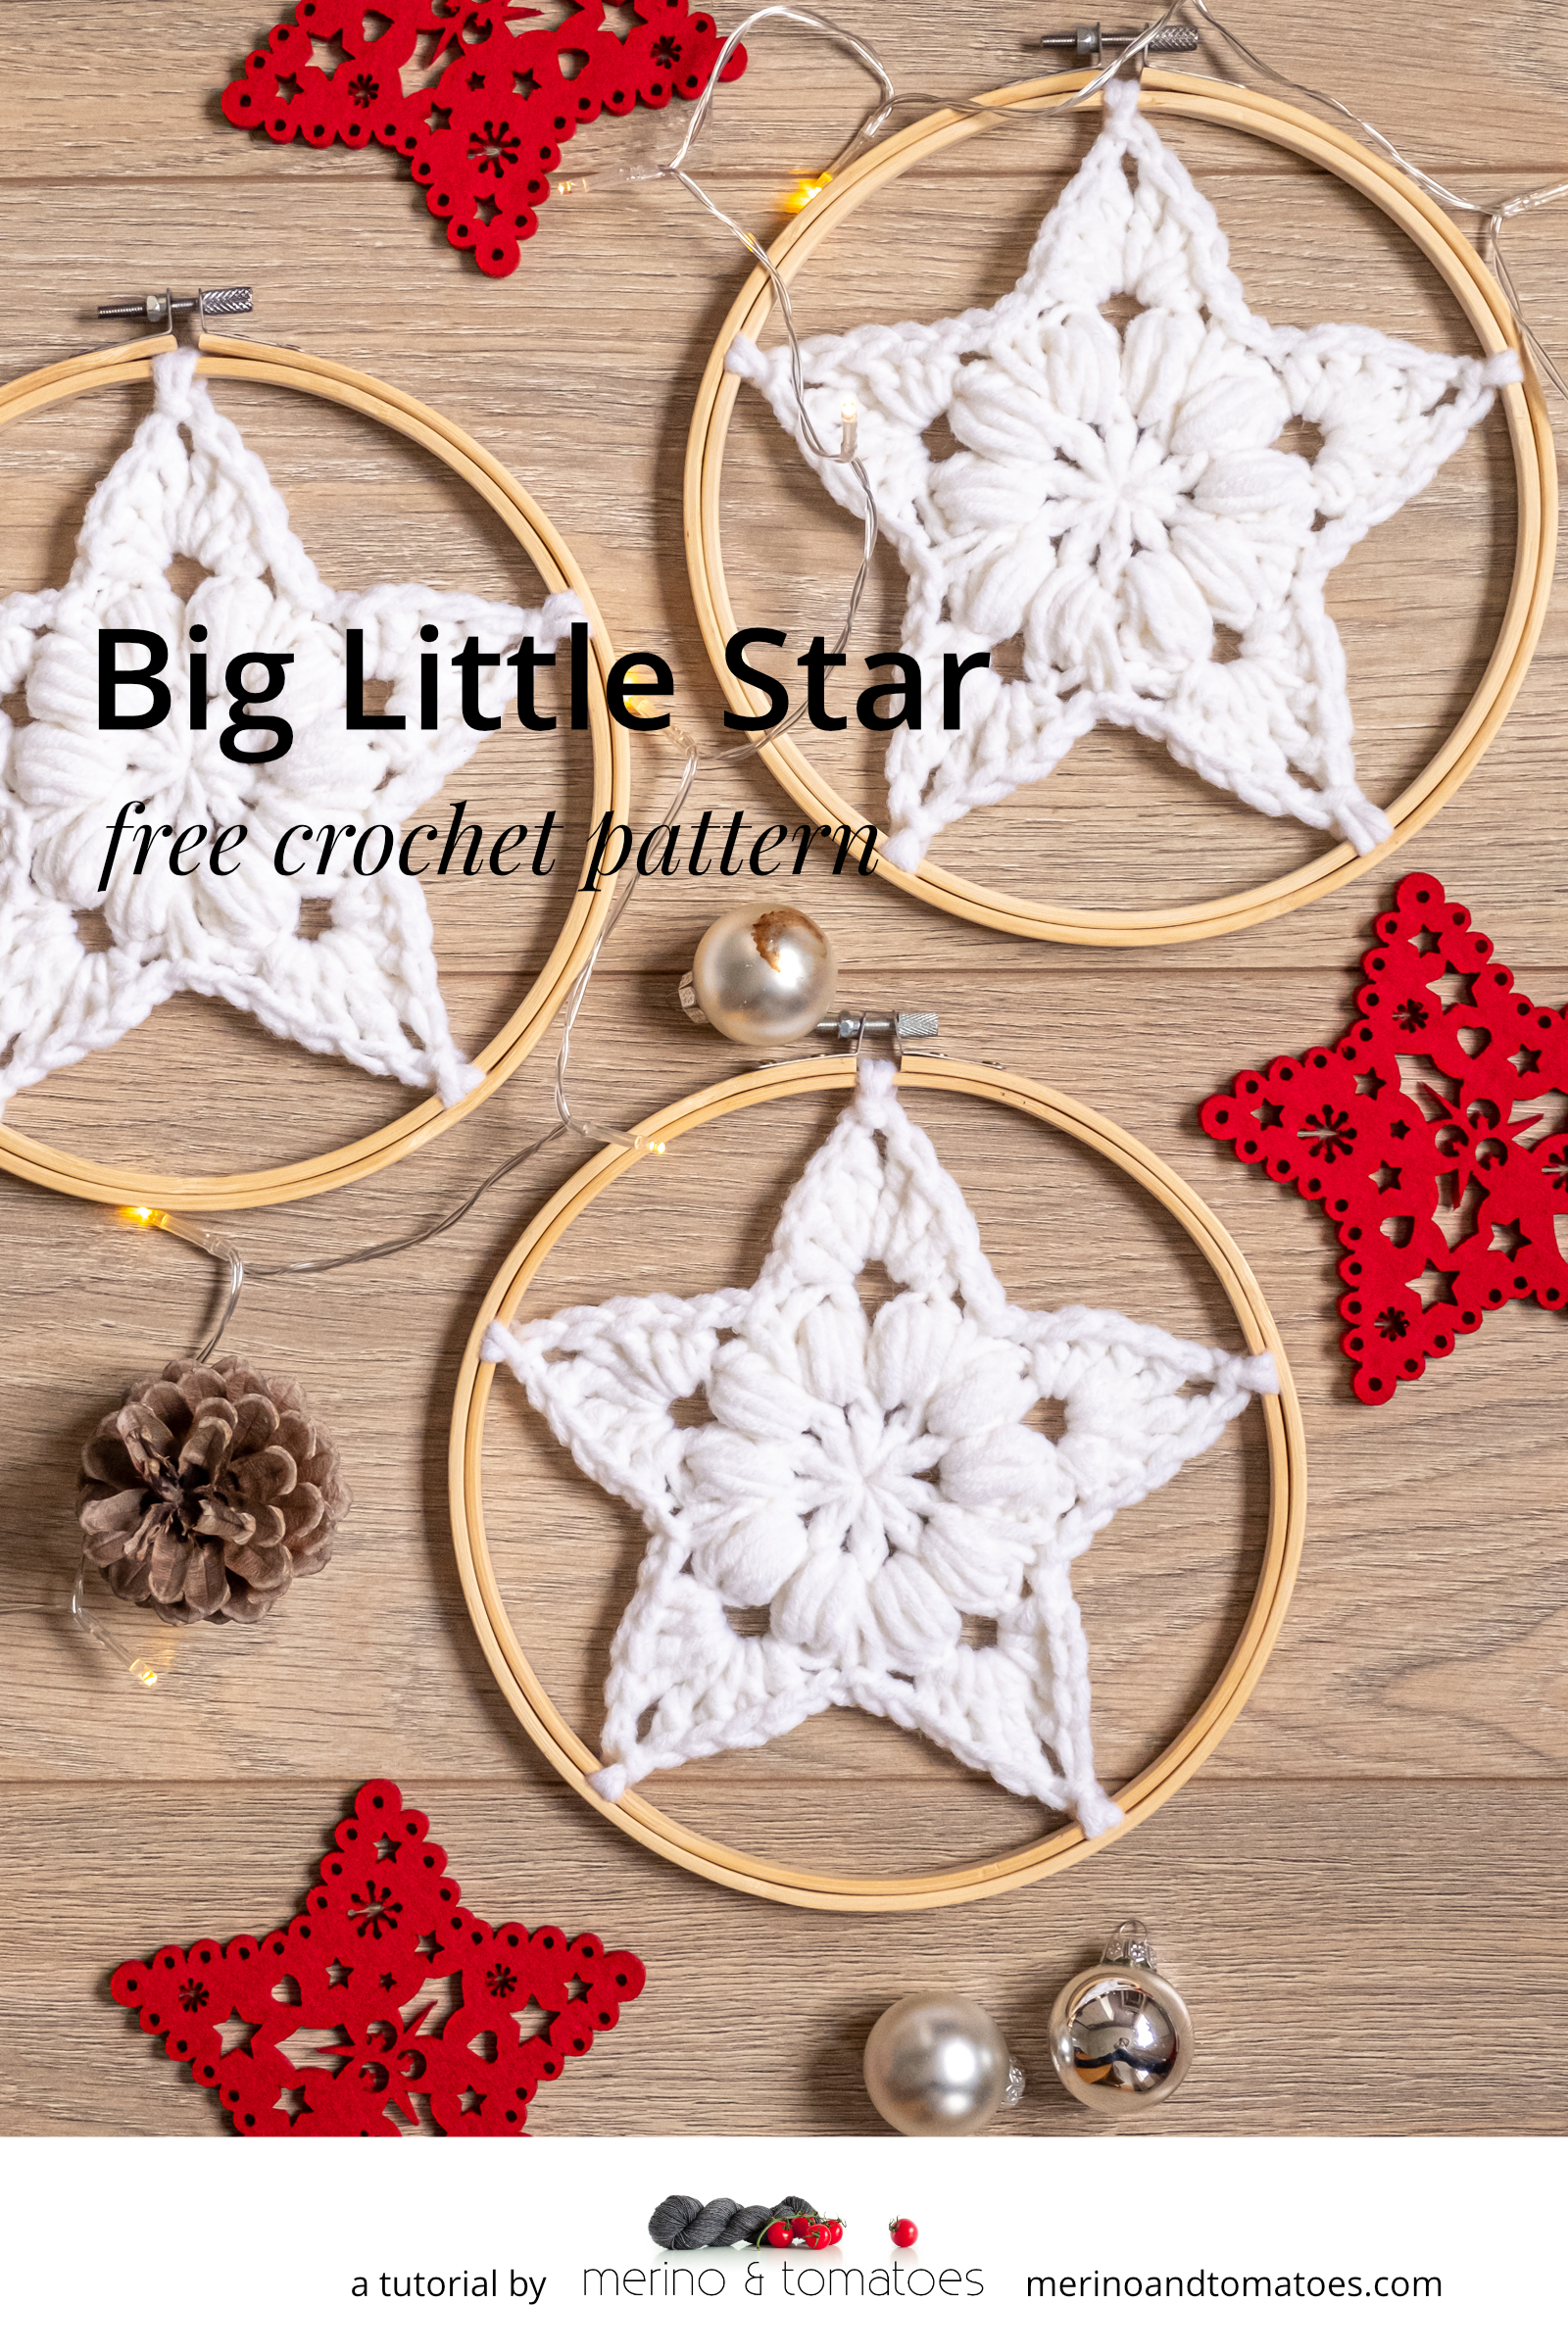
The Little Star Crochet Pattern
A few years ago I posted a free crochet pattern for a LIttle Star here on my website. The little star was a rather spontaneous design… I couldn’t find a suitable pattern on the web and decided to make my own version.
Since then, Little Stars start to pop up in my Instagram feed every year from August or so on when people feature it as a craft idea for the Holiday Season. I have to admit that it is so nice to see Little Stars appearing all over the world!
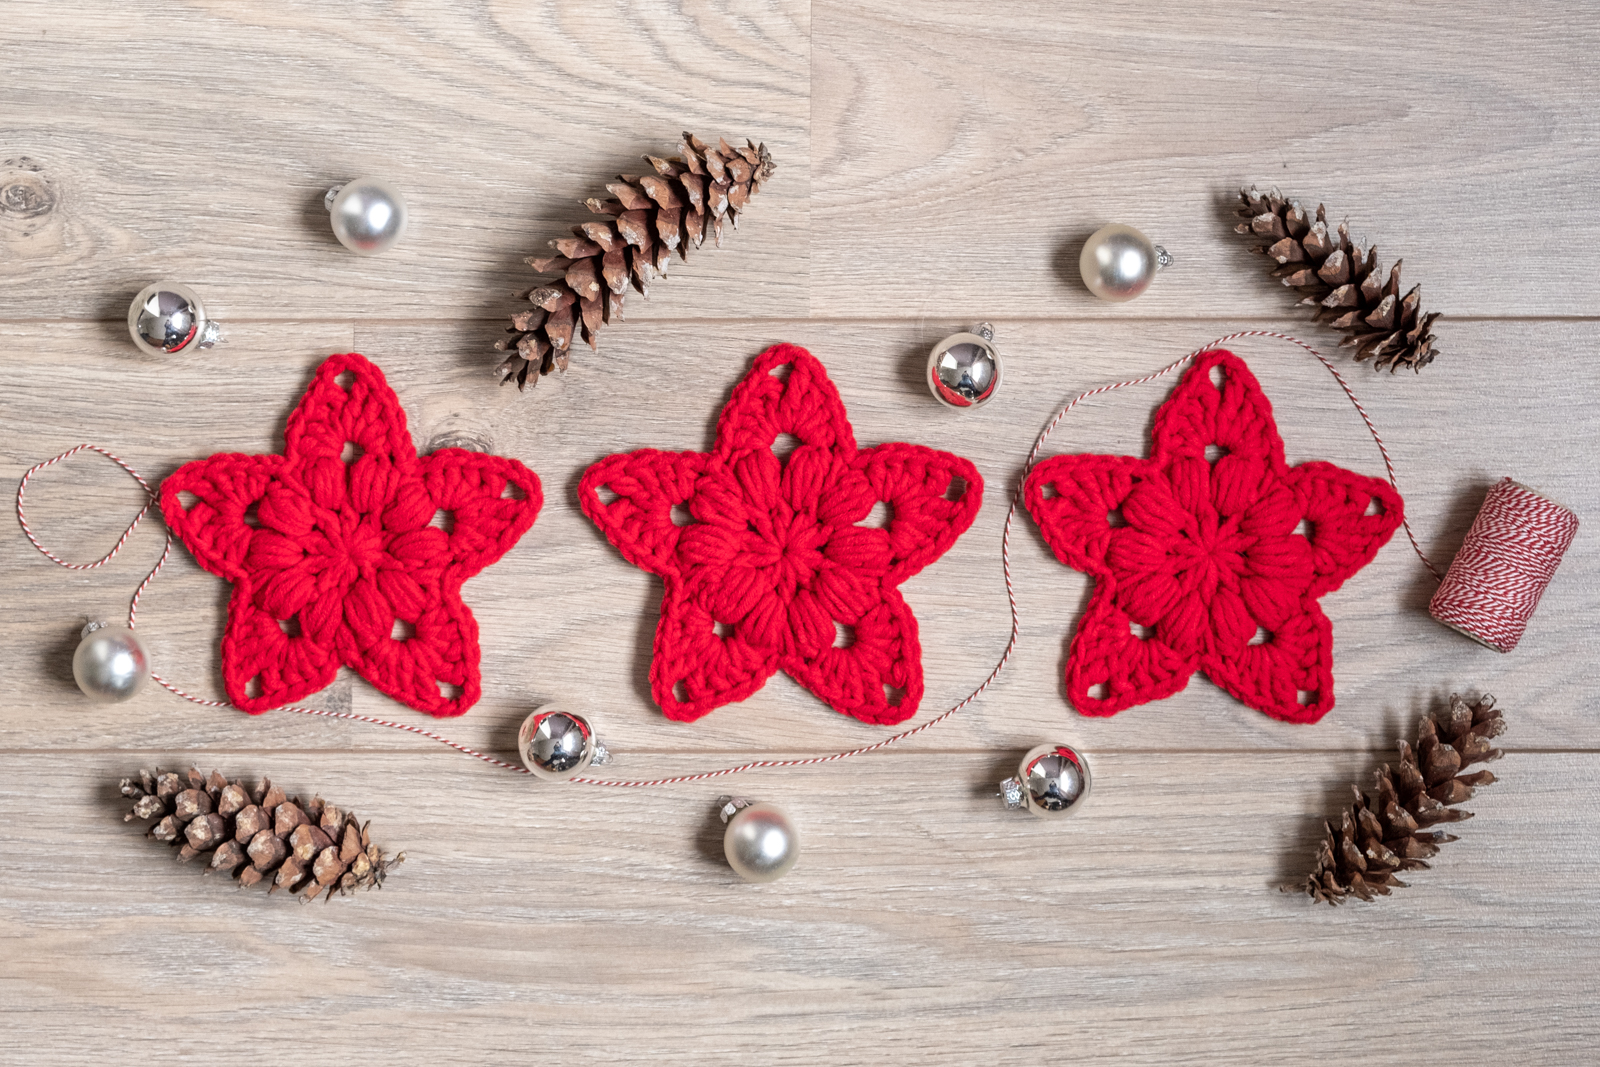
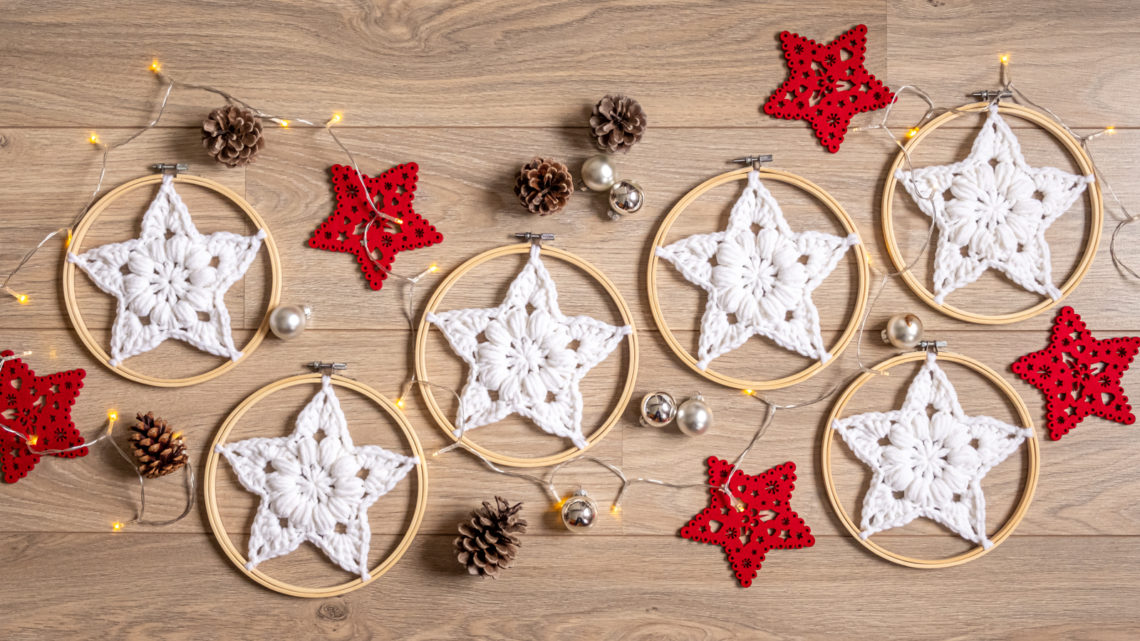
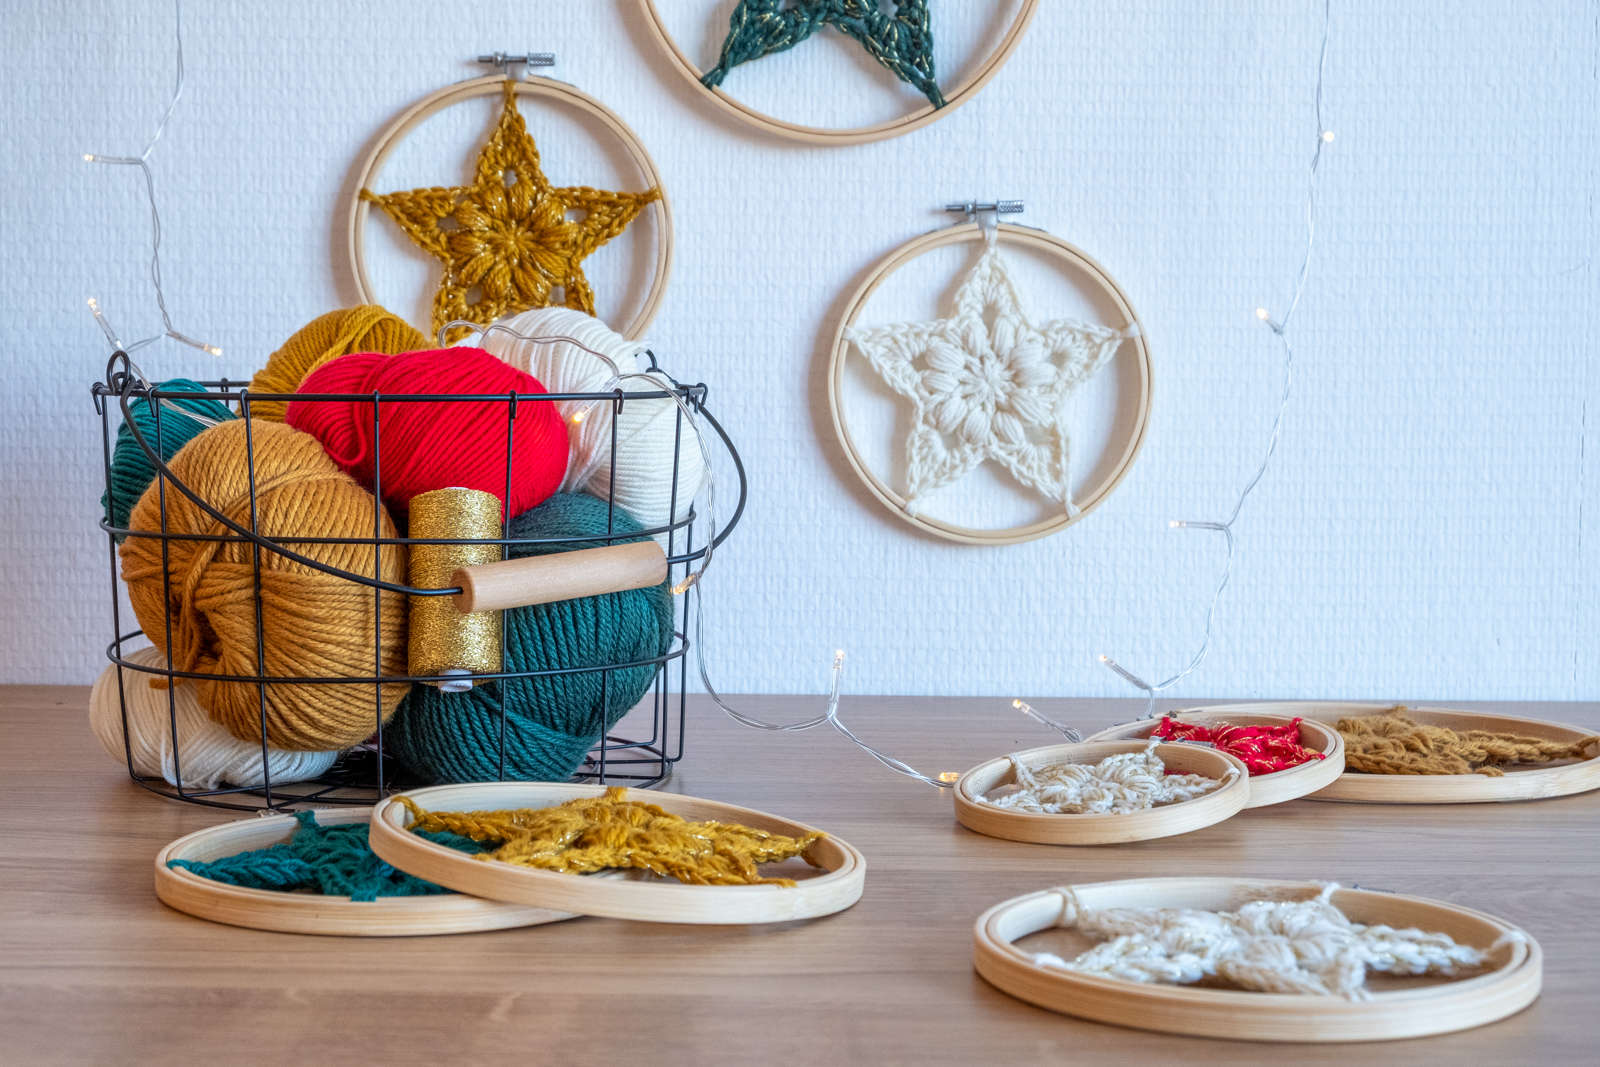
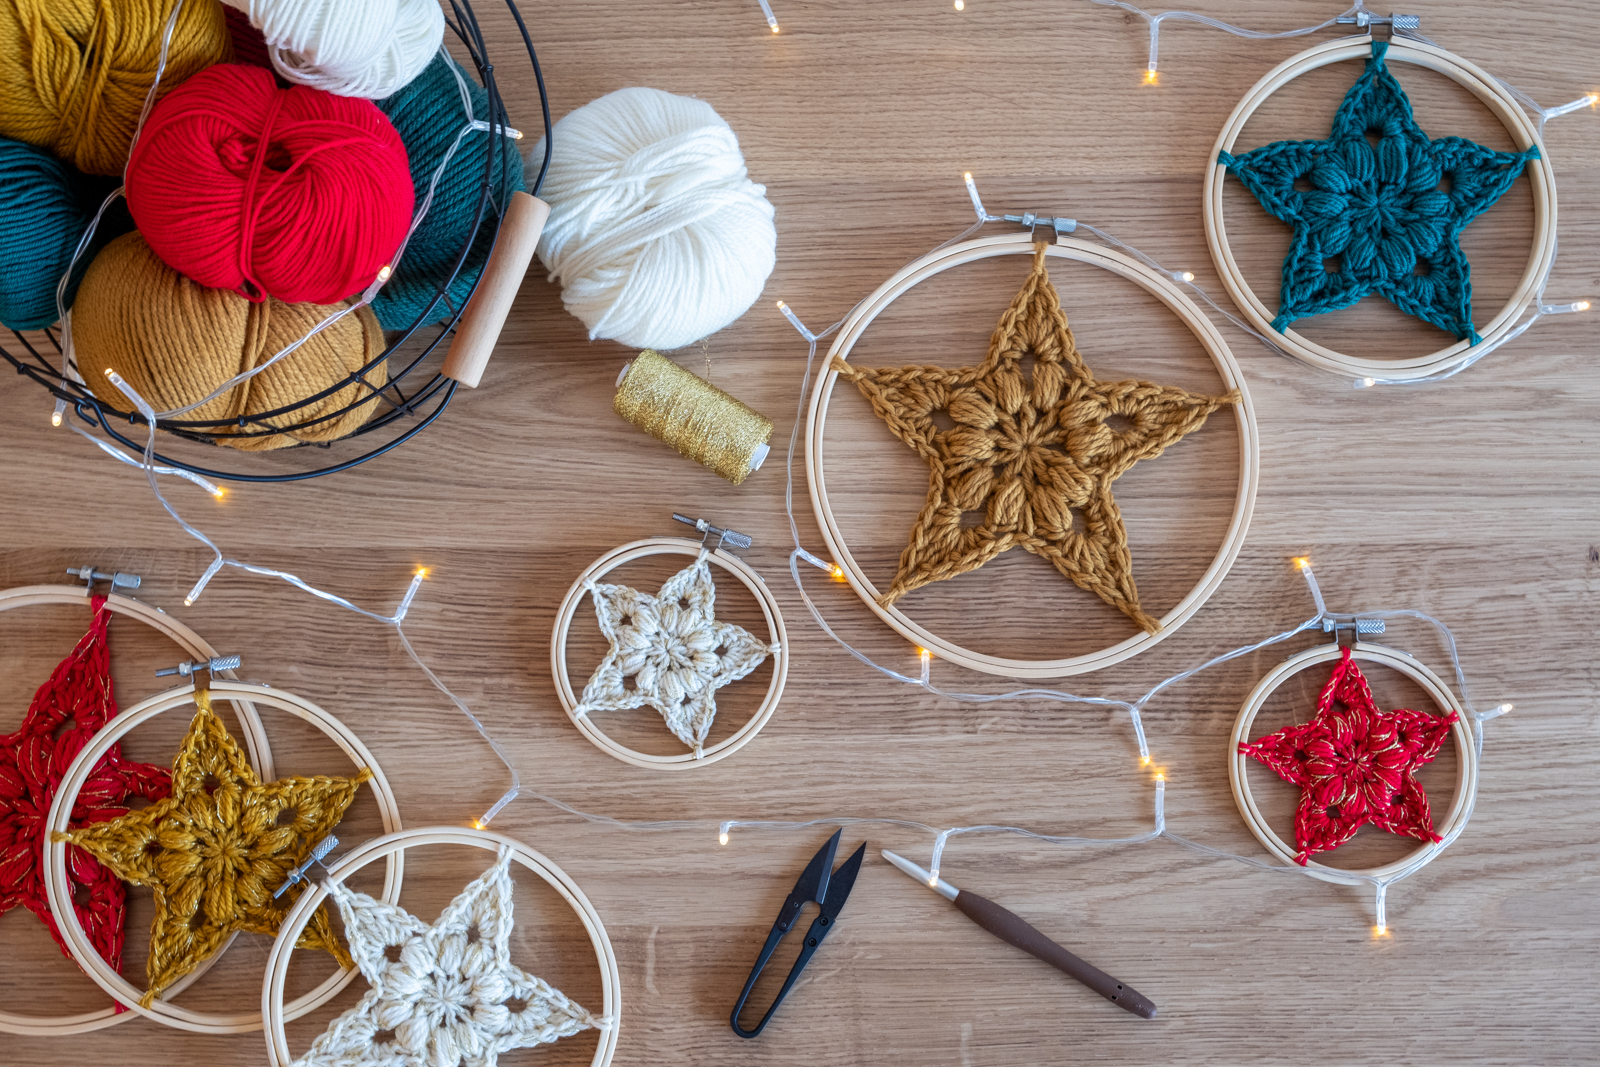
It also brought me back to that same free crochet pattern and I decided to do a big version of it! These big stars using bulky wool are perfect to use as ornaments.
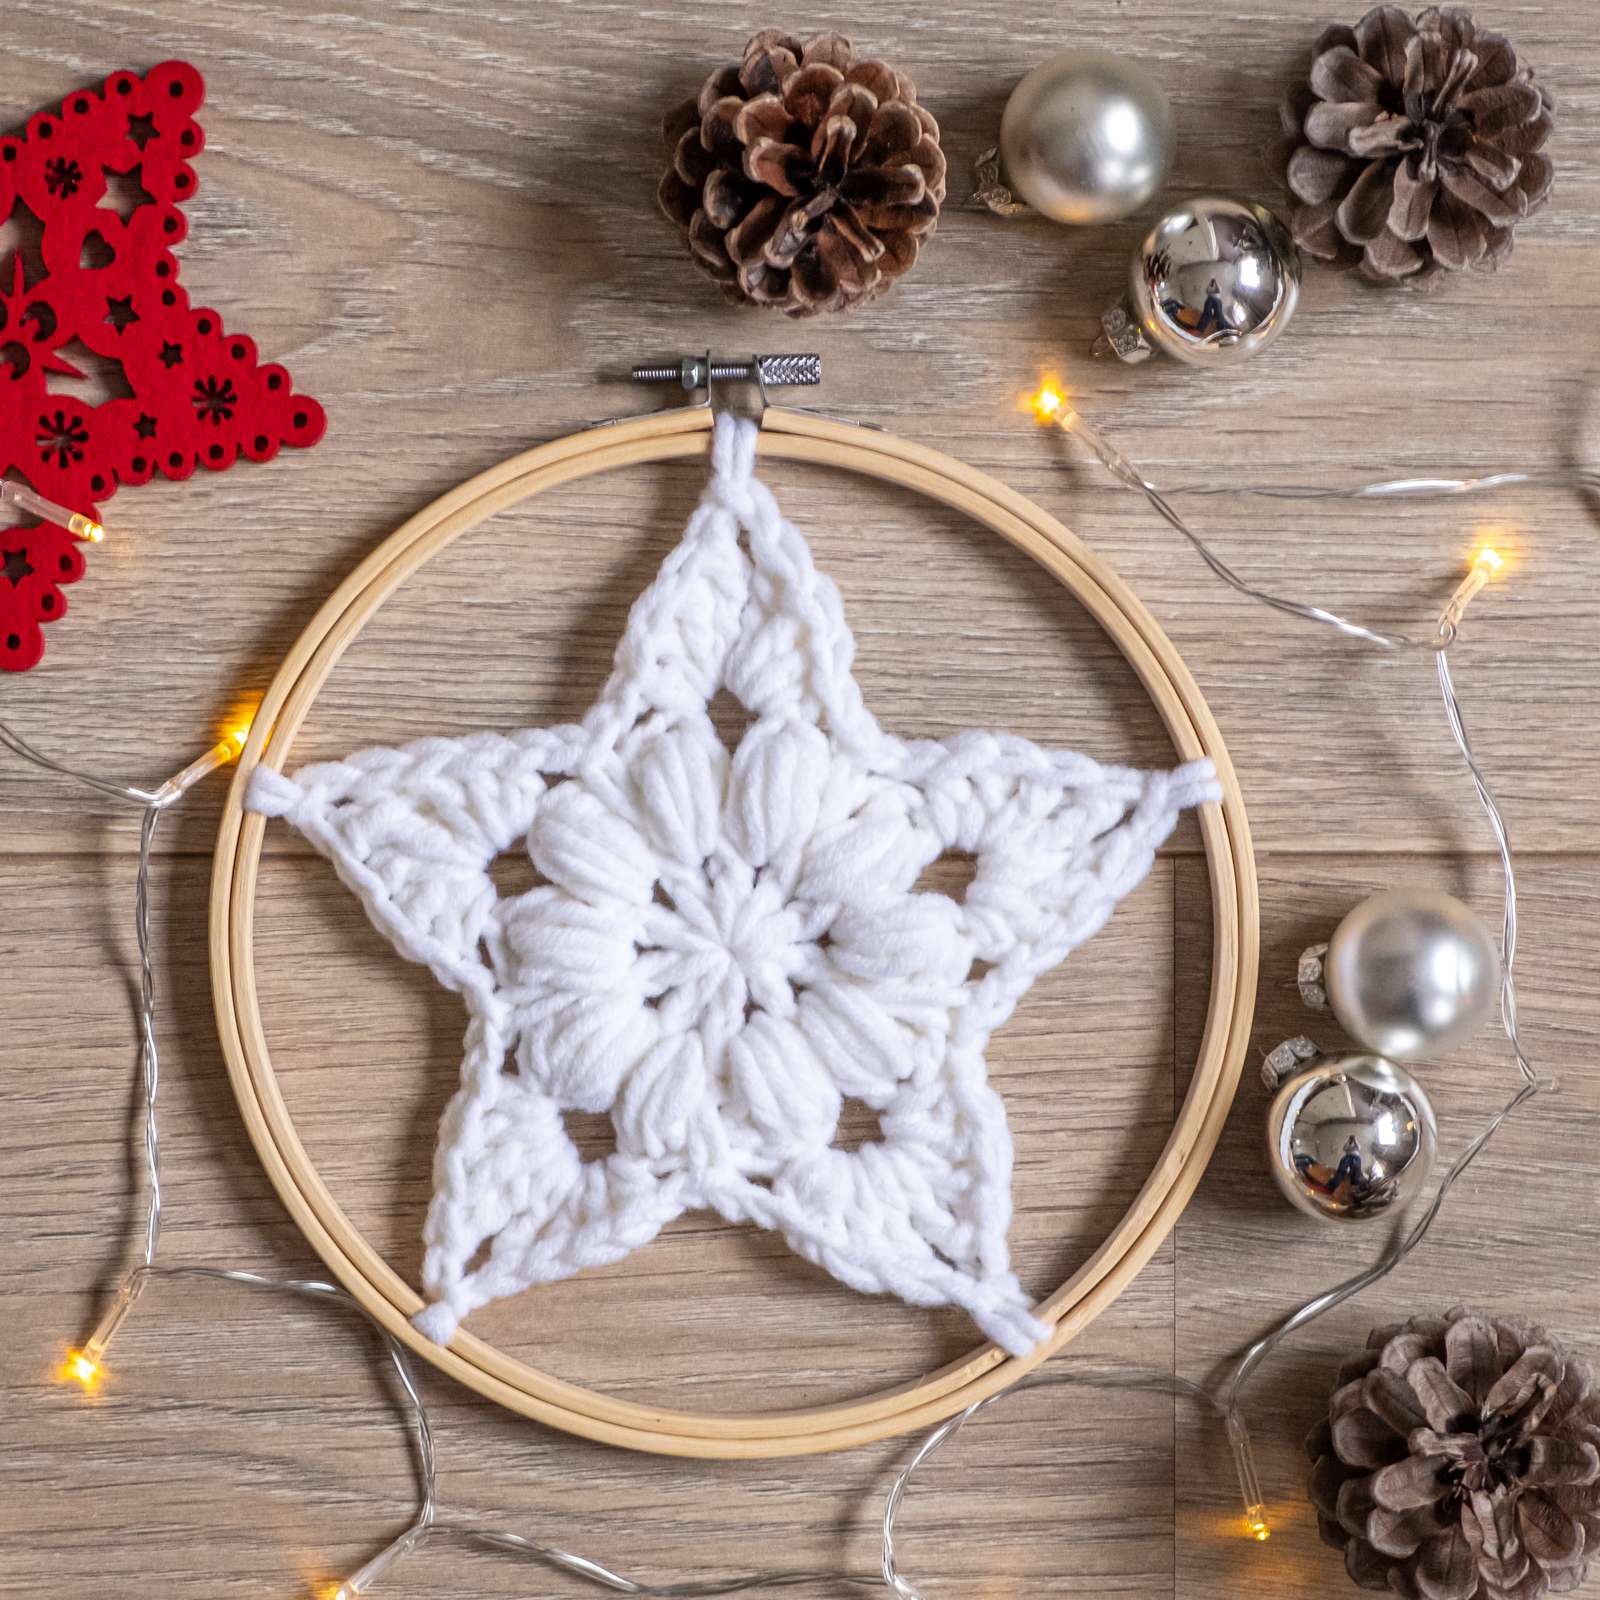
And I had another idea: How about attaching the star to a hoop?
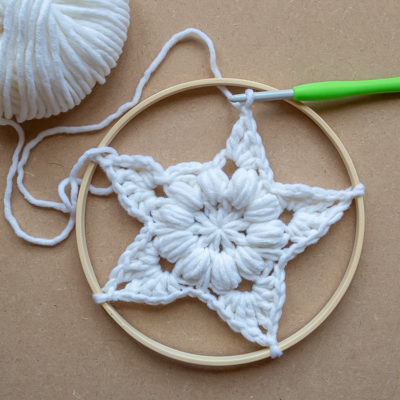
Basically, it’s the same pattern but the crochet star is attached to an embroidery hoop in the final round. There’s a small adjustment to the original design in order to attach the star to the hoop. I will explain it here!
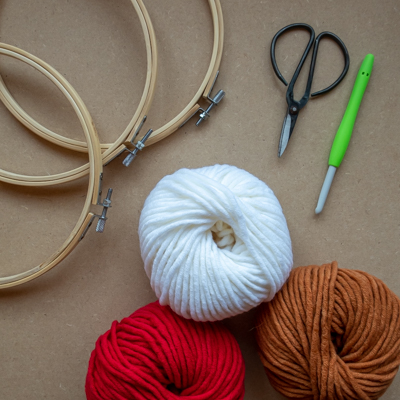
What do you need?
Basically, you need yarn, a hook and an embroidery hoop (or ring). Also, a pair of scissors and a needle.
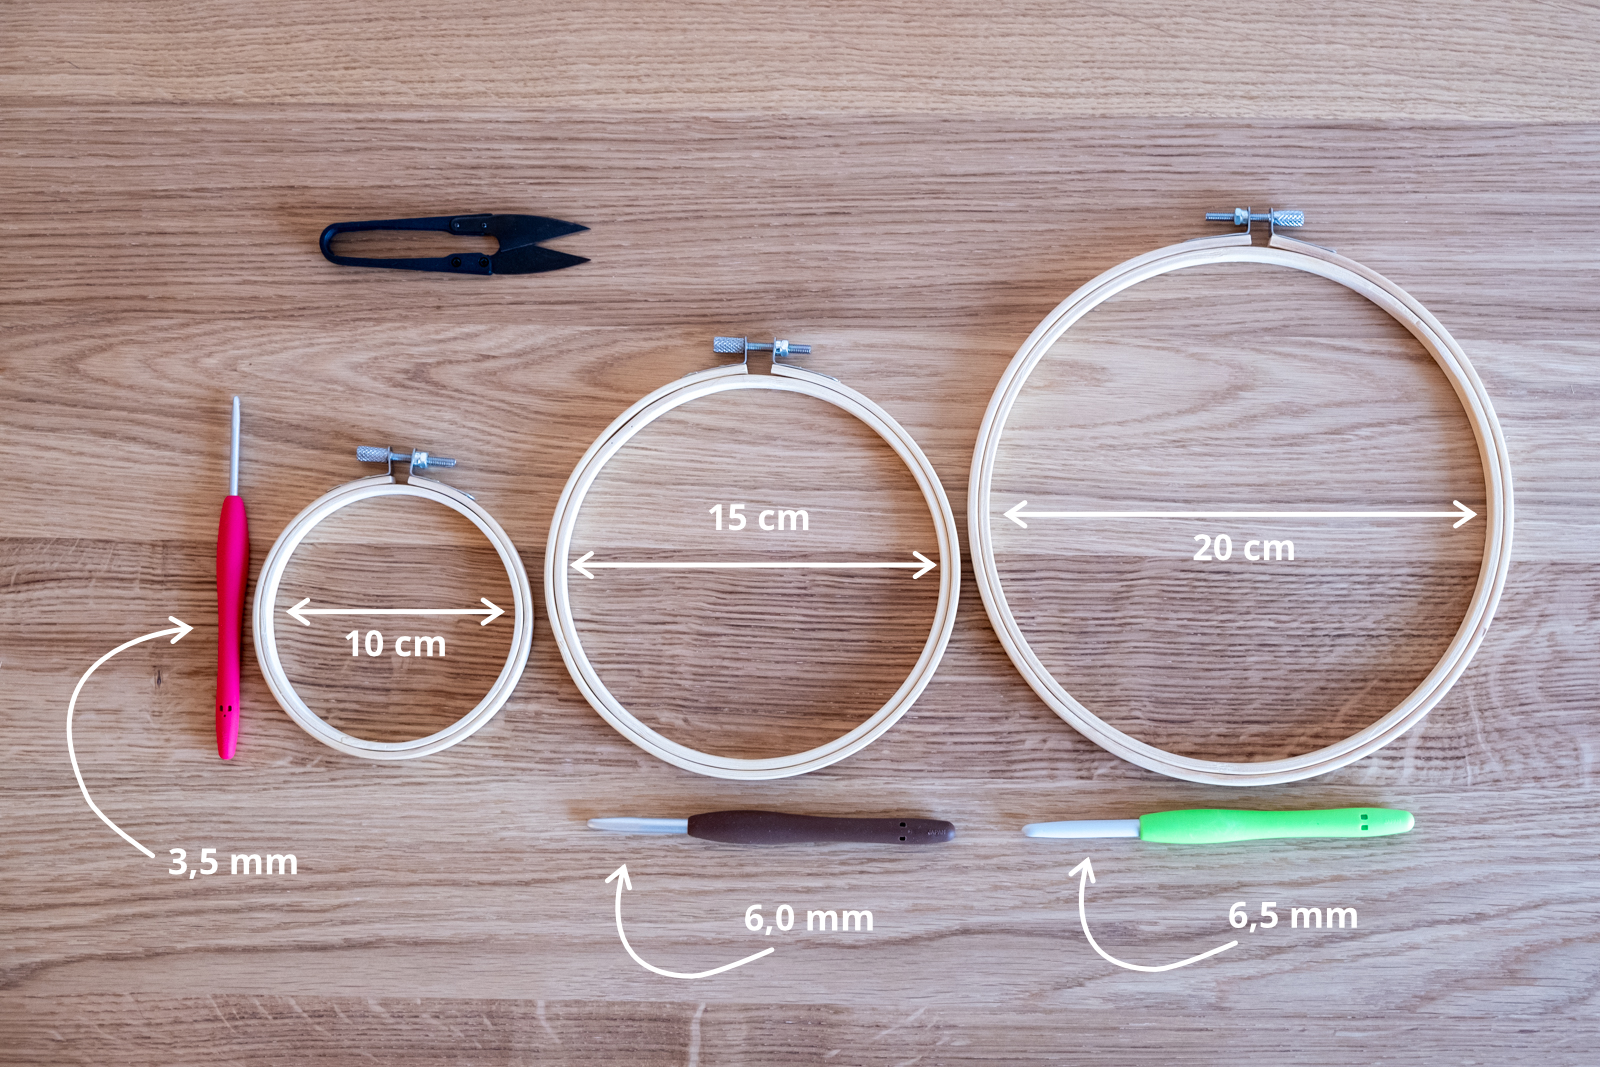
You can use hoops and yarns in different sizes and weights.
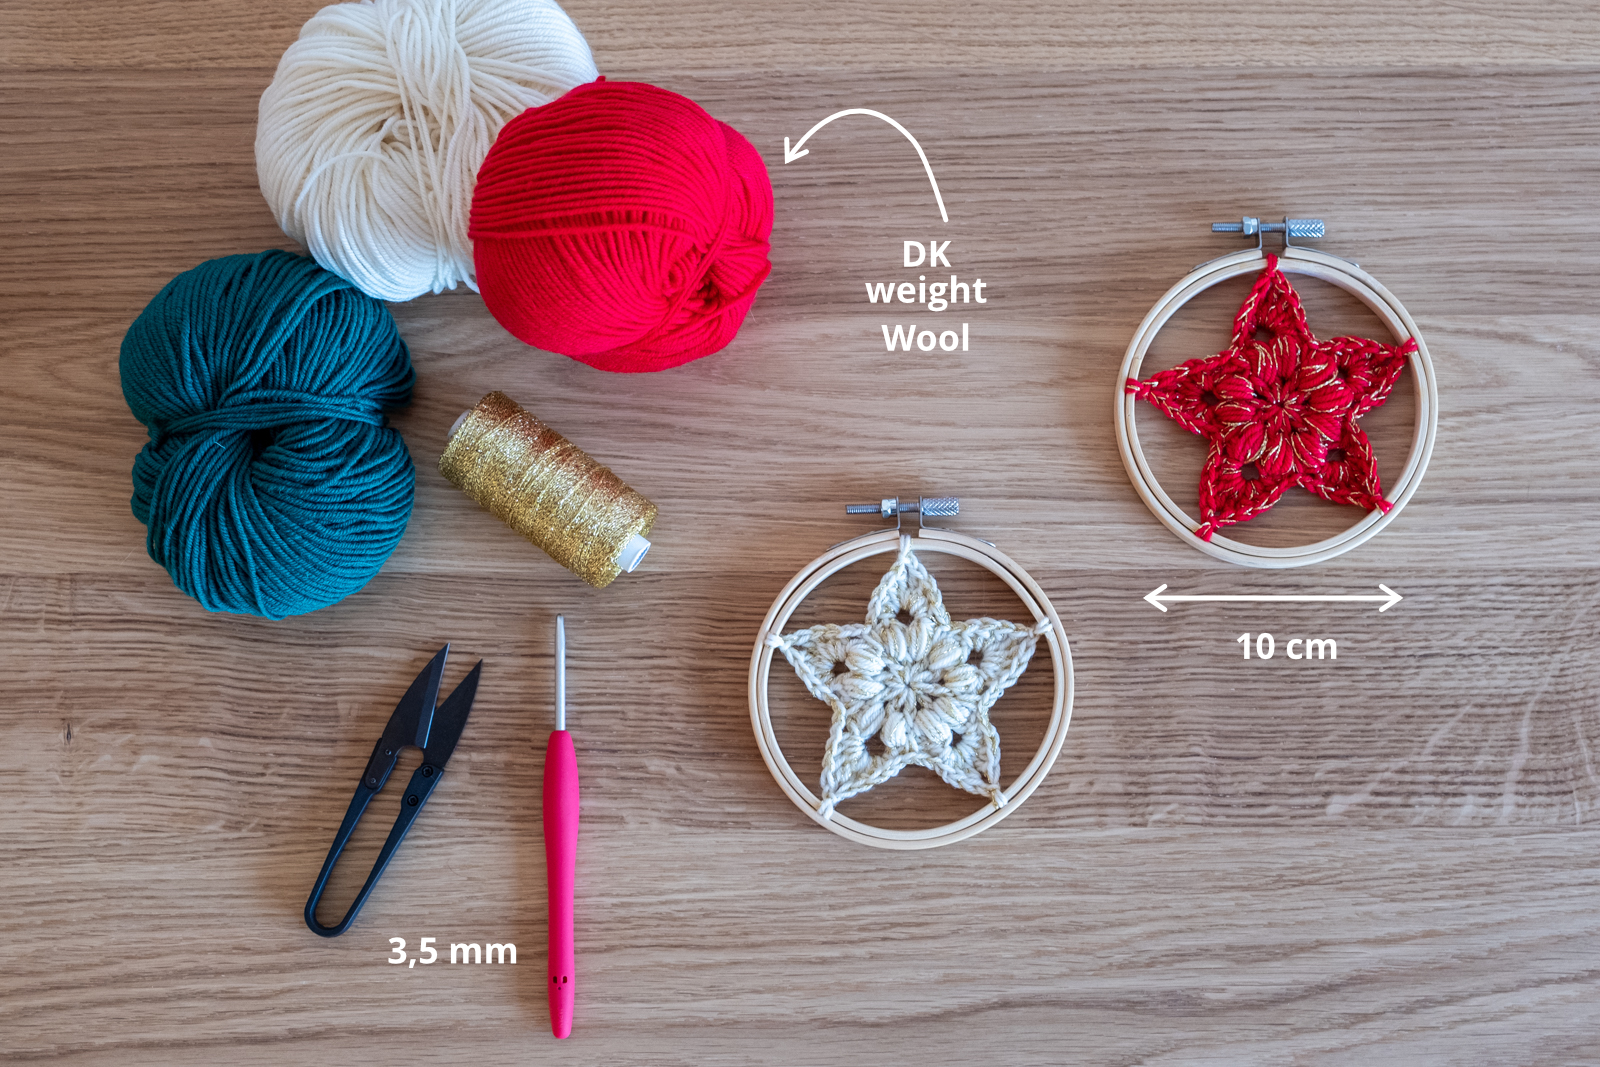
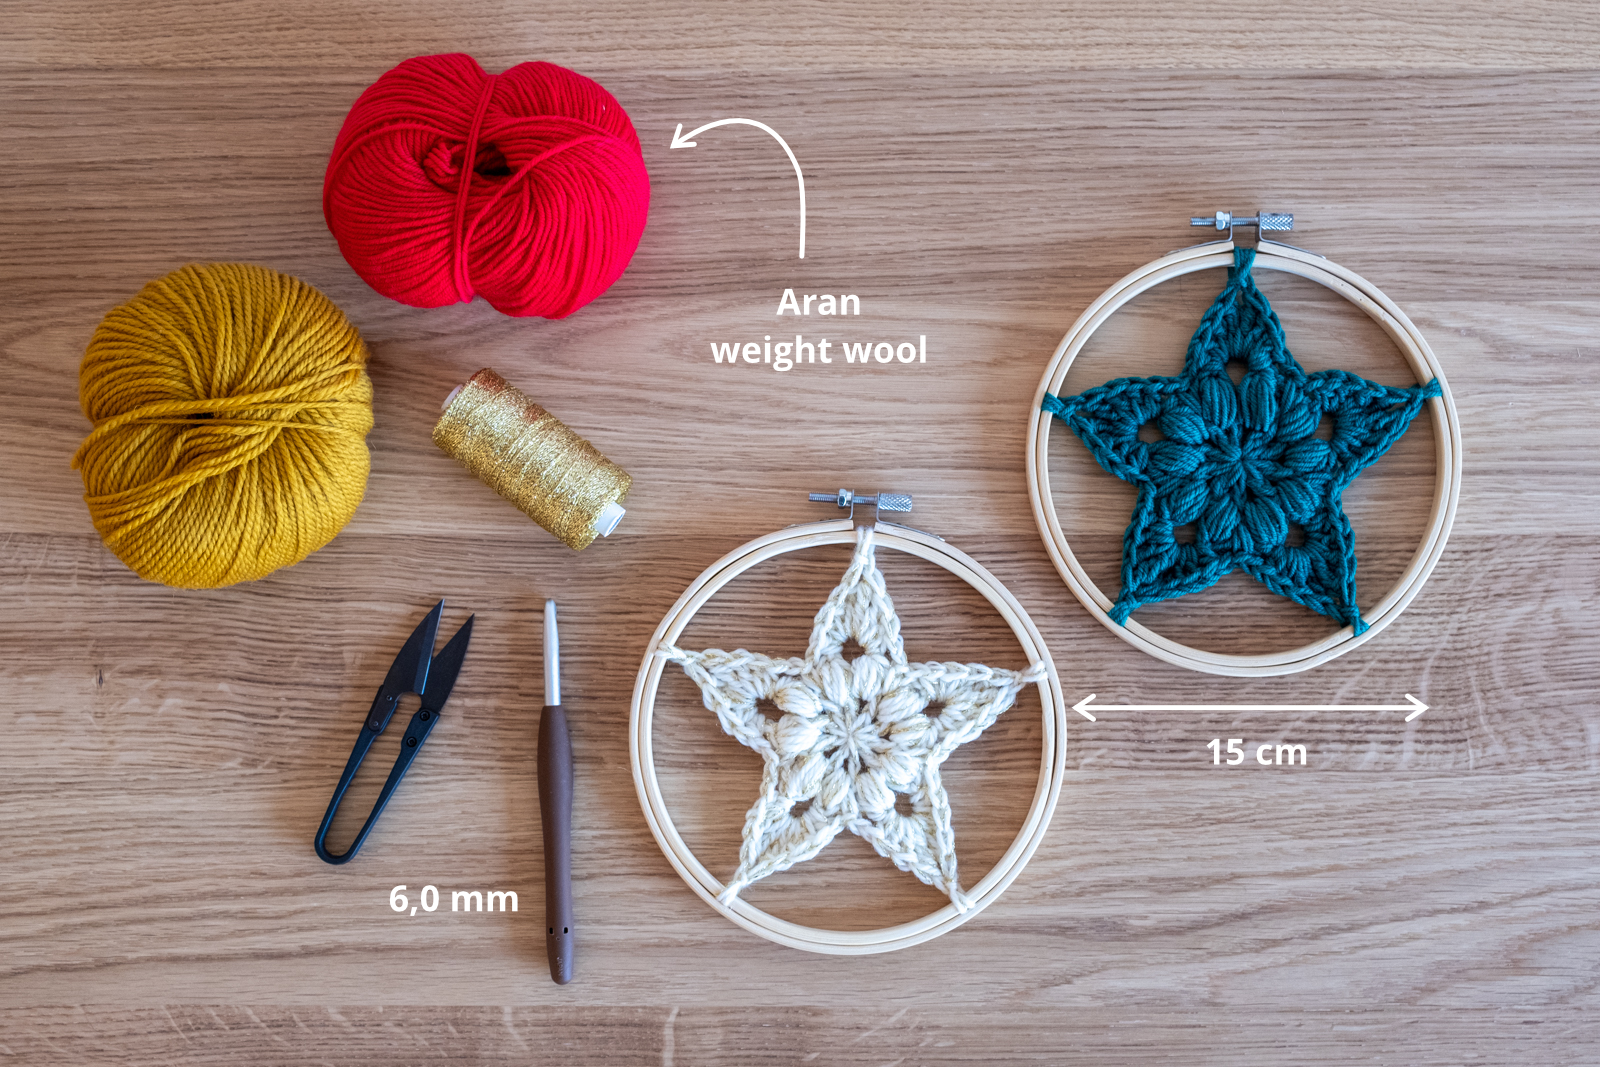
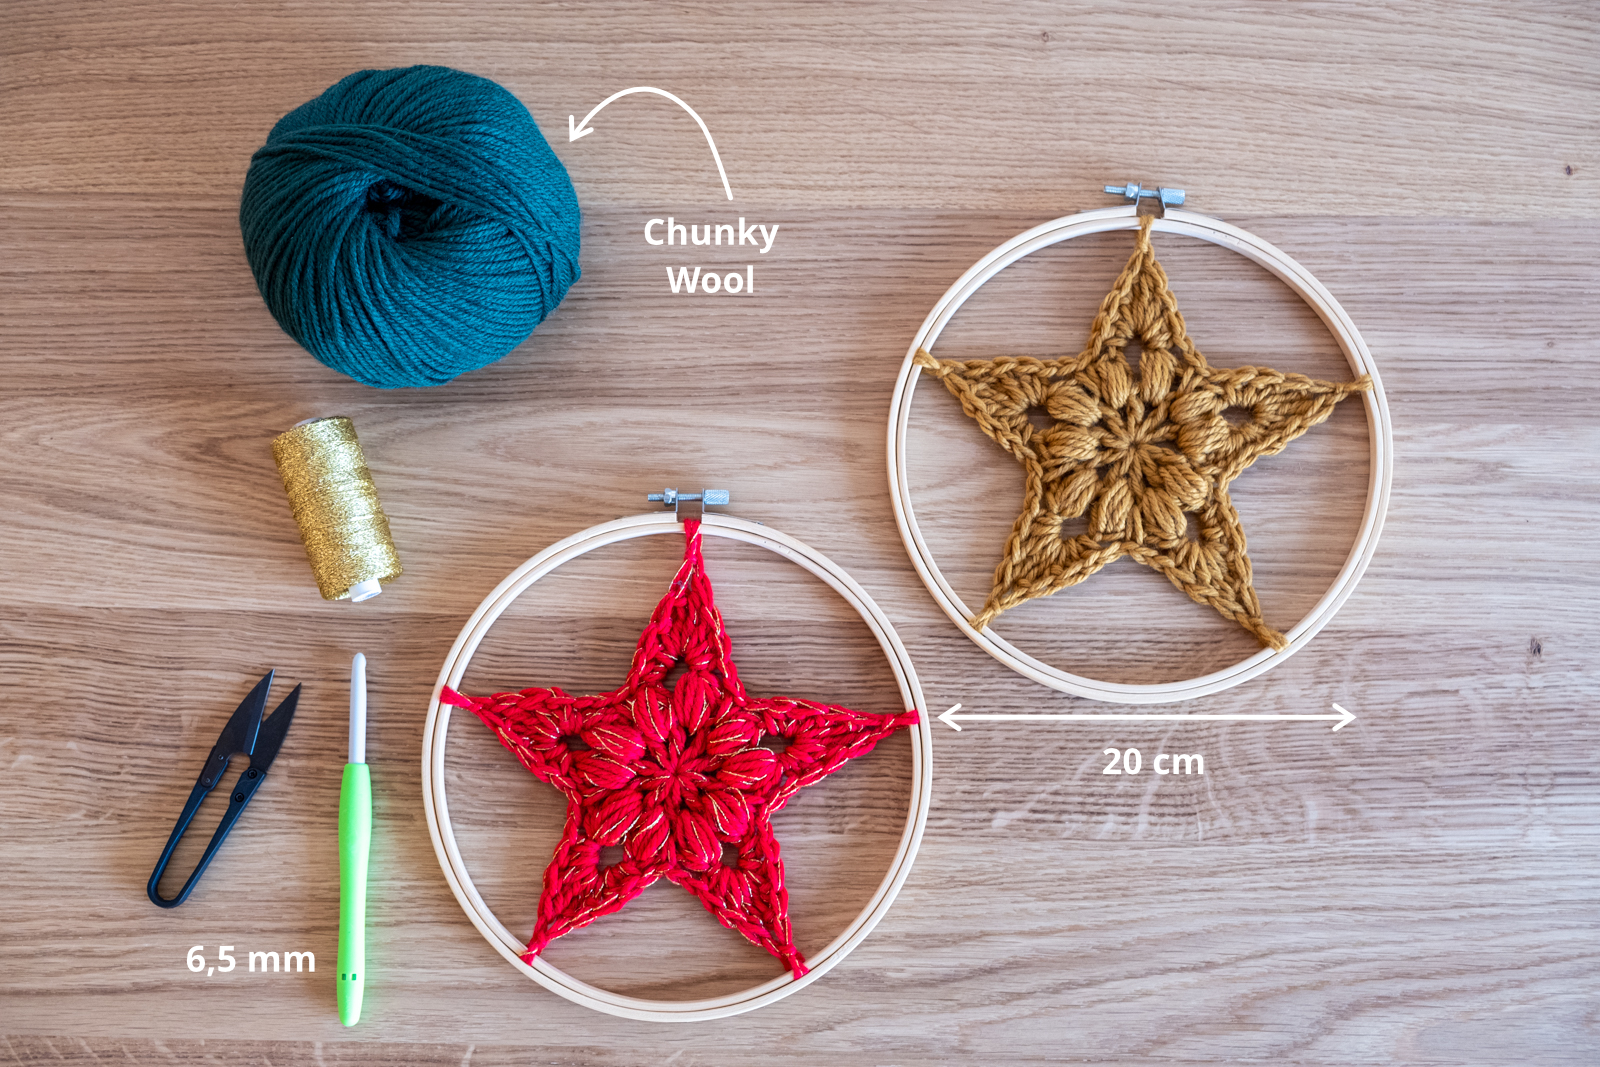
The weight of the yarn combined with the hook size determines the size of the star. I’ve shown examples of different yarn and hook combinations in the original pattern. If you’d like to attach the star to an embroidery hoop, you will have to adapt the size of the star to fit the ring. You can do this by using different yarn weights and hook sizes. You’ll find a few examples in the table below.
| Diameter Hoop | Yarn Weight | Yarn Quantity* | Hook Size |
| 10 cm / 4 inch | DK | 5g / 12 m | 3,5 mm / E-4 |
| 15 cm / 6 inch | DK held double | 10g / 24 m | 6,0 mm / J-10 |
| 15 cm / 6 inch | Aran held double with metallic thread | 5g / 10 m | 6,0 mm / J-10 |
| 20 cm / 8 inch | Chunky | 12g / 15 m | 6,5 mm / K-10½ |
| 20 cm / 8 inch | Bulky | 18g / 17 m | 6,5 mm / K-10½ |
Be aware that the examples above work for me and my tension. You may have to experiment a little to get the best result. The star should have a rather tight fitting in the ring (meaning you have to ‘stretch’ the star a bit to make it fit). If the star is too big, it’ll be wobbly.
Tip: You can play a little with the size of the star by varying the height of the puff stitches in round 2!
I used various yarns by Rico Design for the stars that you see in this blog post. I searched for yarn in certain colours and where these particular colours were available in different yarn weights (to accommodate the different hoop sizes). And the yarn had to be wool because I like the texture of the finished stars better in wool compared to cotton. But that’s a personal preference. The yarns that I used are:
- Riso Essentials Big (for the tutorial and the red stars without hoop, 50g/48m)
- Rico Essentials Mega Wool Chunky (100g/125m)
- Rico Essentials Soft Merino Aran (50g/100m)
- Rico Essentials Merino DK (50g/120m)
For an extra festive effect, I added a fine gold thread to some of the stars. Mine was so fine that I didn’t adjust the hook size and I just held the thread and my yarn double.
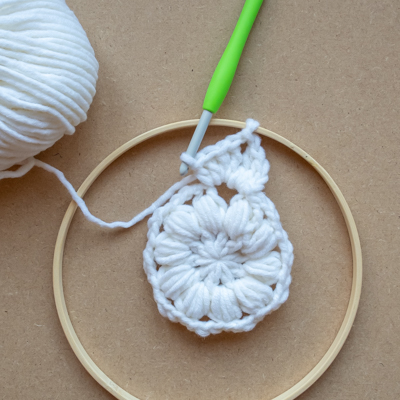
Here are a few examples:
Let’s get started!
Make sure that you have your materials ready and remove the outer (adjustable ring) of the embroidery hoop. Put it aside for now.
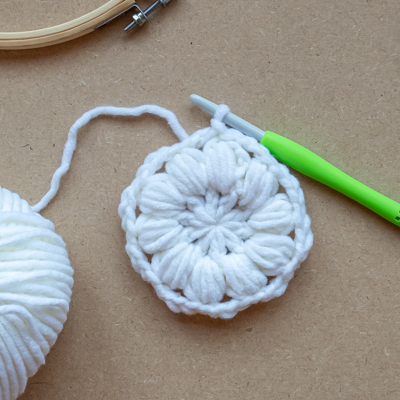
You start by working the first two rounds of the pattern just like the original pattern. The third round is worked a little bit differently and I will guide you through it with step-by-step photos.
Click to go to the pattern and crochet diagram!
 |  | 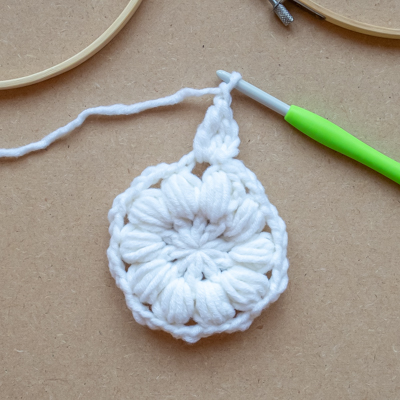 |
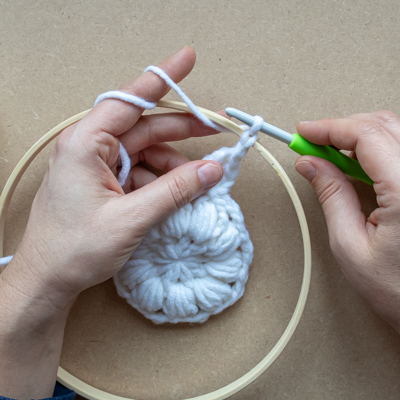
| Prepare your materials. Remove the outer (adjustable ring) from the hoop. | Work the first two rounds according to the original pattern. | Start round 3: Sl st in the next ch2-sp, ch3 (counts as first dc), in the same ch2-sp (dc, tr, ch). |
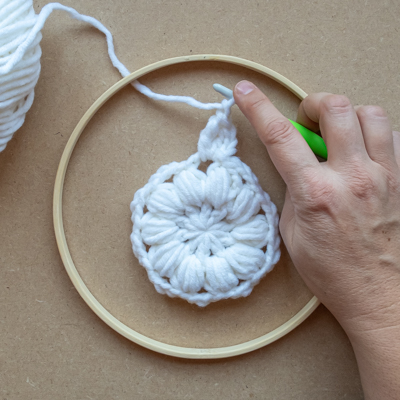 | 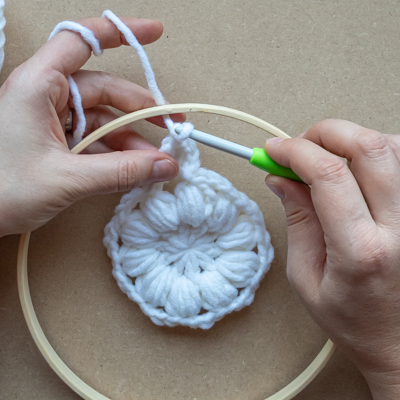 |  |
| Place the inner ring around your work making sure the working yarn is behind the ring. | Pick up your working yarn. | Make a sl st around the hoop. |
 |  |  |
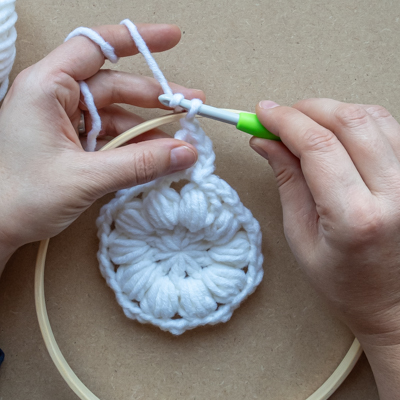
| The completed sl st with the working yarn still behind the ring. | Bring your working yarn through the ring to the front of your work again. | Pick up your working yarn again. |
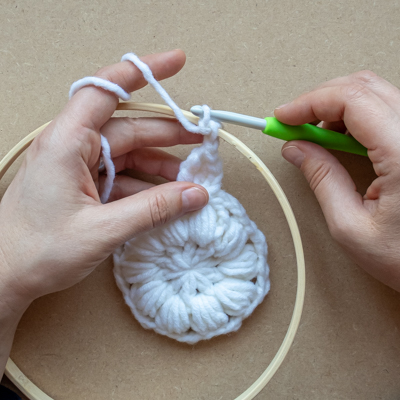 |  |  |
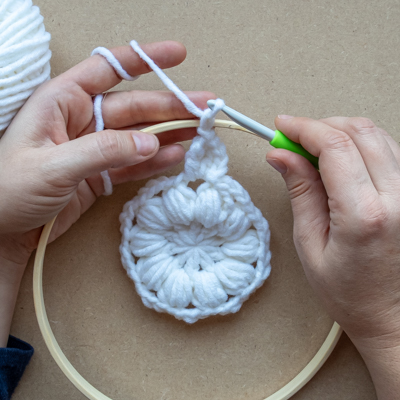
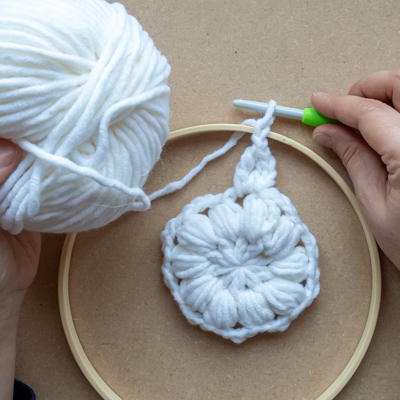
| And ch1. | Finish the tip of the star by working (tr, 2dc, hdc) into the same ch-2 sp. Then ch1, sp st in the next ch2-sp, ch1. | Work the next three tips of the star as follows: in the next ch2-sp (hdc, 2dc, tr, ch, sl st around the ring, ch, tr, 2dc, hdc), ch1, sp st in the next ch2-sp, ch1, repeat from * two more times. It’s easiest to keep the tips together on one part of the ring. |
 |  | 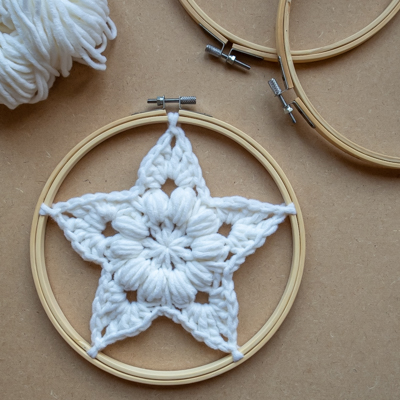 |
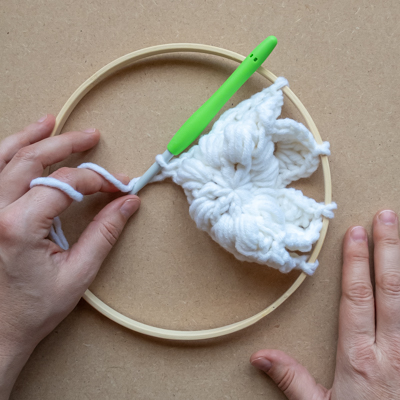
| Start the last tip: in the next ch2-sp (hdc, 2dc, tr, ch. Before finishing the last tip distribute the other tips evenly around the ring. Now finish it: sl st around the ring, ch, tr, 2dc, hdc), ch1, sp st in the next ch2-sp, ch1, hdc in the next ch-2 sp and close the round. | Cut your yarn and weave in the tails. | Place the outer (adjustable ring) around the ring with your star and make sure the tips of the star are evenly distributed around the ring before tightening the screw at the top. You’re finished! |
Make your own!
Making these stars was a lovely way to move into a festive mood! They are a rather quick make and a perfect companion for watching a Christmas movie!
I’m very pleased with how they’ve turned out! I hope you like them too and that you’ll share your Big Little Stars with me on social media! I’m always very happy to see your creations!
Love this tutorial?
Pin it for later!

2 Comments
E. Hansen (Utah)
17th September 2023 at 19:03Just found your site this morning. Such a cute idea! Was surprised to discover that you incorporate the hoop as you go, rather than tacking it on afterward. That part will take a little getting used to, I suspect! Appreciate the tutorial and pattern!
judith
22nd September 2023 at 15:27Thank you for commenting! I’m glad you like the stars! Attaching the stars directly to the hoop is a bit fiddly in the beginning, but once you’ve made a few it’s easy!