
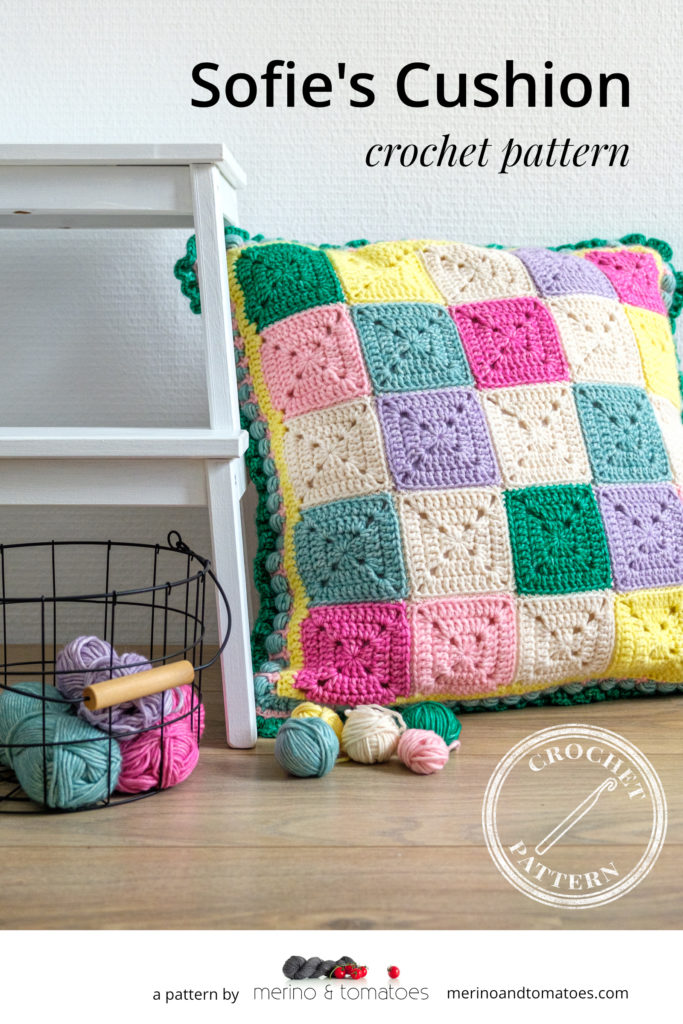
Once upon a time… two girls moved to a new house and got a new bedroom to decorate. Their mother asked me if I would like to make them something for their new rooms. I said yes and started to think about what to make. I decided on a crochet cushion. The result is the pattern for Sofie’s Cushion and it’s available now on Ravelry.
It sounds like it’s a long time ago… and to be honest: it is. I think they moved into their new house almost three years ago. Oops.
Anyway, today I can finally show you the pattern and share a ton of photos with you all!
The Idea
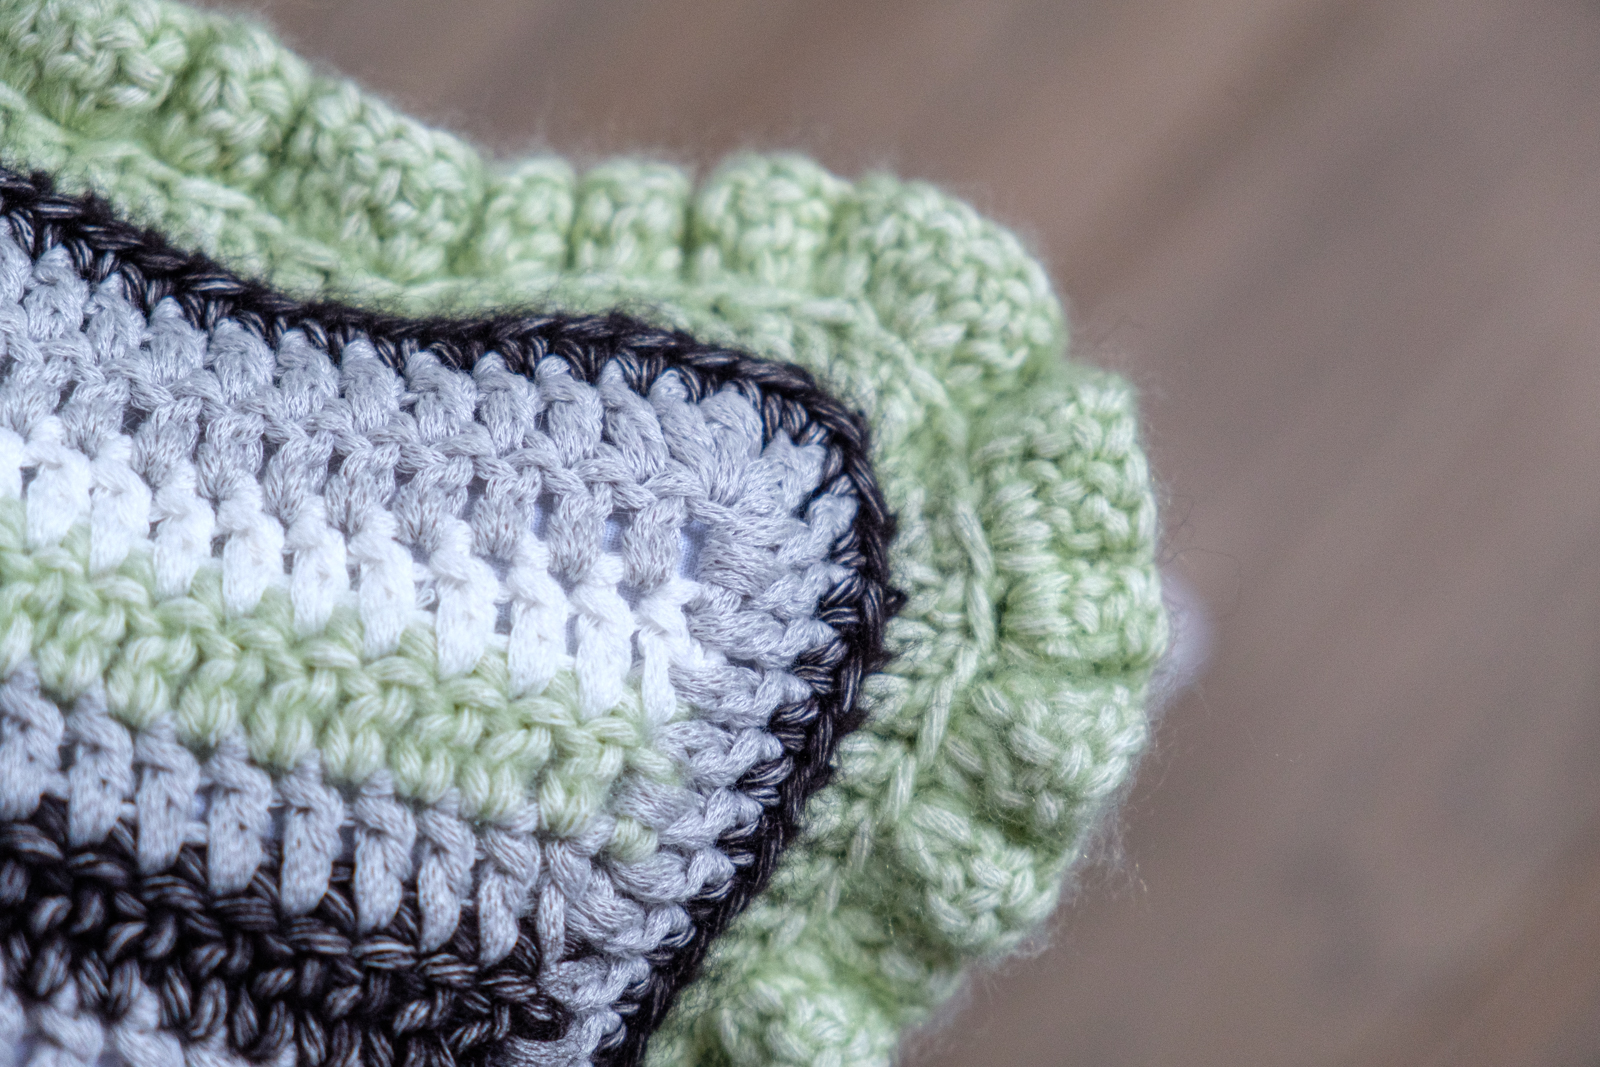
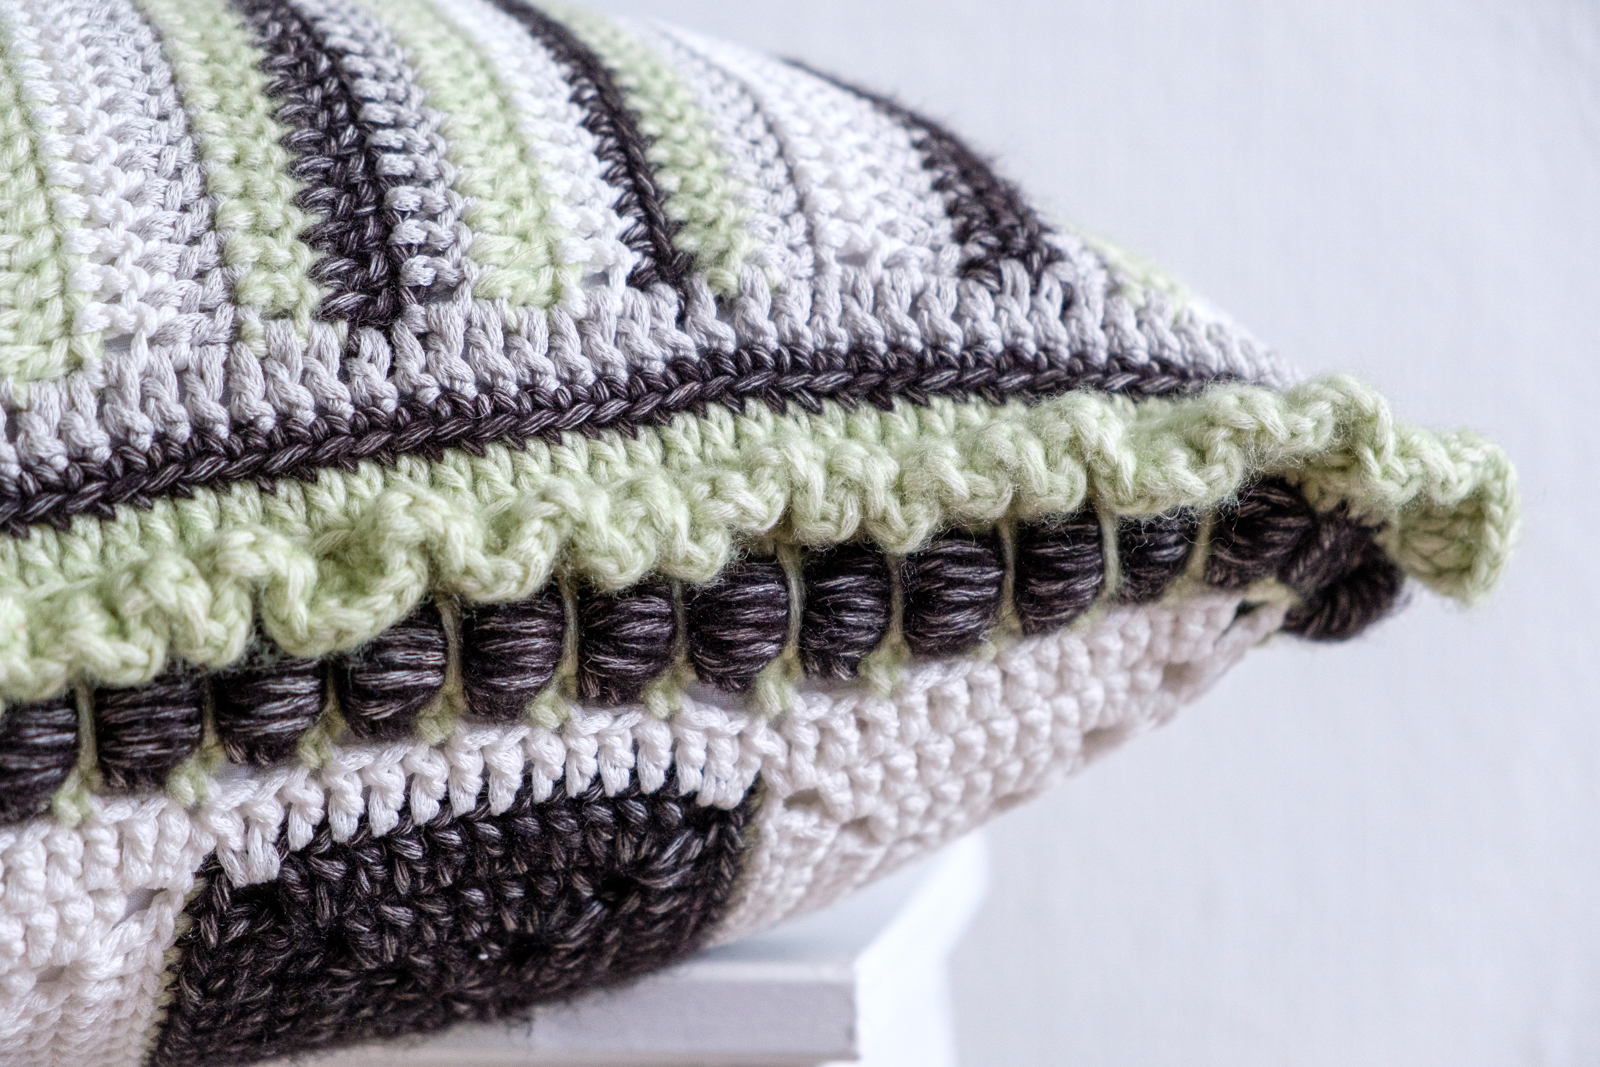
Let’s start at the beginning! Do you remember the Caterpillar Cushion? I used the wrap stitch to create a textured circle in the squares on the front of the pillow. I really like the effect of that stitch and I wanted to use it again but differently. I decided to include it on the border of the cushion this time. I wanted to keep the rest of the pattern plain and simple and decided to use basic squares and stripes.
The Colour Palette
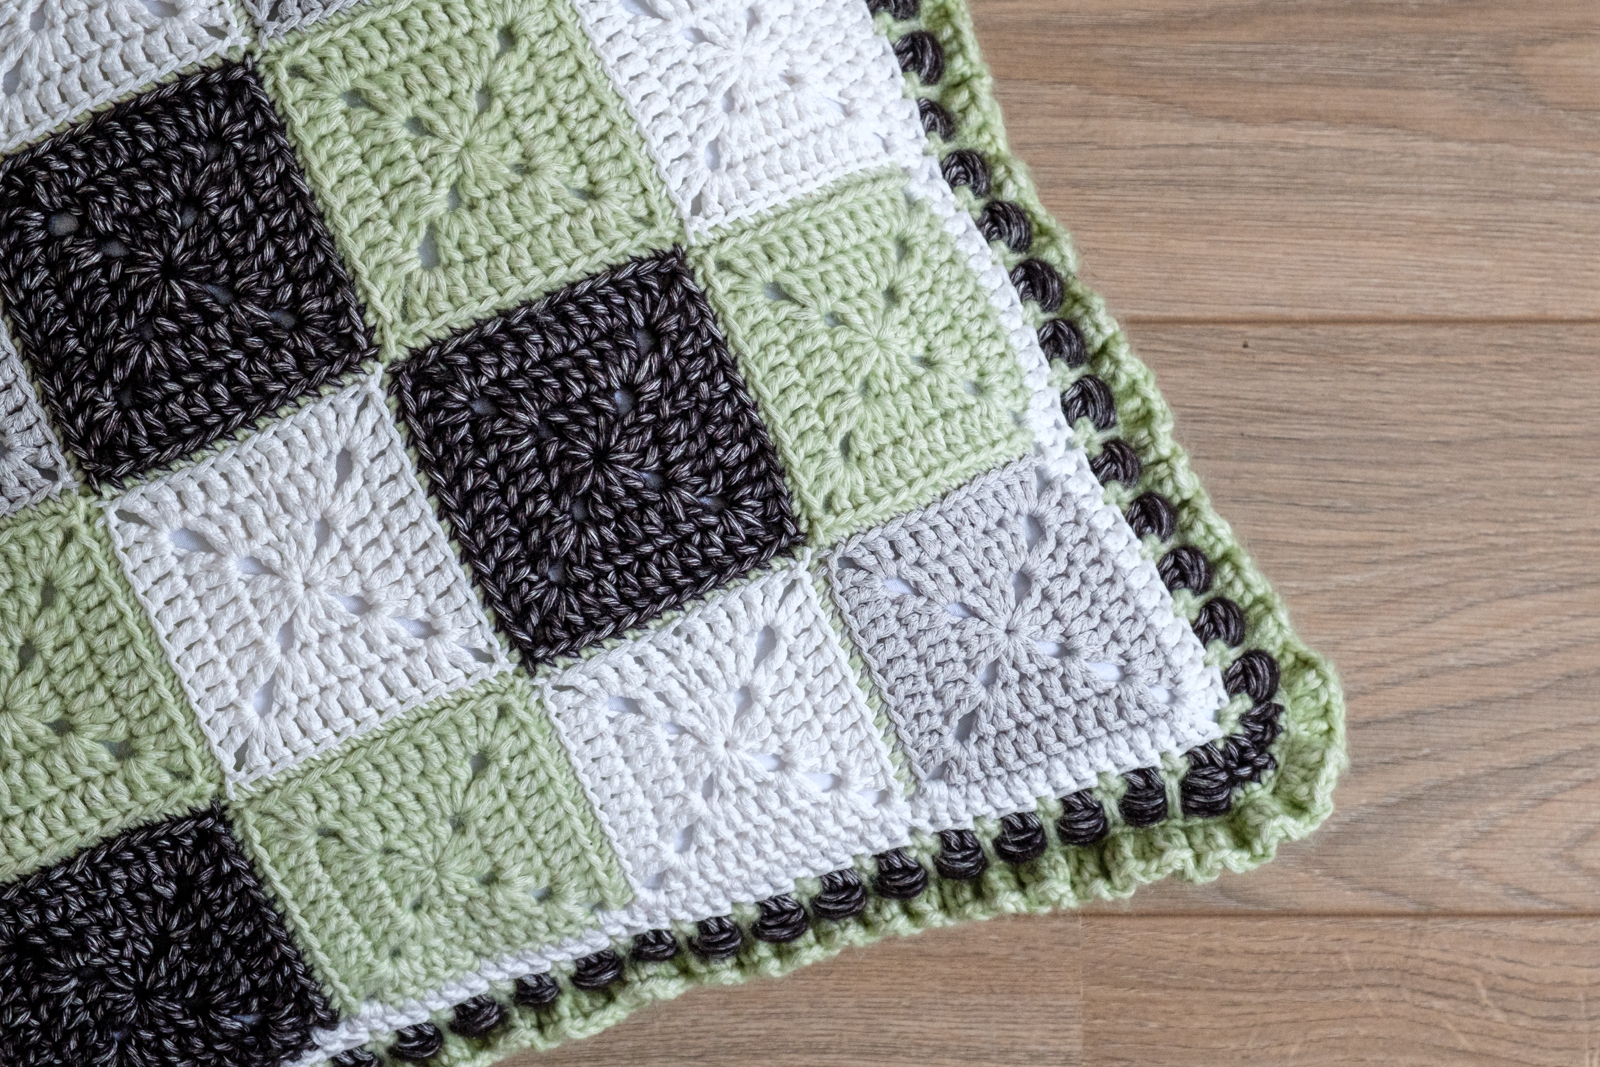
Both girls had picked one accent colour to paint a wall in their new bedroom and I used the sample cards of that paint as my starting point. The mint that was picked by Sofie (yes, that’s how the cushion got its name) was going to be combined with black.
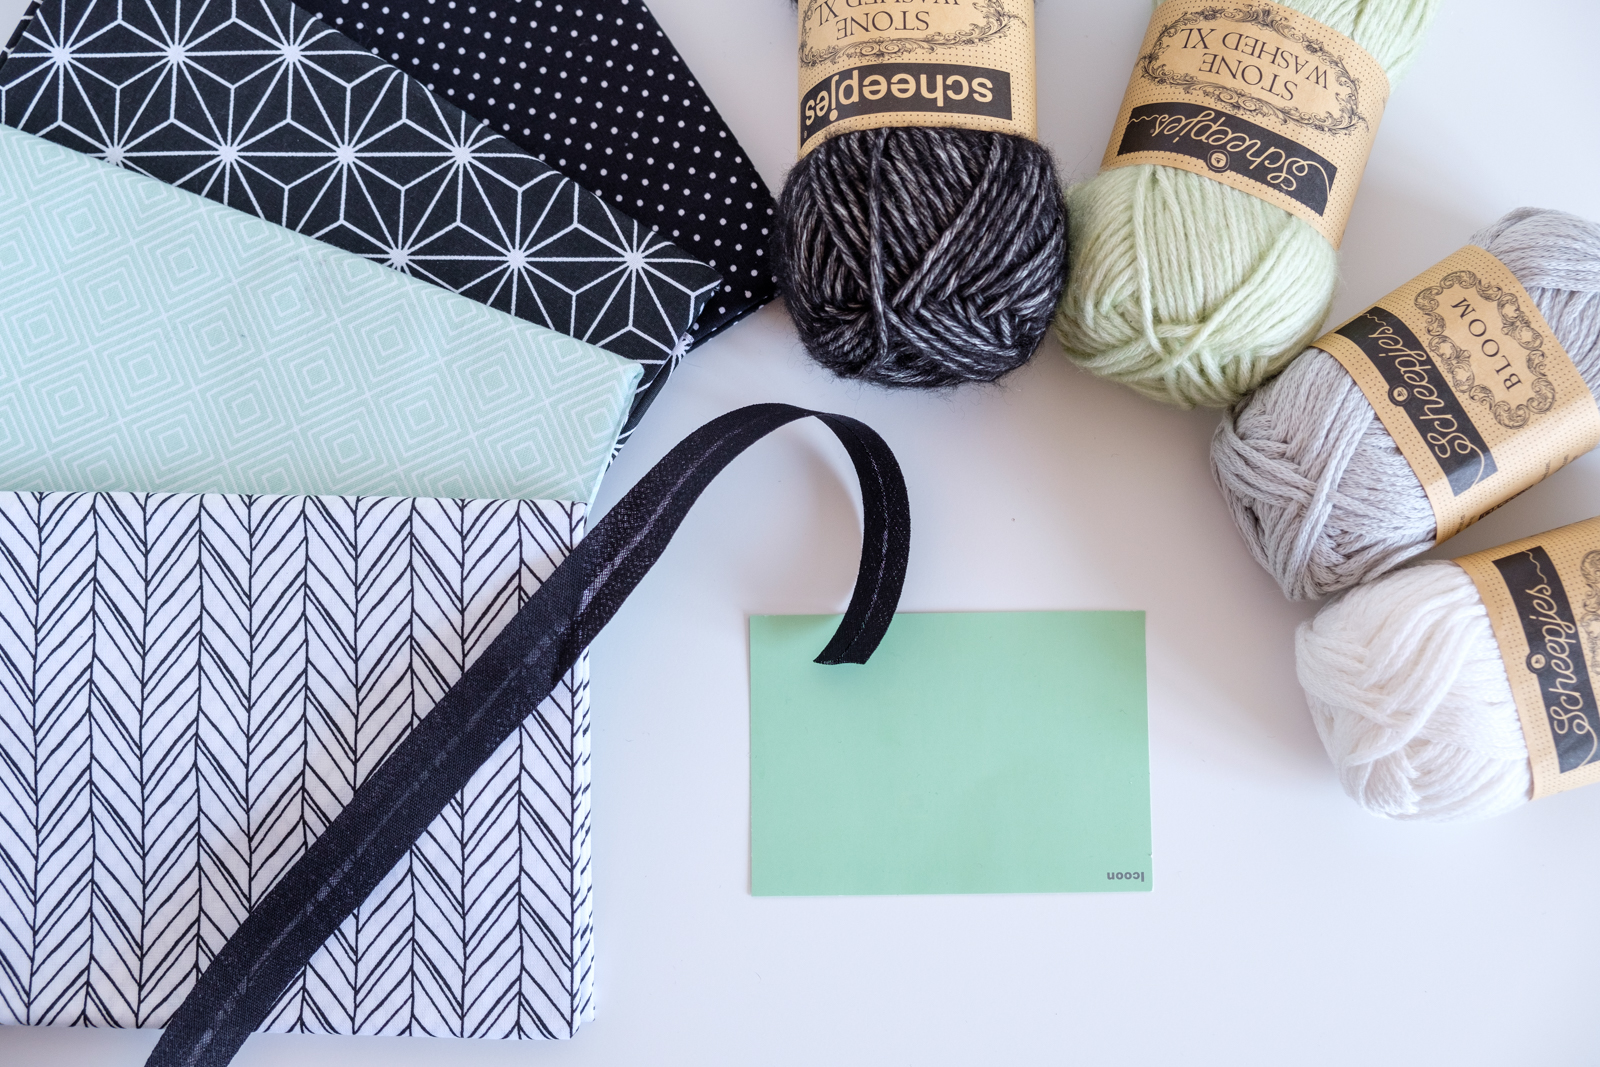
For the cushion, I chose a soft mint, a black, a grey and a neutral yarn. I combined them with fabrics in similar colours.
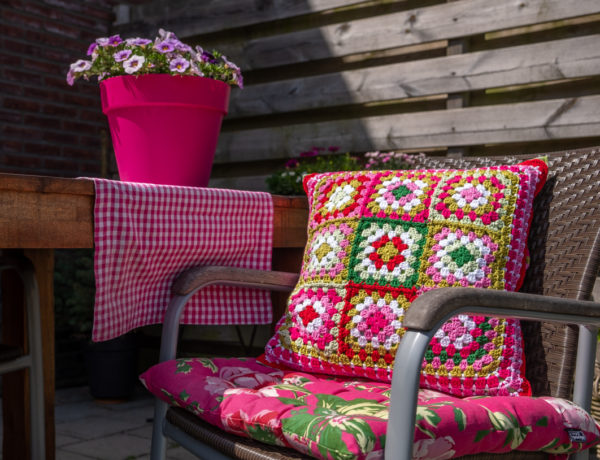
The second version is a lot more colourful! Click here to see that one!
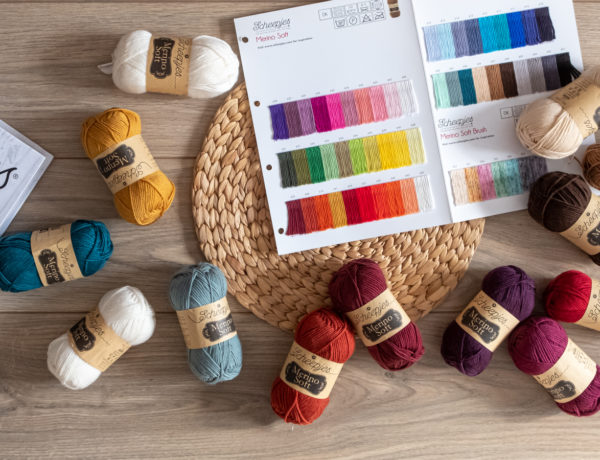
The Yarn
One of my favourite yarns to work with for these kinds of projects is Scheepjes Stonewashed XL. It’s an Aran weight yarn and the stonewashed effect makes it a little more subtle. Black is not entirely black.
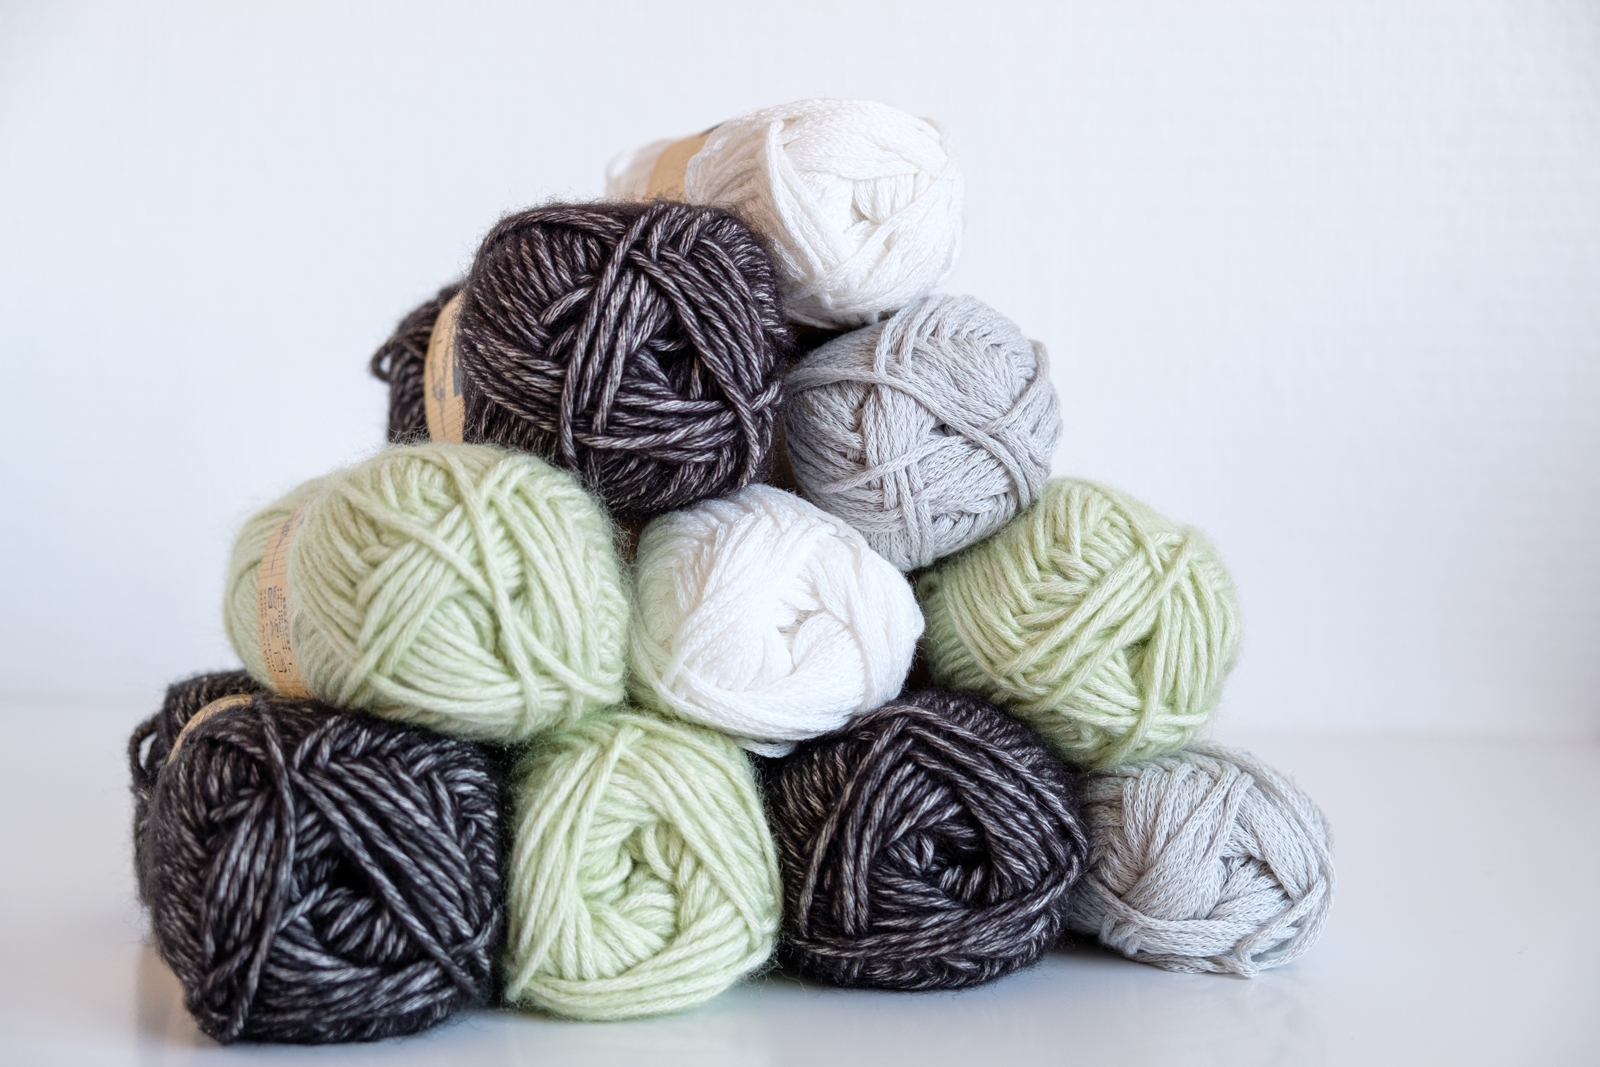
For Sofie’s Cushion, I combined two colours of Stonewashed XL with two colours of Scheepjes Bloom. Both yarns have a completely different look which adds texture and interest to the pillow. Especially since I’m only using four colours.
The colours are Black Onyx (843) and New Jade (859) in Stonewashed XL and Old Lily (422) and Daisy (423) in Bloom.
The yarn for Sofie’s Cushion is kindly provided by Scheepjes.
The Construction
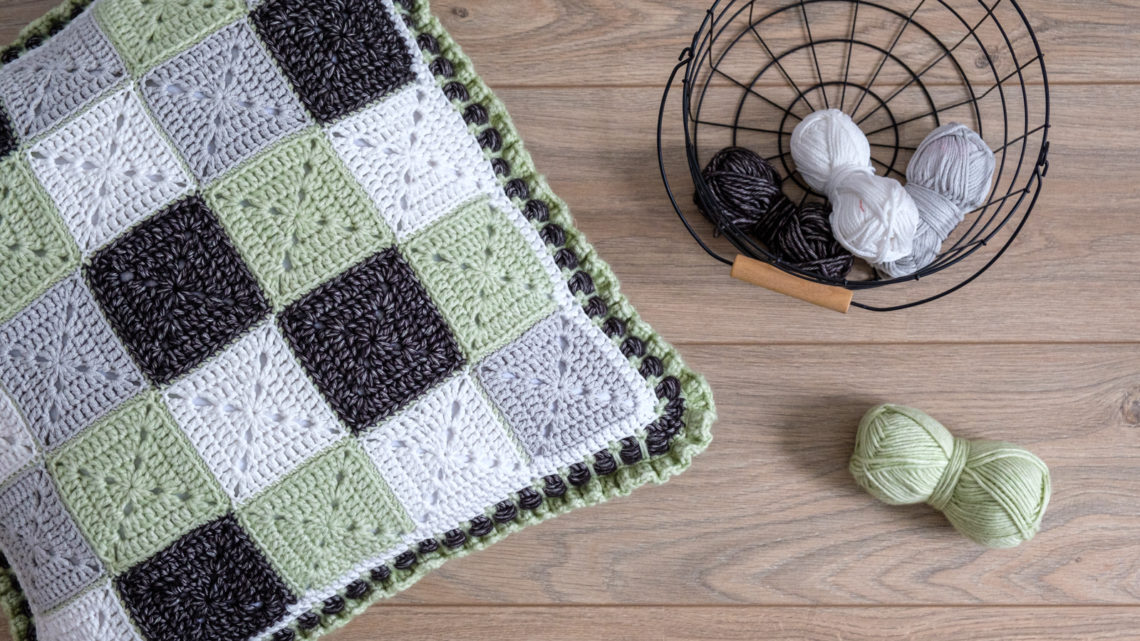
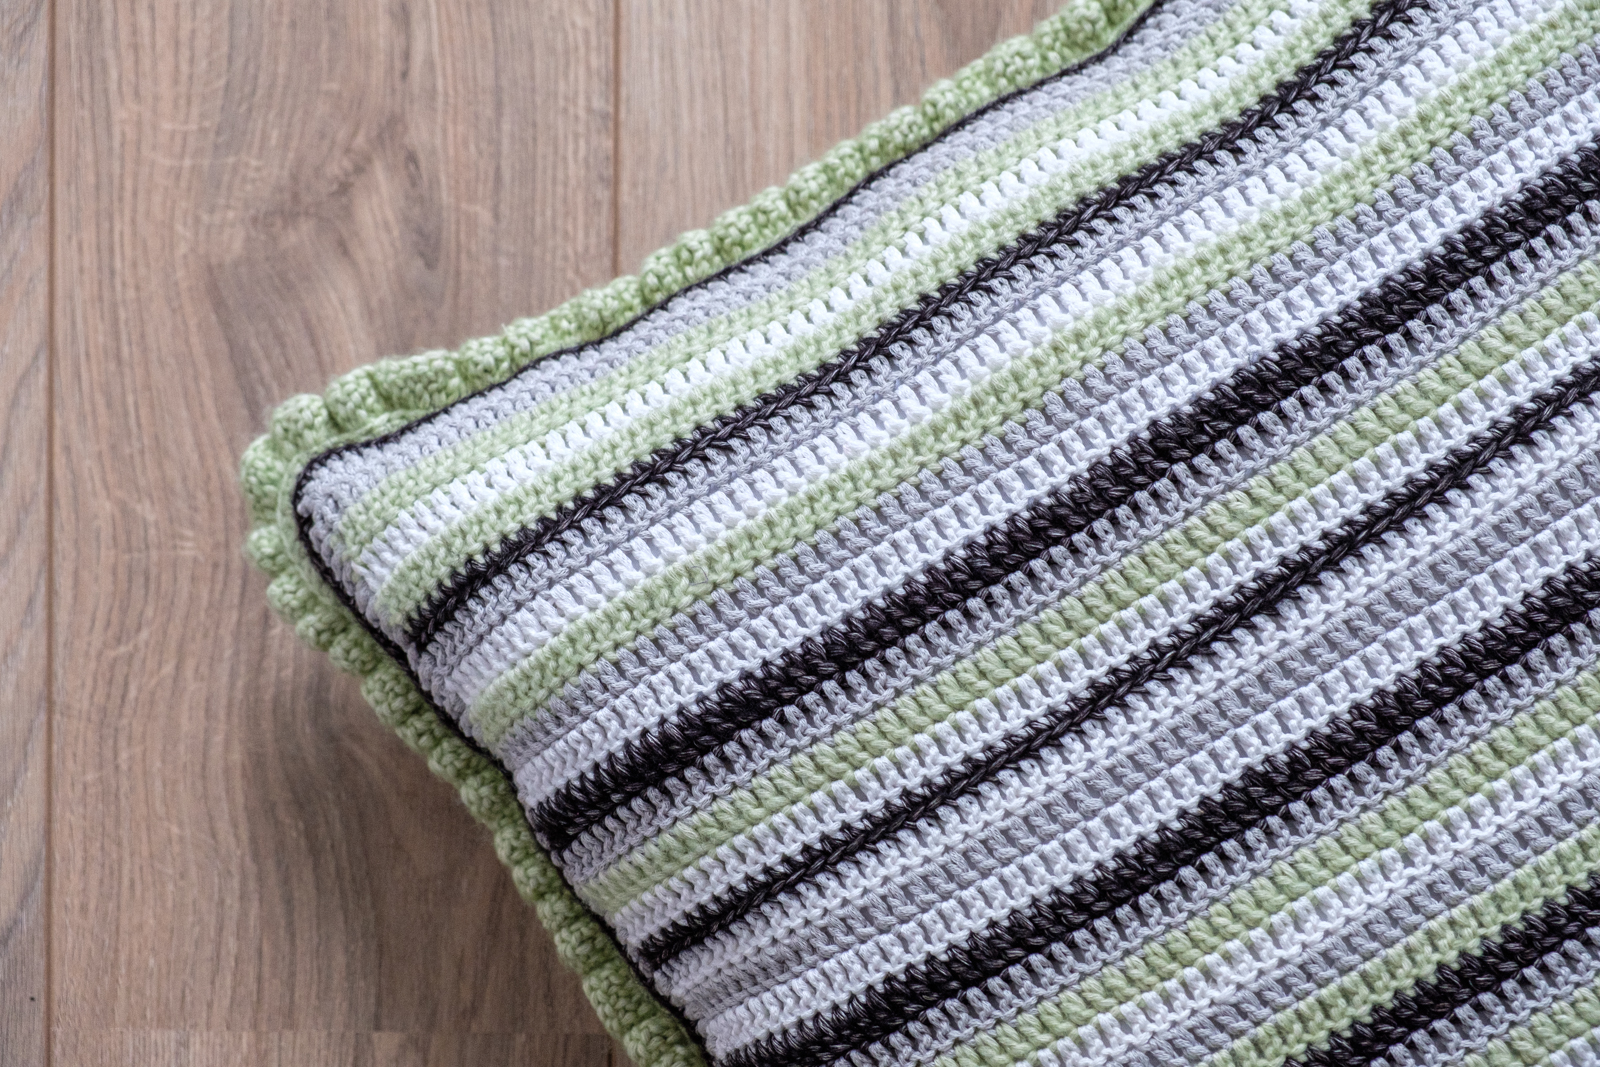
Sofie’s Cushion has a crochet front and back panel. Both panels are made separately and then joined with a ruffle border. The front panel is mainly made up of basic and plain granny squares.
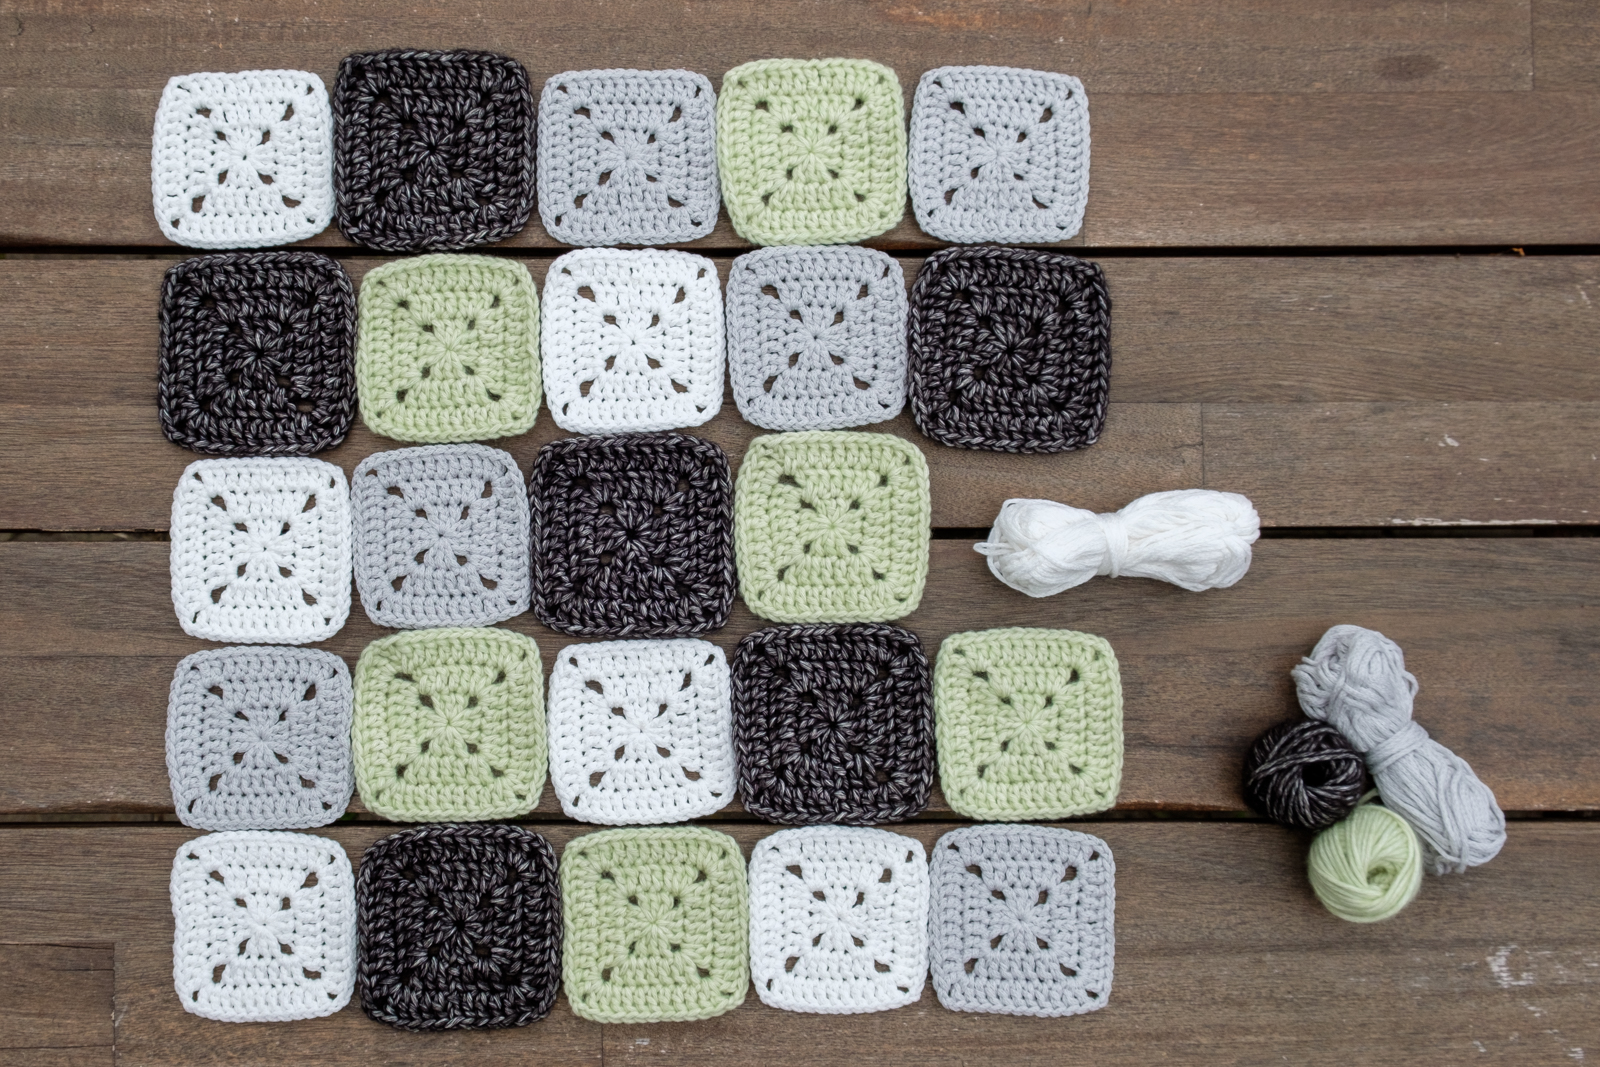
I needed 25 squares for the front panel and I started by making six squares of each colour resulting in 24 squares. I then laid them out on a table to decide on the colour order and to see what colour the last square should be.
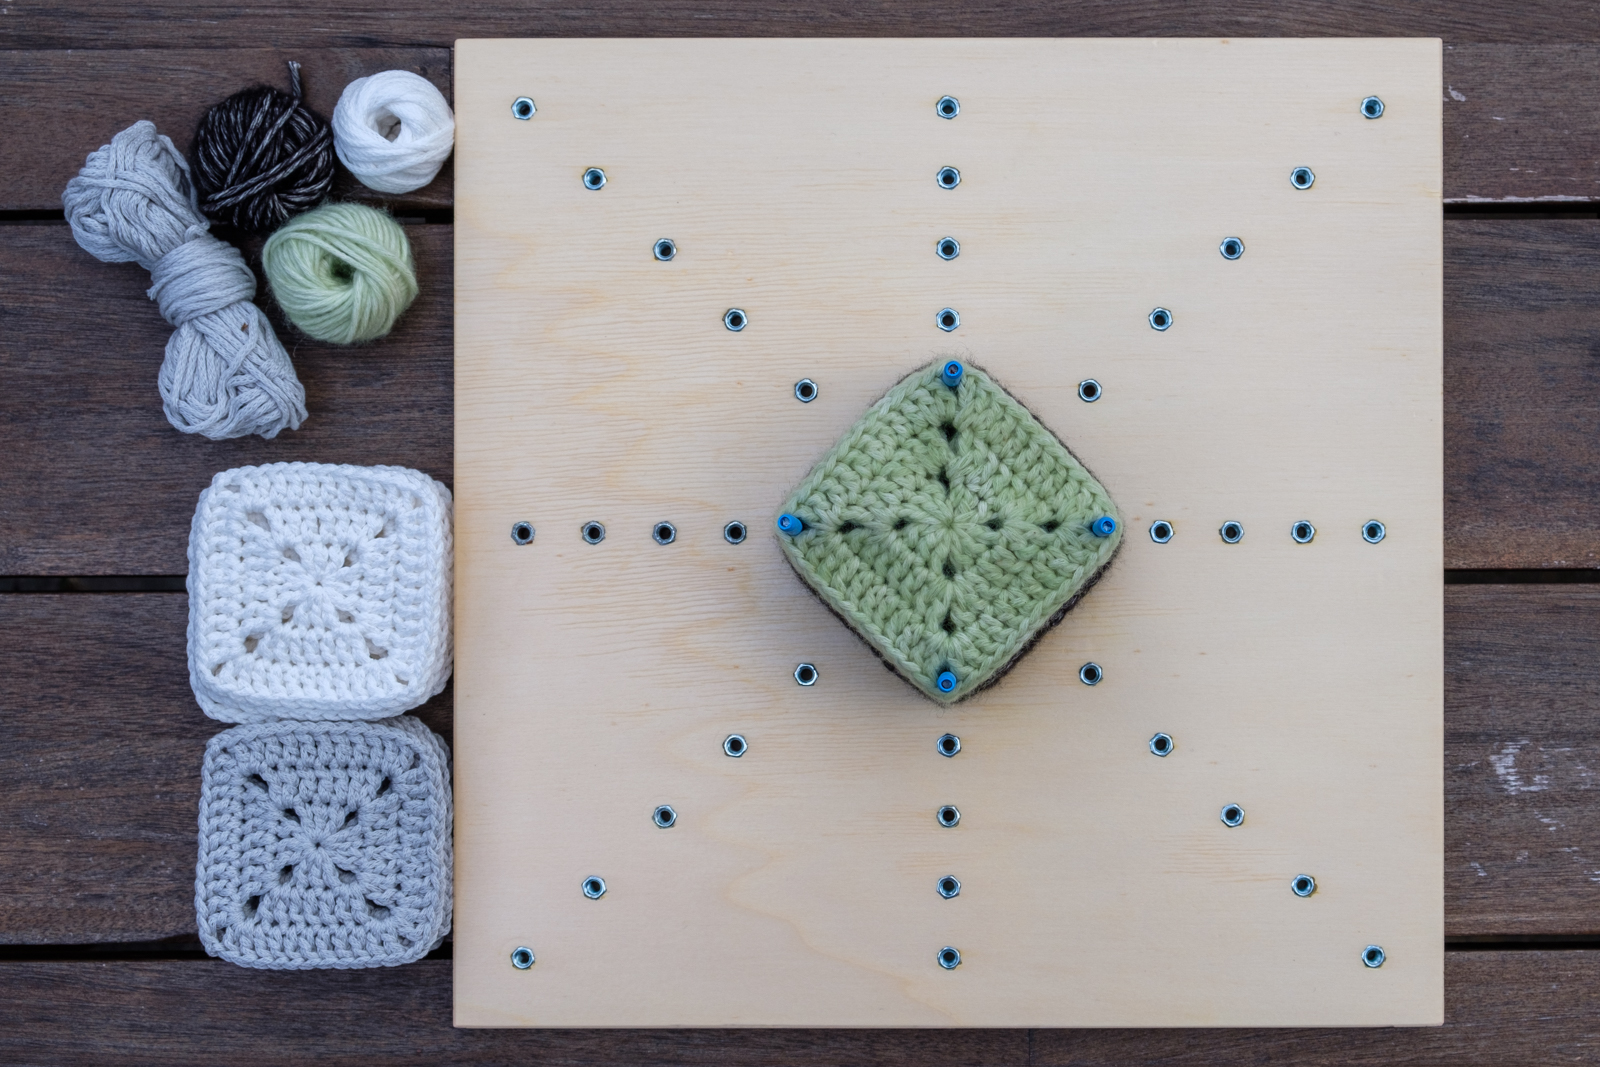
For a neat finish, I blocked the squares before joining them.
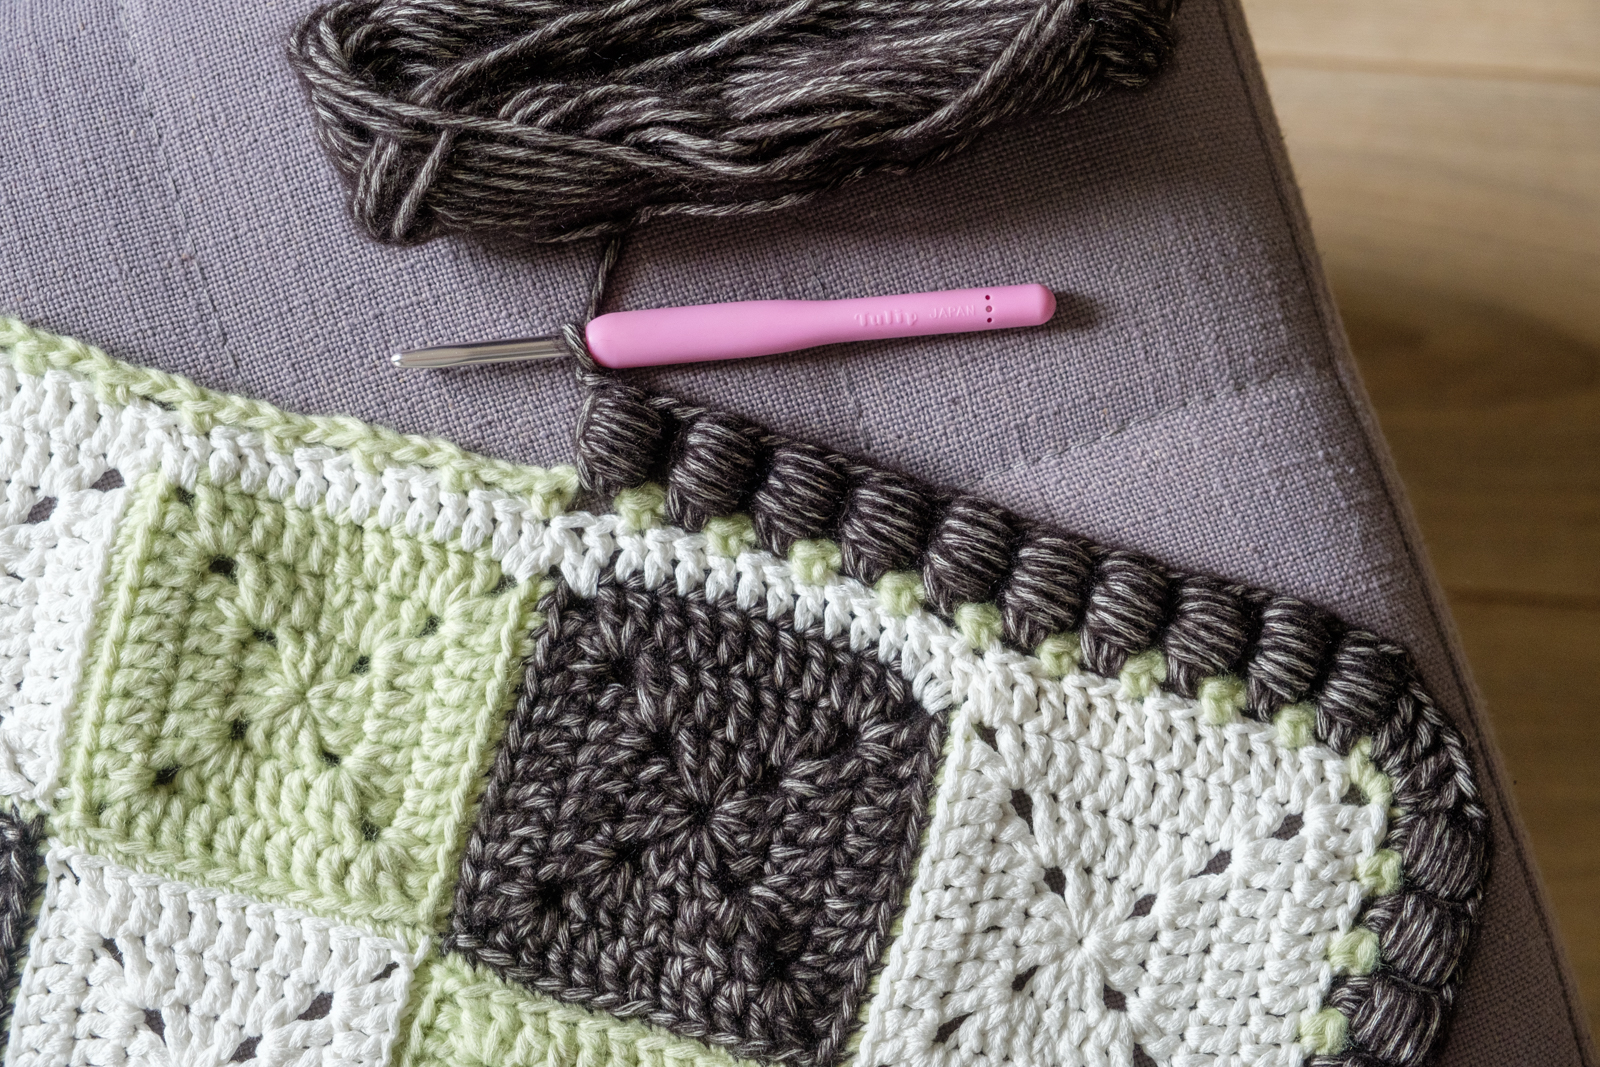
Then it’s border time! The highlight of this pattern is the wrap stitch border. I really like it a lot! And in this black colour, it almost looks like a certain kind of liquorice we have here in The Netherlands! Yum!
After that, only the striped backside has to be made and both panels can be joined with a decorative, ruffle border (don’t forget to insert the cushion pad while there’s still enough space to do so)!
Sewing Little Gifts
Let’s take a sidestep from the cushion and have a look at the little sewn gifts that I included! Earlier in this post, I showed you that I picked a few matching fabrics as well. I wanted to include a few smaller sewn gifts with the cushion.
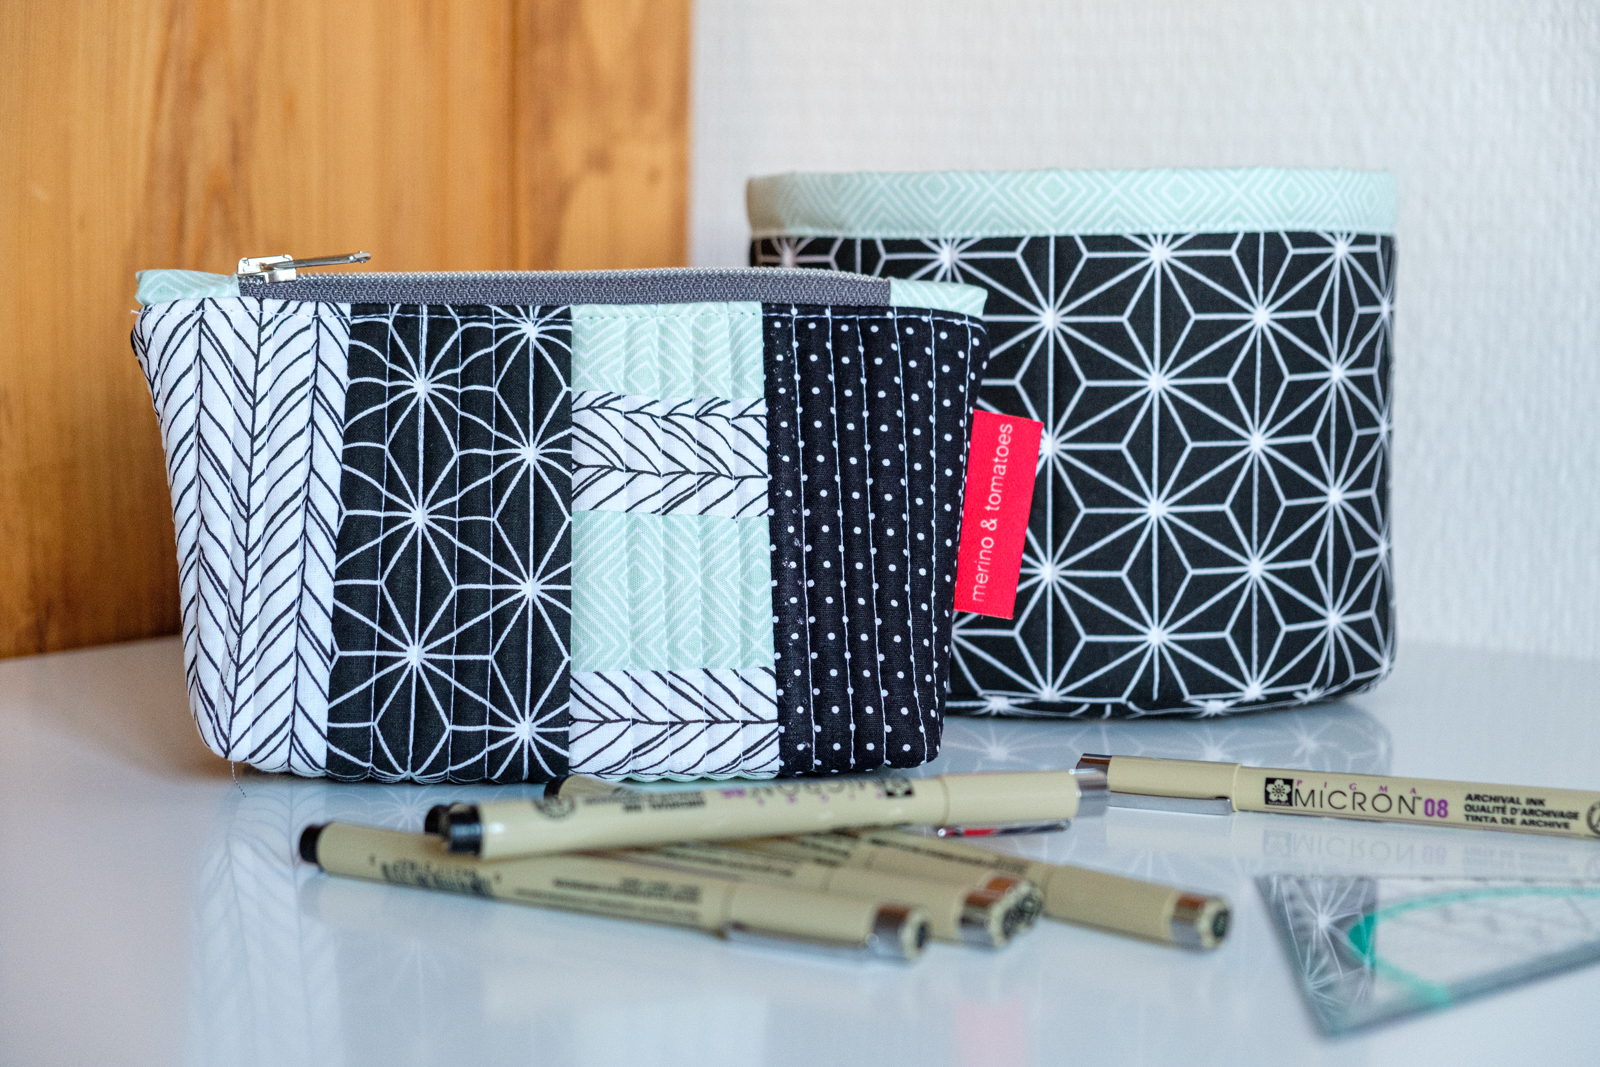
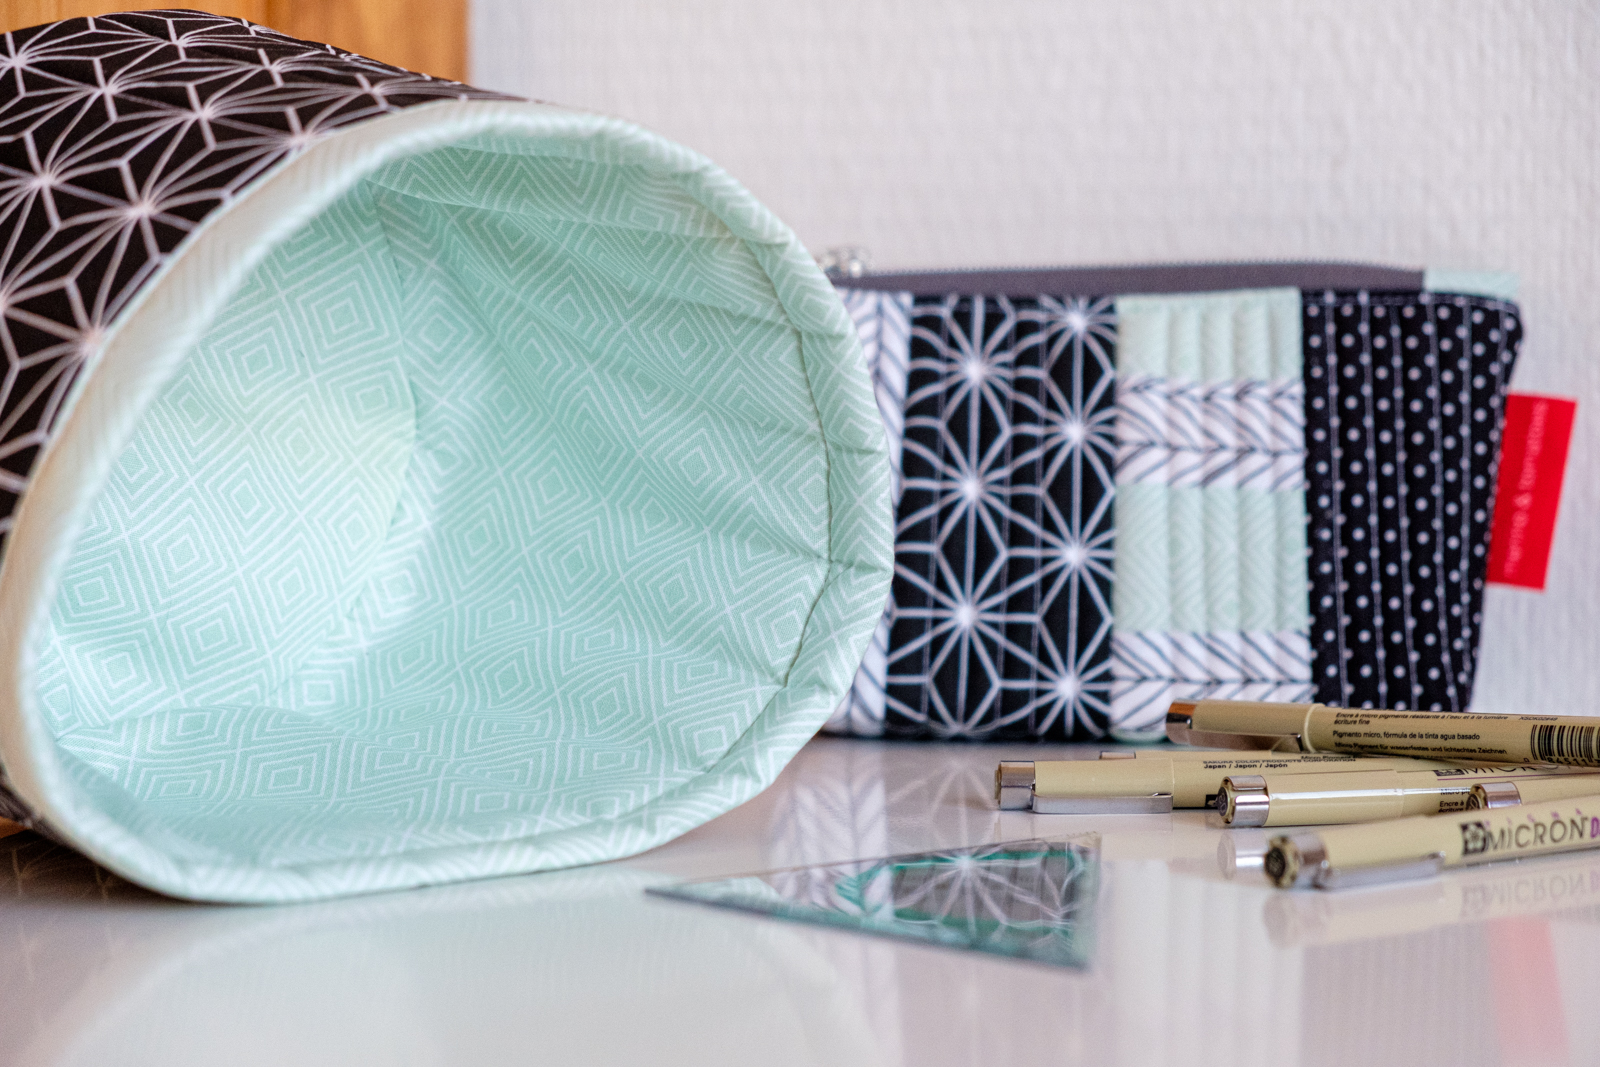
I made a patchwork pencil case and a round storage bin.
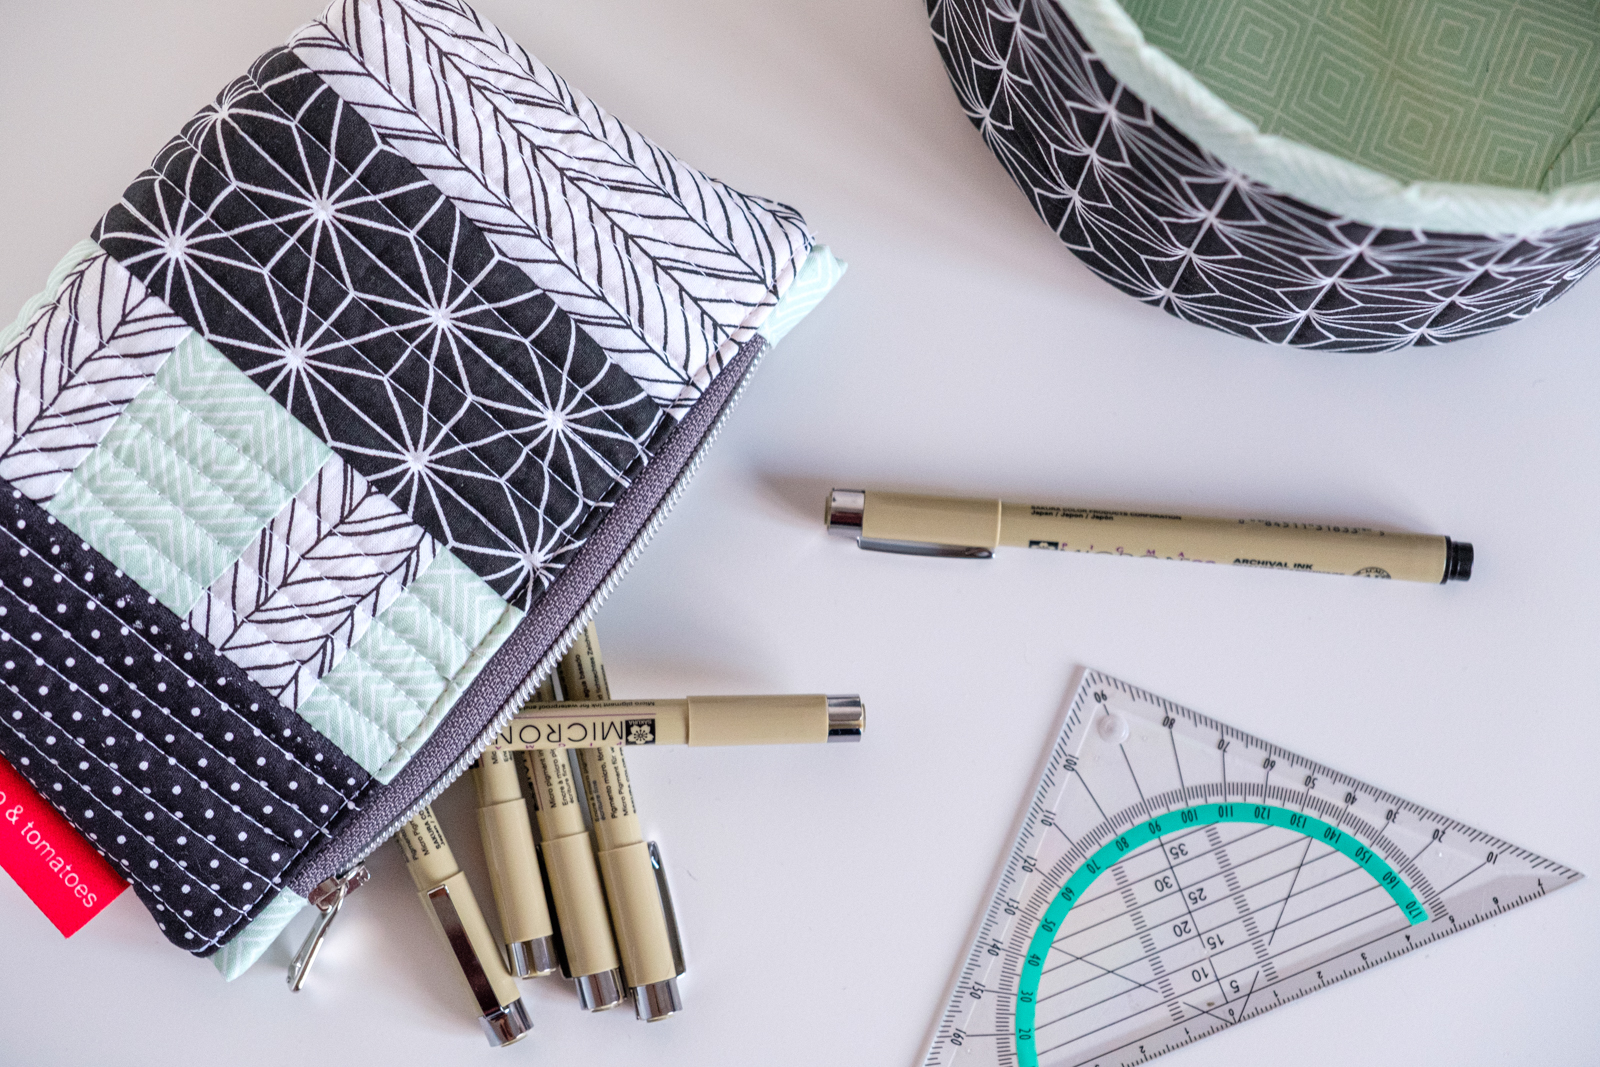
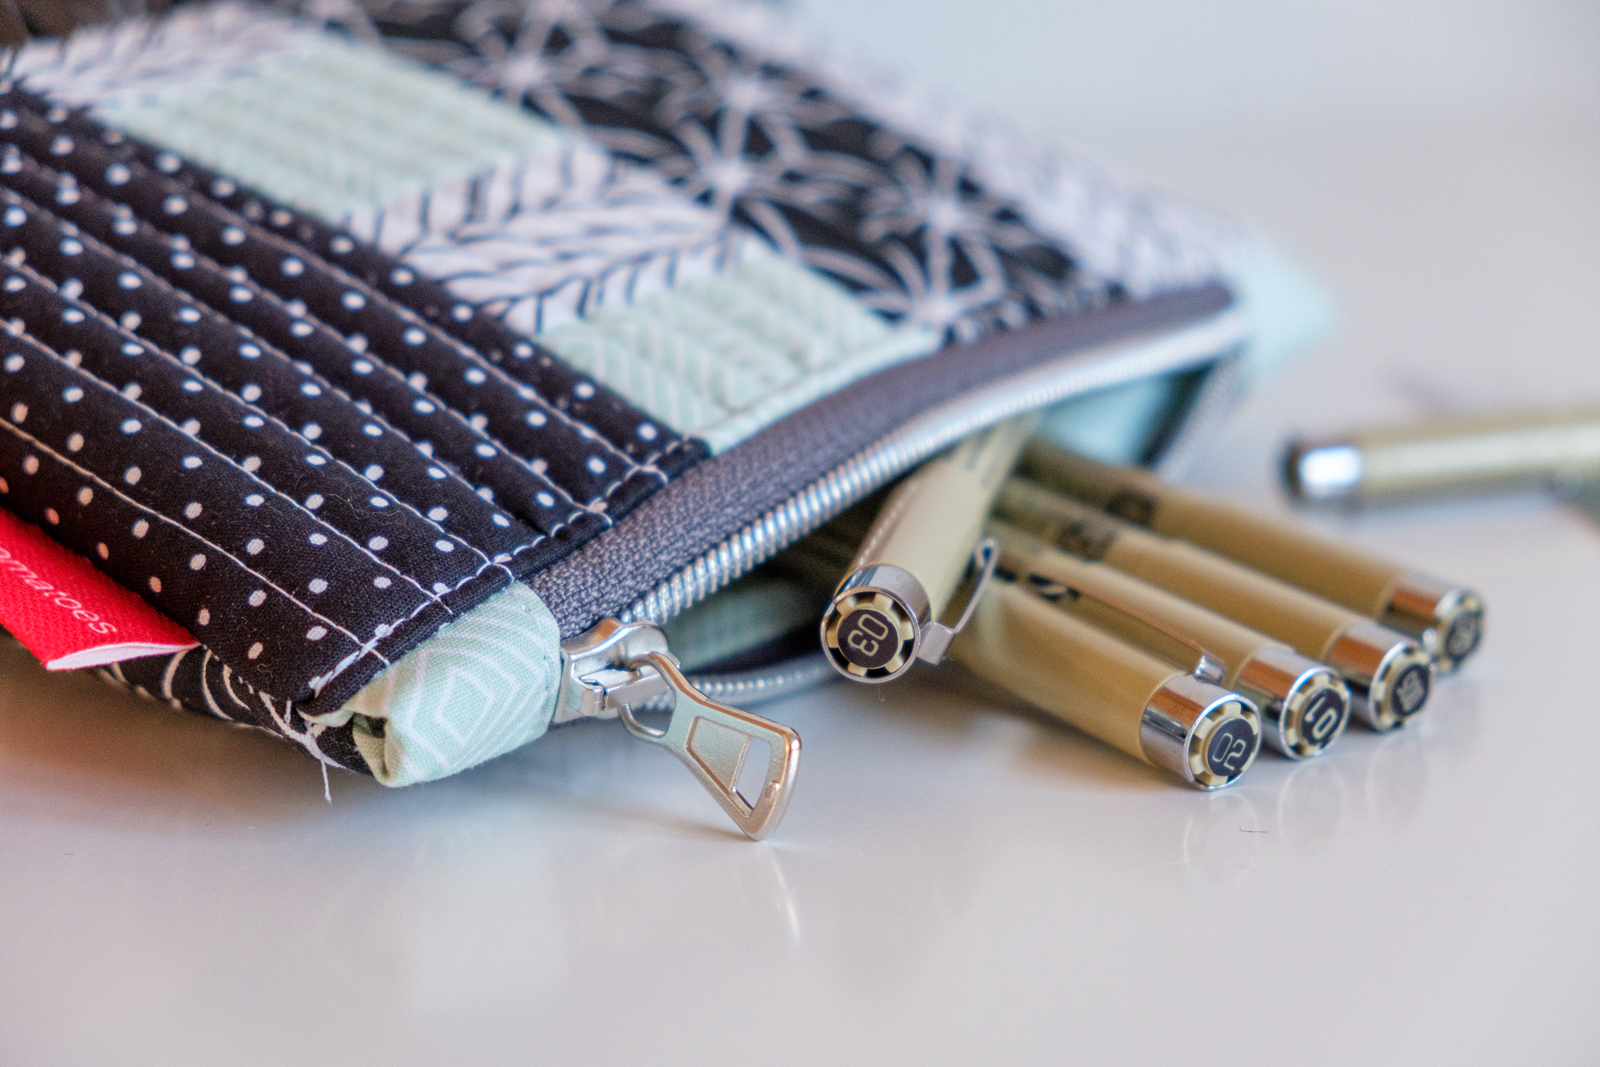
The patchwork pencil case is made without a pattern, however, you can find a lot of tutorials for these kinds of pouches on the Internet. I am a big fan of these lovely zippers! They look like metal, but they’re not! That makes sewing with them a lot easier because you don’t have to be afraid to trash your needle while sewing (or worse!)
I used a simplified version of the Tub Family pattern by Rosie Taylor for this little bin. I like the geometric pattern on the black fabric and I wanted it to stand out on its own, so no patchwork here! I also made the lining in one piece and without the contrasting binding around the top.
These little tubs or containers are perfect for small things that need storage, like hair bands! I remember that as a girl I always had a lot of small things to put into these tubs!
Ta-dah!
Okay, by now you want to see the finished cushion, right? Well, here is Sofie’s Cushion!
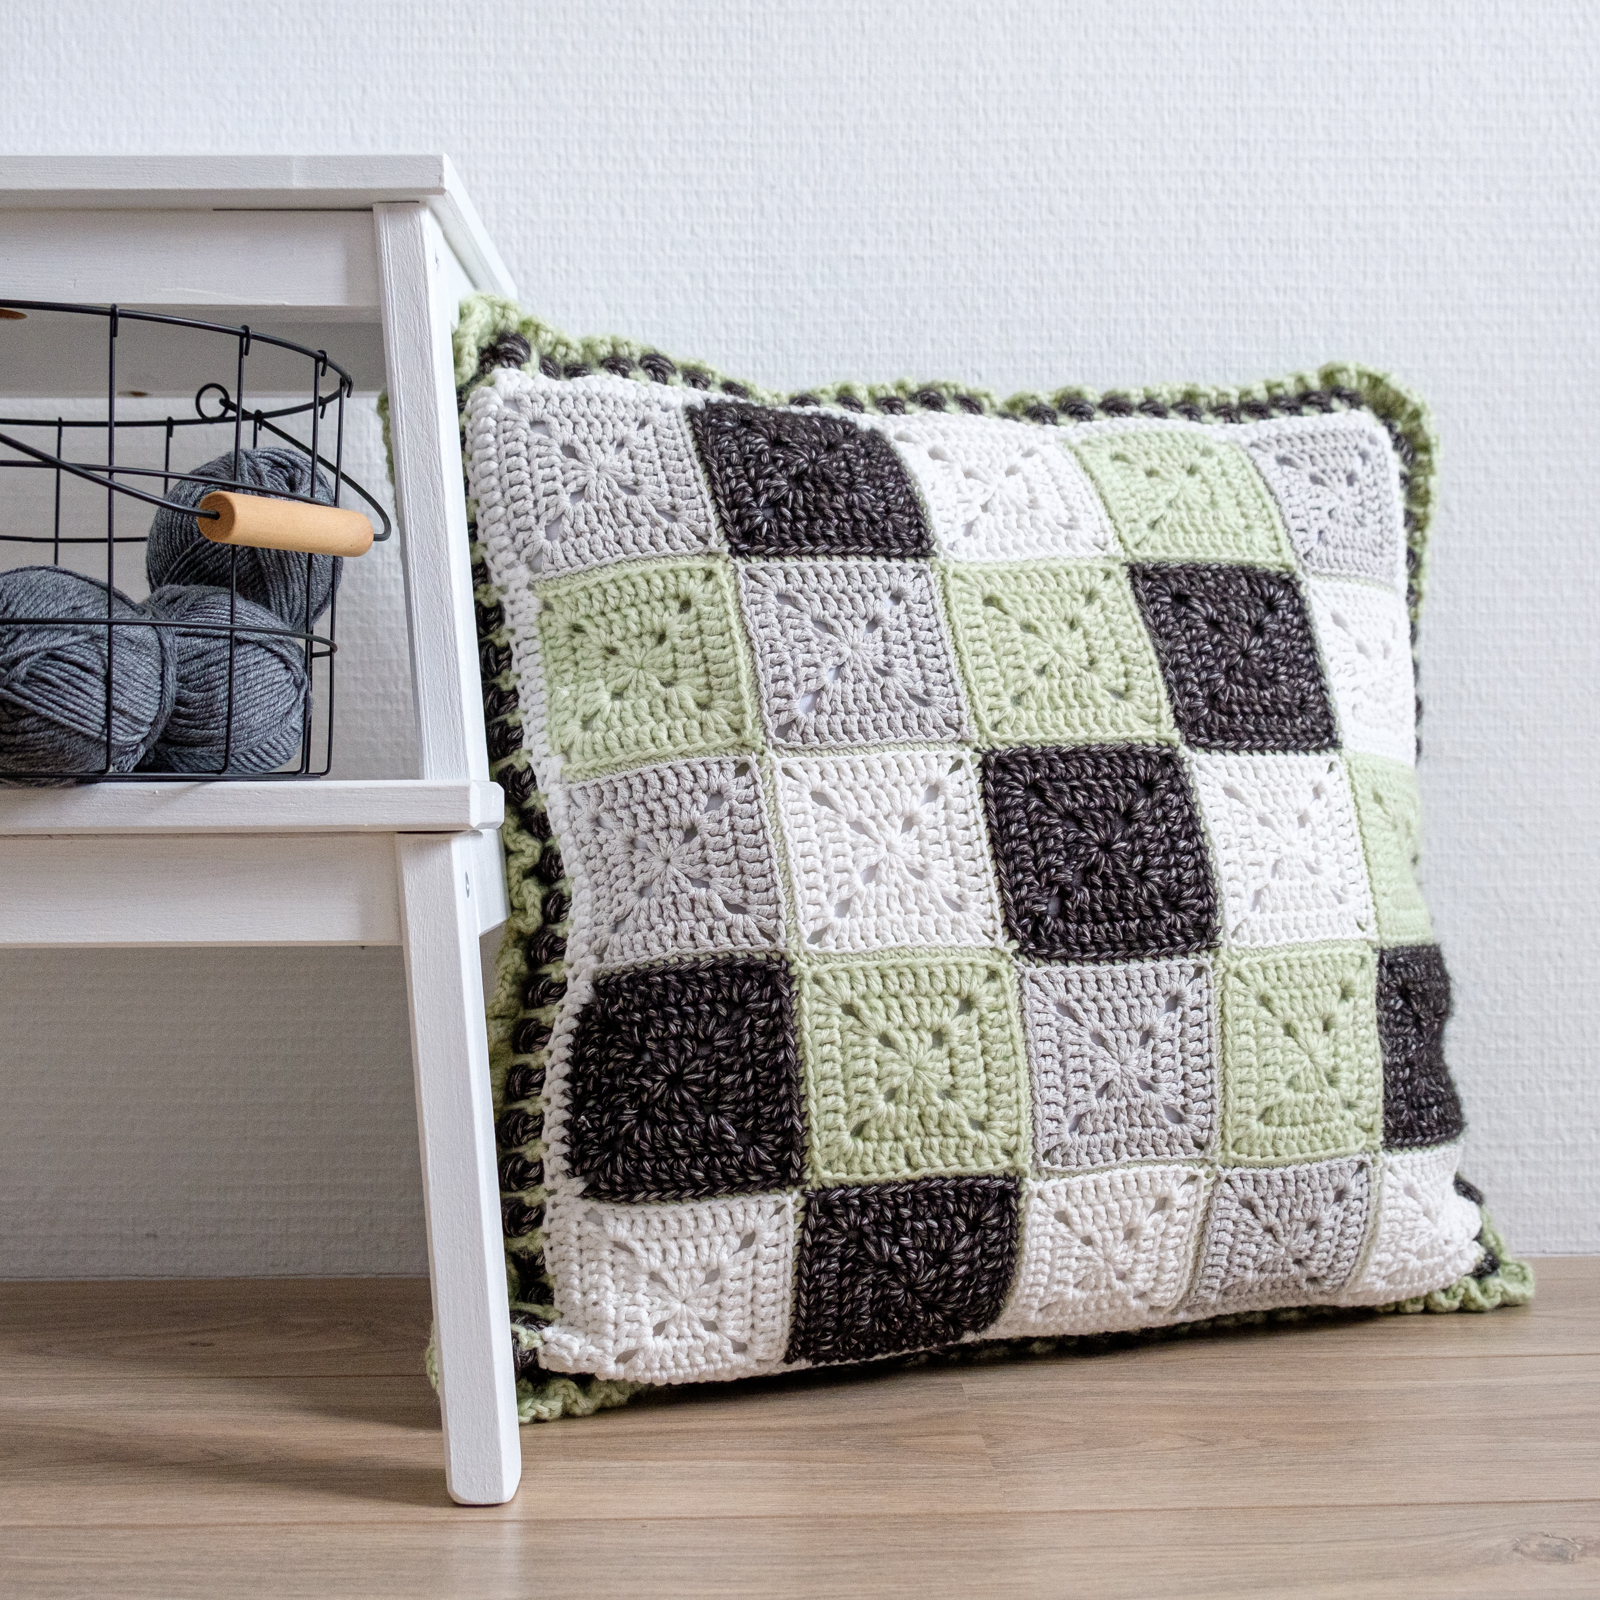
It’s large and squishy… Just what a pillow should be like!
I like the look of this! All elements of the pattern come together here: the granny squares, the stripes, the lovely wrap stitch and the ruffle border!
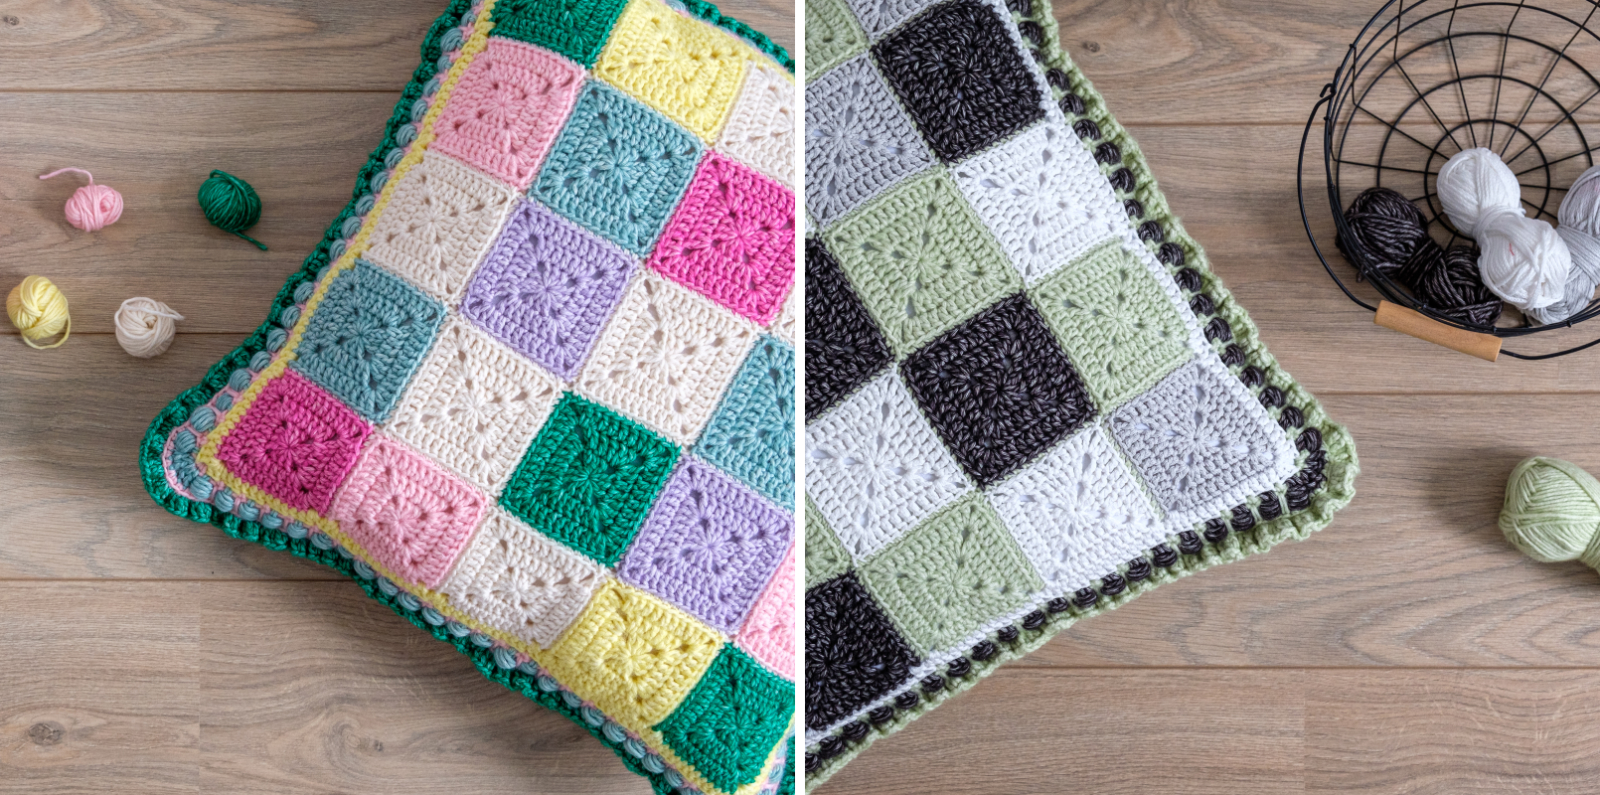
Are you curious about what the second cushion looks like? Here’s a little sneak peek!
The Pattern
The digital pattern for Sofie’s Cushion is available through Ravelry. It is written in English and uses US crochet terms. There are detailed instructions for both versions including yarn requirements and colour schemes. Basically, you receive the instructions for a four-colour version and a version using seven colours.
The pattern contains written instructions as well as charts for parts of the pattern and it includes detailed photo tutorials for:
- Joining the squares for the front panel.
- Making the wrap stitch.
- Working the spike stitch.

No Comments